If you love saunas, having one at home can be a dream come true. And building your own sauna isn’t as tricky as you might think.
One of the most expensive parts of the project is usually the sauna stove. But if you don’t have cash to splash on a ready-made model, don’t despair! You can get great results – and a real sense of achievement – by building your own.
We’re going to take you through how to build a sauna stove, step by step. And we’ll share some pro tips to help you get great results.
So let’s get started!
Tools and materials
- Old, empty propane tank – one holding 30 pounds is a good size for most small saunas
- Large container – big enough to hold the tank
- Length of single wall stove pipe
- Steel banding
- Steel shelving or sheet metal
- Sheet metal screws
- Hinges
- Hose
- Angle grinder
- Welder and protective gear
- Rocks
Step-by-step guide for DIY Sauna Stove
Step 1: Remove the propane from your tank
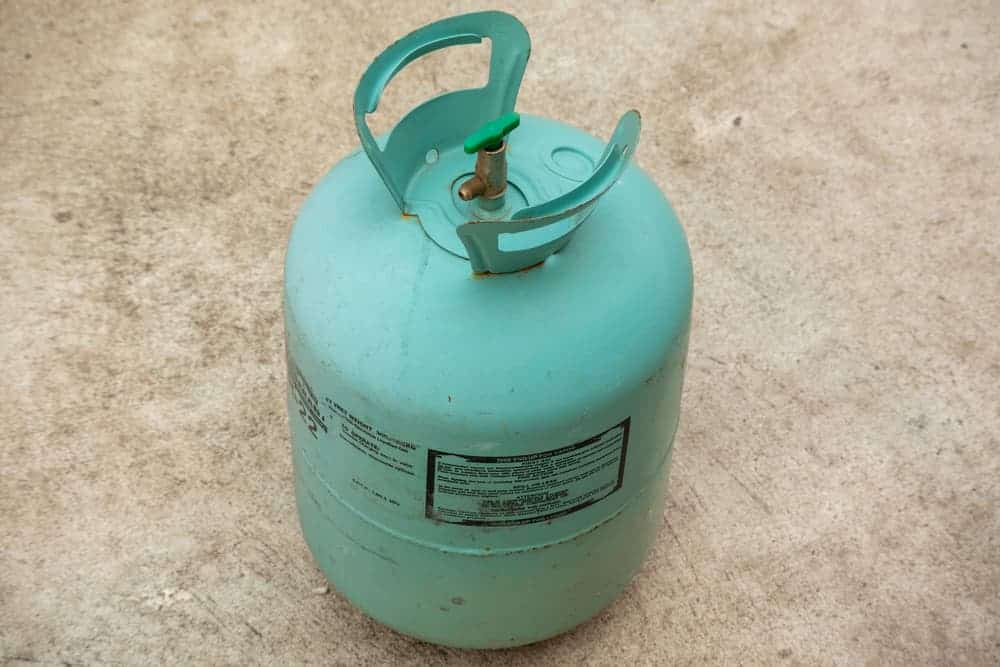
We’ll be using an old propane tank to make the body of the stove.
Propane tanks work brilliantly because the metal is tough enough to cope with high temperatures. They’re also great at radiating the heat into your sauna. Shop around and you may be able to find one very cheaply on Craigslist or similar sites. You may even be able to pick one up for free.
Before you start work on the tank, you’ll need to make sure there’s no trace of propane left inside. You’re going to be cutting into the tank with an angle grinder, and that’s likely to produce sparks. Sparks and propane aren’t a combination you want to be around!
Unscrew the knob from the top of the tank and put a hose in its place. Now fill up the tank with water. You want it completely full, so that water is coming out at the top. When the tank is overbrimming, turn off the faucet and dump the contents.
Take care with the water that’s been inside the tank. This may contain propane, so could itself now be flammable. Dispose of it safely, well away from where you’ll be cutting.
Now fill your large container with fresh water and place the tank inside. That will make sure there’s no propane left.
It’s very important that you complete this step thoroughly before going any further. Check out the extra tips for further information on making sure your tank is safe to work with.
Pro tip: If you want to and can do so safely, you can also burn the tank in a firepit. That’s a great way to ensure there’s no trace of propane in the tank when it’s time to cut into it.
Step 2: Prepare the shell of the stove
Now that your tank is free from propane, you can get to work cutting it.
Most sauna stoves use the tank in a horizontal position. That means you’ll need to make some legs to hold it. But it’s worth the extra hassle, as this design seems to heat up more efficiently. This YouTube video shows rather a complex stove design which uses the tank in a horizontal position.
Begin by removing the fitting. Then use your angle grinder to slice through the top and bottom of the tank. Now remove any hand holds on top. Put the offcuts to one side – you may be able to use them elsewhere in the build.
You should now have a simple metal cylinder.
Step 3: Create a hole for the stove pipe
Now it’s time to cut a hole in the side for the stove pipe. This will carry the smoke from the burning wood away from the interior of the sauna. Make sure the diameter of the hole is slightly smaller than the diameter of the pipe.
Remember: the cylinder will sit on its side, and you want the stove pipe to come out of the top. That means you’ll need to cut into the curved side of the tank.
Pro tip: If you want to save space in your sauna, you can design the stove so that the tank sits vertically. But if you do that, you’ll need to cut a piece of sheet metal to use as a baffle. That will be necessary to keep the fire in the fire box, rather than leaping into the chimney.
Step 4: Make the stove door
Your stove door serves two purposes. It will be the space through which you’ll add wood to your fire. And it will also provide access to allow you to clean the interior. So make sure your door is big enough for those tasks.
Mark out where your door will sit, making sure it’s right in the middle of the tank. Now use your angle grinder to cut the hole.
Keep the section of metal you’ve cut out. You’ll be using this for the door. Now use steel banding and sheet metal screws to attach the hinges to the door. Repeat the process to attach the hinges and door to the tank.
You’ve now got all the key components of your sauna heater!
Step 5: Make the legs
Your stove needs to stand securely on the floor of your sauna. That means it needs legs!
If you’ve cut the ends of the tank off in a straight line, you can use these for this purpose. Just flip them over, and weld them to the bottom of the tank so that the flat surface is at the bottom.
Another option is to use lengths of metal pipe for the legs. Bend two lengths in a curve of the same circumference. You can then weld these to the bottom of the tank, one at each end. Attach them so that each curve forms two legs for the stove.
Step 6: Attach the chimney
Position your stove in your chosen location in the sauna. Now cut your stove pipe to the right length to carry the smoke out through the wall or roof of your sauna. If it will go through the wall, you’ll need two sections – one shorter horizontal, and a longer vertical section.
You’ll want the top of the pipe to finish at least a couple of feet above the roof.
Then weld the stove pipe into place in the hole you made earlier. You now have a chimney that will carry the smoke away from the interior of the sauna.
Step 7: Make a holder for your rocks
The final component of your sauna stove is the rocks. These sit on top of the stove and you pour water on them to create steam.
For this to work, you need some way of balancing the rocks on top of your stove. There are at least two options for doing this.
One is to make a simple tray from sheet metal. Curving the edges slightly will help keep the rocks in place. You can weld the tray to the top of the tank to make it more secure.
Another option is to create a cage around the stove pipe. This can be done using steel wire shelving. It will allow you to add lots more rocks. And the tall column can act as a striking focal point in your sauna.
When you’ve made your holder, the final step is to add the rocks.
Your sauna is now ready to go. Why not reward yourself with a session after all your hard work?
Extra tips
- It’s essential that your propane tank is absolutely empty of propane before you start working on it. And it’s also very important to dispose of all the cleaning materials that may contain propane carefully.
That includes careful disposal of the water in which the tank has been cleaned. Make sure you do this well away from where you’ll be cutting. A stray spark could otherwise easily ignite the propane in the water.
If you’re in any doubt at all about whether the tank is completely empty, don’t cut into it. Taking risks could be fatal.
- We’ve already covered two ways to make a holder for your rocks. If you haven’t used the offcuts from your tank as legs, another option is to repurpose these here. Cut off the solid end from one offcut and flip the metal on its side. You’ll now have a ready-made ring to sit on top of the tank.
If you like, you can also add extra squares of sheet metal at intervals around the circumference. That will help it hold its shape.
Ready to make your own sauna stove?
We hope you’ve enjoyed our step-by-step guide to how to build a sauna stove! This is the kind of project where there are lots of ways to customize the design. So take your time, and don’t be afraid to experiment.
But one thing it’s important not to experiment with is removing the propane from the tank. Make sure you do this thoroughly. And get rid of any water or other cleaning materials that may contain propane. These will be flammable, so you don’t want them anywhere near where you’ll be cutting into your tank.
Good luck with your project, and we hope you’re soon enjoying a relaxing sauna!