Garbage disposal is a device you will want to install in your kitchen for easy waste removal. Although it can last for a very long time, you will need to replace it one day.
Whether it’s a new one for a kitchen remodel or you want to replace the old one, you need to know the steps for installing a garbage disposal. If you have the right tools, you’ll find it easier to set up the device. Follow the provided steps to replace or install garbage disposal below.
Garbage Disposal Installation Step-By-Step
Installing new garbage disposal requires some technical knowledge. For one, it involves high tech wiring and piping, so if you can handle it, call a plumber. Most kitchens have some of these wirings installed already like 20amp 120-volt passage beneath the sink where you’ll install the disposal.
The passage is the control switch for the disposal, so it should be within arm’s length. You’ll also have to install one if your kitchen doesn’t have any.
Tools & Materials Needed to Install a Garbage Disposal
- New one garbage disposal
- Drain fittings and rings of garbage disposal
- Plumber’s putty
- Screwdrivers
- Garbage disposal power cable
- Extension pieces for the drain pipes
- Hammer
- Pliers (channel type)
Step 1: Look out for damages and repair them
Some spoilt disposal does not necessarily need replacement, you just a simple repair can get them working. Try out these steps.
Spot the Clogs
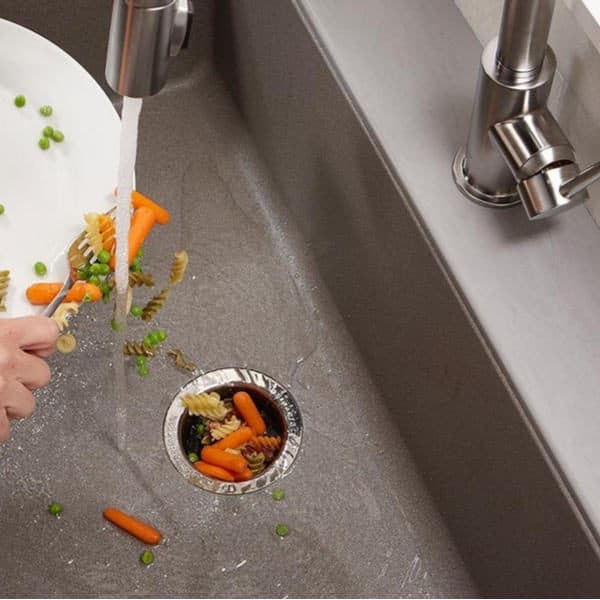
Food debris might have piled up and clogged the blades of the disposal. Switch off the motor that supplies power, and then infuse the device. Switch off the breaker if it’s hardwired, then with the aid of a flashlight decongest the clog. Use a pair of tongs for safety.
Manually Rotate the Motor
To do this, you will need to get a hex wrench. You can get one from the hardware store although some disposals arrive with one. What you need to do is rotate it from front to back until the motor turns freely with no hindrance. This process is to ensure that nothing is holding the motor, and then you can turn it on.
Reset the Motor Using the Reset Knob
You will find the reset knob under the disposal. This feature comes in to play when the garbage disposal has overheated due to a clog.
If your disposal has worked for long hours, you need to give it a break to maintain its efficiency. Stop using it and wait for five minutes before you hit the reset knob for the disposal to start working effectively again.
Step 2: Switch Off Completely
Before you detach the food waste grinder from the sink unit, ensure you disengaged it completely from the power source. You can do this by unplugging directly from the electrical passage or shut down the circuit from the main service section. This process also applies to older versions, which are connected directly into the circuit wiring (hard electric wiring).
These older versions are stressful because you’ll go to the circuit breaker or service panel (detachable fuse) to switch off power. For easier access, you may have to install an electrical passage near the sink, saving you time and stress in the long run.
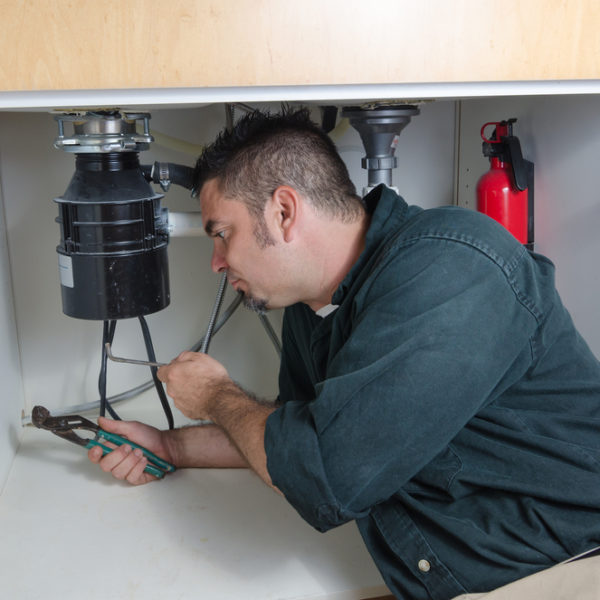
Step 3: Take Off the Older Disposal
First, you have to detach the drain links before you disengage the device from the extension assemblage. Discard the extension assembly unless the new installation is from the same producer as the old one. But the best option would be to change these fittings and put new ones so that the drain will flow well.
You should be aware that these garbage disposals are not always lightweight, so try to arrange for help. Getting extra hands on the job will help reduce the stress when turning the lower escalating bracket. The reason is that it could lead to damage when the disposal slips and falls, so better request a helping hand to ensure safety.
The first thing you should do when installing new garbage disposal is to disassemble everything for easier access to fittings. Afterward, arrange support for the unit with a tin container or a pile of woods with enough breach to drop. This support is essential when installing a new garbage disposal.
Step 4: Loosen the Dishwasher Knockout
One of the first steps to installing garbage disposal is to ensure the old one is not repairable. When you’ve ascertained this, ensure you loosen the dishwasher knockout.
Do not make the mistake of hanging a new unit without taking down the dishwasher knockout. Keep this in mind to avoid grinding the plastic plate in the new disposal. So after disconnecting the disposal from the box, take down the knock out with a screwdriver and mallet.
Then reach down inside the disposal and bring out the knockout carefully. You should attach a power cable and plug it to your disposal. This is the best time to that since you won’t want to add anything after you’ve successfully installation.
Step 5: Ensure the Length Is Right
You need to check the length of the new discharge tube, probably not the same size as that of your old disposal. All you have to do is attach the new discharge tube and then cut off the excess part through the aid of a hacksaw.
However, you should also ensure you don’t get a shorter one to avoid the stress of going back to the store. The best thing is to ensure your new kit has a spare discharge tube just in case.
Step 6: Install a New Snap Ring
The snap ring is what stops the upper escalating bracket from dropping off when you’re working under the sink. This snap ring must fit perfectly into the groove on the sink flange’s lower end. This process could be a challenging task unless you’re aware of it.
Afterward, put in a slightly sharp edge screwdriver to link the ring and extension, ensure you start at the break in the ring. If you pull the ring, it will pull out with the screwdriver right around its circumference.
Fitting the New Installation
There are things you should be familiar with when installing a new garbage disposal.
Step 1: Know the Parts
Before getting down to the business of the day, make sure you at least know the components and functions of everything. That means the part contained in the new disposal box you want to install. Place them in the right order of installation and check out the locking machinery.
Familiarity with the parts and functions will help you to carry out an excellent installing job.
Step 2: Connect the Disposal Wire
Most garbage disposal arrives with the connection intact. If yours doesn’t come with one, uncover the plate under the device and connect its cable. Make sure you adhere to the instructions on the user manual during this installation.
Also, remove the power cable, plug from the old one, and then connect it to the new garbage disposal. That’s if it’s functioning well or go buy a new power cable and cord from a nearby store. Moreover, standard disposals come with a cable and plug attached; you need to buy one from the selling store.
You can search online for standard garbage disposals or inform the store attendant of your specifications.
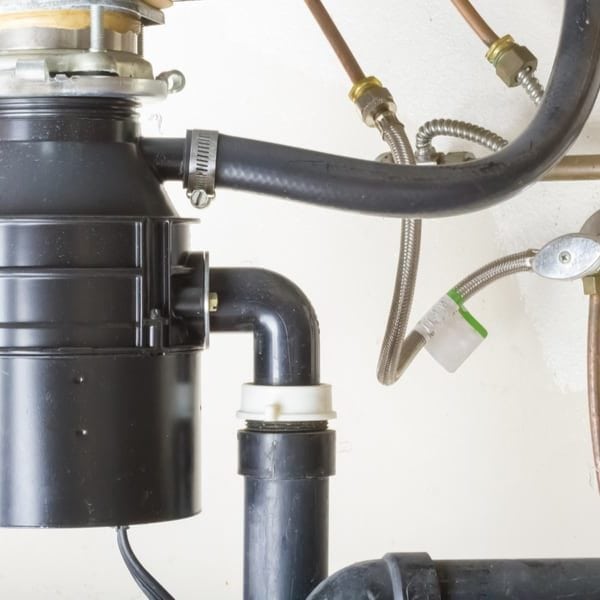
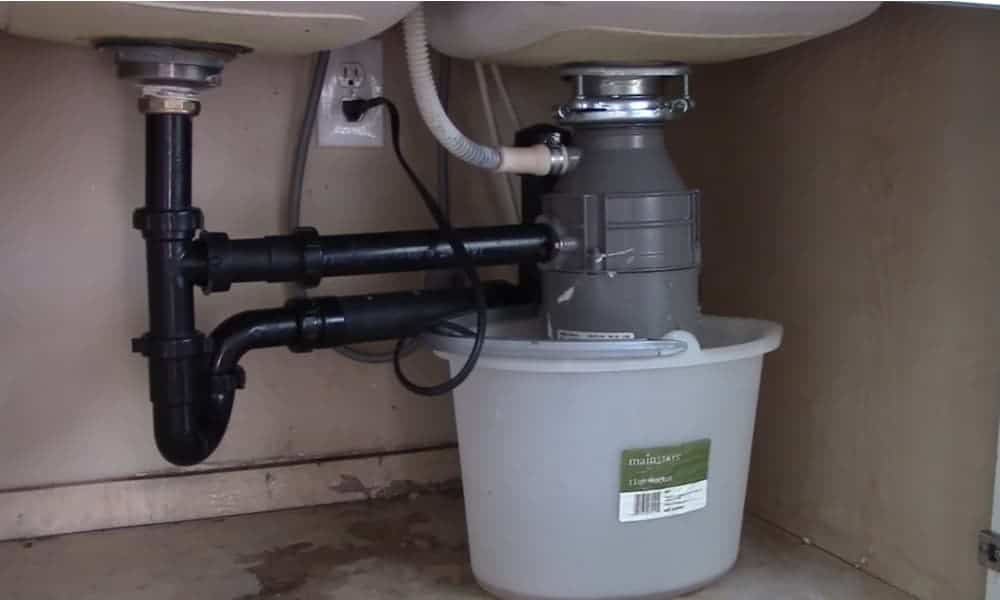
Step 3: Fix Up the Mounting Ring and Drain Fitting
The drain fitting contains a flange and a mountain ring on the sink top and around the bottom of the drain opening. This assembly helps to hold the garbage disposal in place beneath the sink.
- Place a ½ inch plumber’s putty on the drain opening from inside the sink to seal it off to avoid unplanned leakage of water.
- Insert the drain flange for the new disposal into the opening on the sink and press firmly into the Plumber’s putty.
- Attach the gristly gasket and triangular attachment ring to the end of the drain fitting. Then bind the round clip spring or snap ring into the groove of the drain fitting to secure the ring. Someone can help you hold the drain extension on top firmly while you work beneath.
- Ensure you tighten the screws of the escalating assemblage, going round with equal force on the three screws. Continue tightening until the drain extension tightly fit beneath the sink, and the putty gummed perfectly. Make sure that the Plumber’s putty fits well on the drain opening.
- Be careful not to tighten too much so that you don’t remove the needed Plumber’s putty that ensures a better seal
- Remove excess Plumber’s putty on the mouth of the drain using a rag.
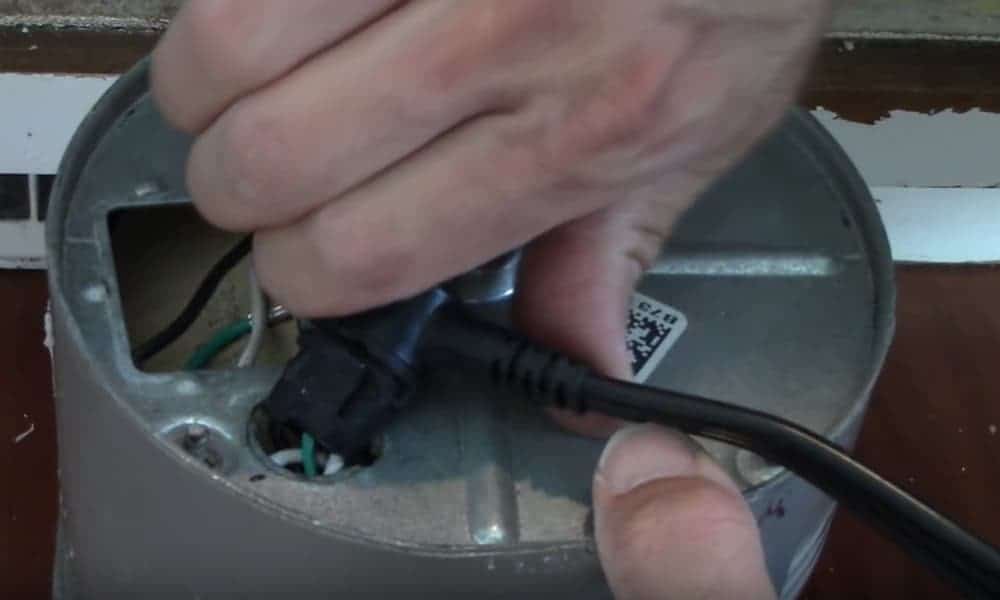
Step 4: Install the Power Cable
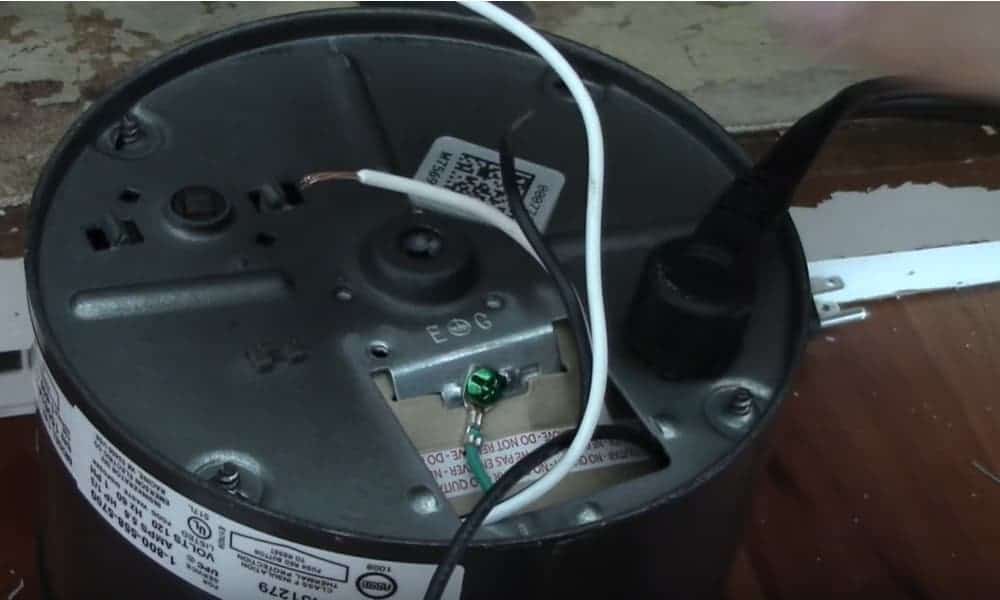
You need to attach the power cable to the garbage disposal before installing it. First, uncover the electrical plate beneath the disposal unit. You’ll find white, black, and green wires accordingly in the electric box.
Connect like wires to those in the electric box and ensure to push them in well before covering the plate.
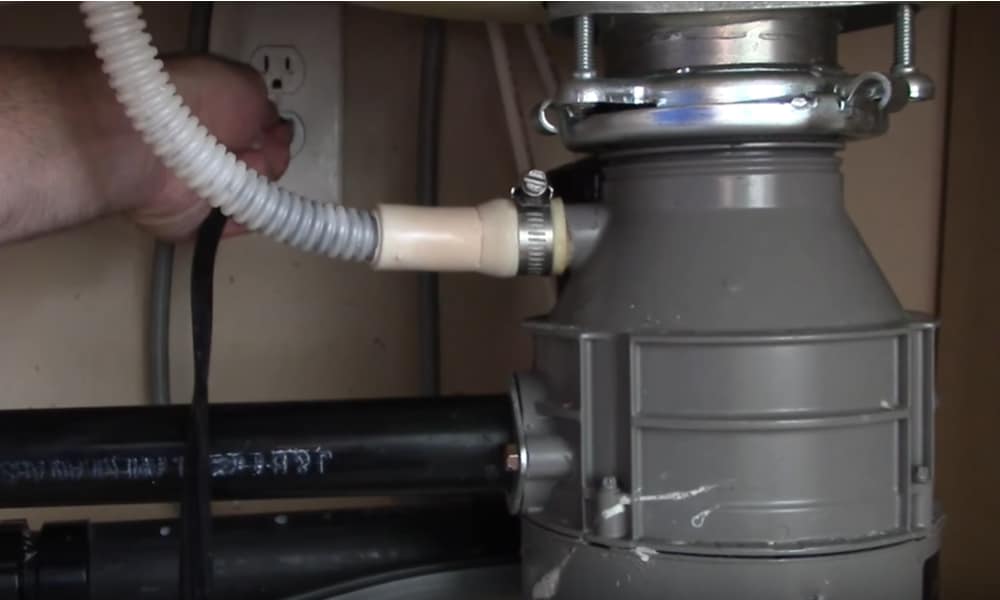
Step 5: Connect the Dishwasher
Depending on how your disposal works, some have drain water from the dishwasher running through them. Find the dishwasher inlet on top the disposal compartment and knock out the plug with a hammer and a screwdriver. Take out the plug inside the dishwasher on the disposal unit.
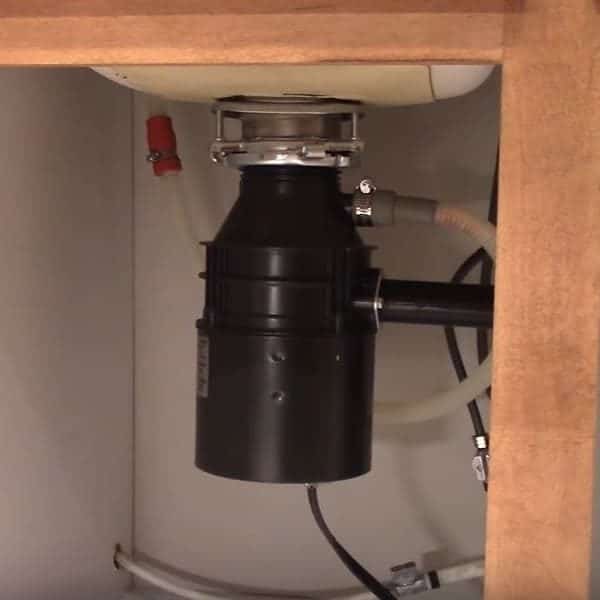
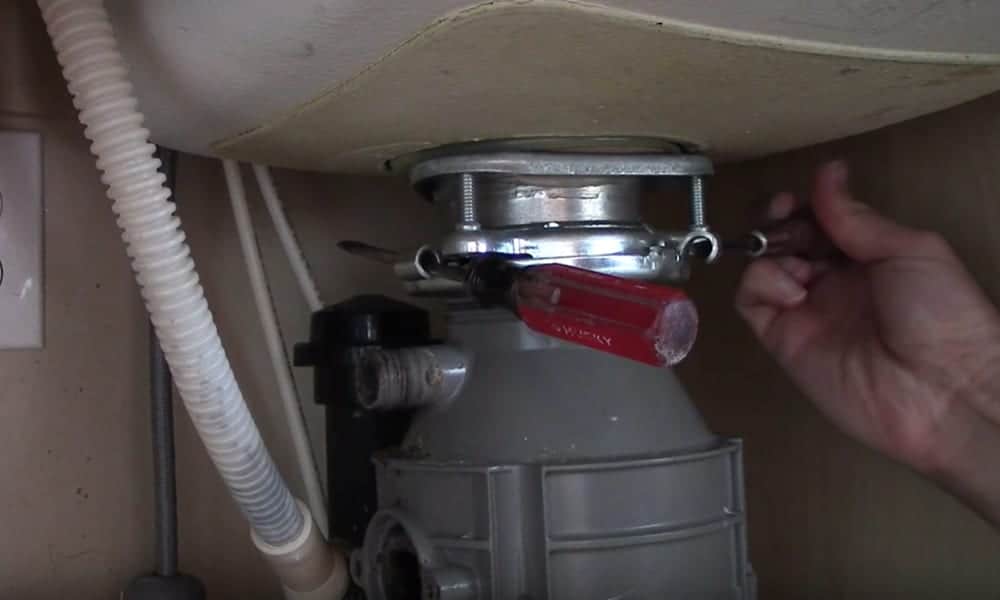
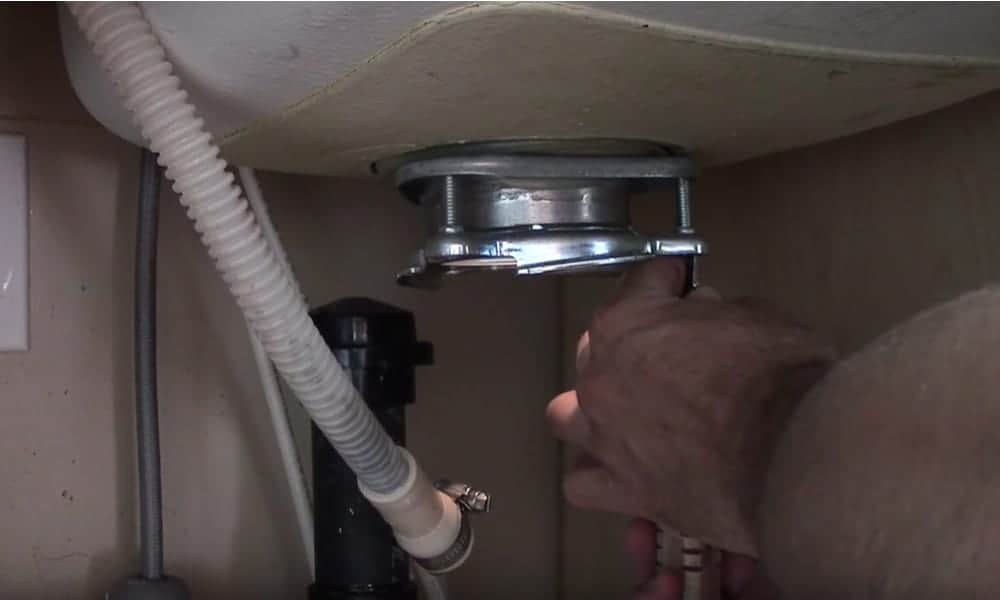
Step 6: Install the Garbage Disposal
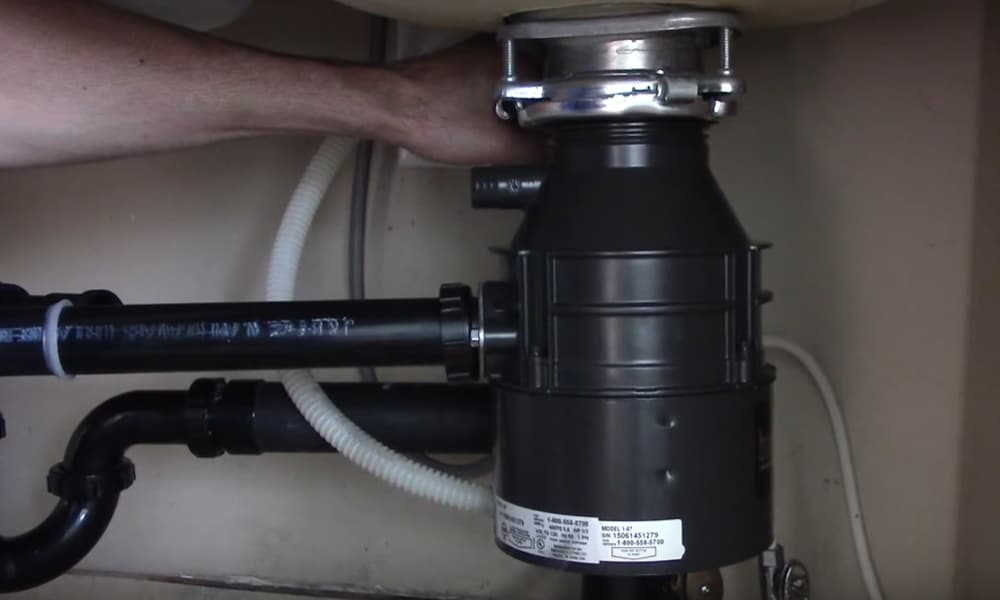
You will need extra hands here as the dishwasher could be a little bit heavy. Connect the device to the sink mounting assembly by the side with the top collar with the three mounting ears. Then hold the disposal firmly and rotate the collar; so that the three mounting ears fit into the escalating neckline beneath the drain fitting.
Ensure you connect the drainage pipes by fitting the discharge tube into the disposal unit using gasket and screws. Connect the discharge tube with the sink drain waste trap by turning the position of the disposal. You can choose to add extension pipes or shorten it, to get the right length of the pipes.
Since you won’t want a shaky disposal unit, so make sure your fittings are tight. Connect the dishwasher pipe after you have done the installation and glide its hose to the disposal nipple. Stiffen this connection with the clamp that comes with the garbage disposal kit.
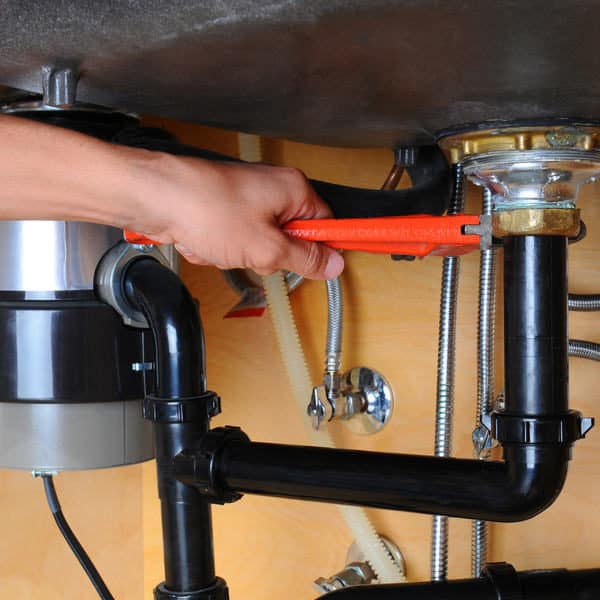
Step 7: Hold the Disposal Unit in Place
First, you should fit the disposal to the sink, escalating assemblage tightly. Rotate the Cam neckline on the device with a screwdriver or a wrench to lock correctly. You need to keep tightening until you hear a clicking noise, which shows it has locked into place.
Step 8: Look Out For Leaks
When you’re done with the installation, ensure to should check out the connections for leaks. Run water through the channels and check if there are leakages anywhere. Tighten any loose drain connection.
Check the whole operation by running the disposal motor to ensure everything is working fine.
Final Word
Once there is a need for a change in your kitchen sink, you should know how to install a garbage disposal. Nevertheless, the steps to install garbage disposal are easy to carry out, for example.
- First, you should know what cause the problem to know if you need to get a new disposal
- Then take out the faulty old one
- Install the new garbage disposal, using the manufacturer’s instructions
- Check the whole operation for leaks and ensure fittings are perfect.