The exhaust fan is a crucial component in any bathroom. It helps control odors and humidity levels, keeping your bathroom a pleasant, fresh and healthy environment.
But if it malfunctions, replacing it can be a headache. And it’s especially tricky if you don’t have access to an attic to work on it from above.
The good news is, we’re here to help! We’re going to take you step by step through how to replace a bathroom exhaust fan without attic access. And we’ll share some expert tips along the way to help make the process as pain-free as possible.
So if you’re ready, let’s get started!
Tools and Equipment for replacing bathroom exhaust fan without attic access
- New exhaust fan – things will be much easier if you get one the same size as the fan you’re replacing
- Pencil
- Screwdriver
- Drywall saw
- Firm straight edge – a paint scraper is ideal
- Box cutter
- Pry bar
- Metallic tape
- Drill
- Screws
- Stepladder
How to Replace a Bathroom Exhaust Fan Without Attic Access
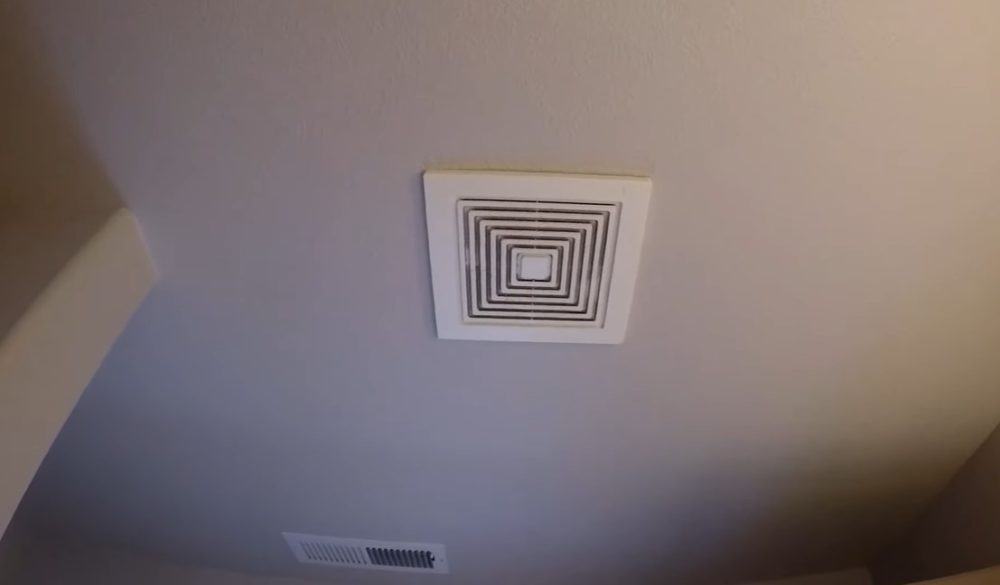
Step 1: Remove the grille from your old fan
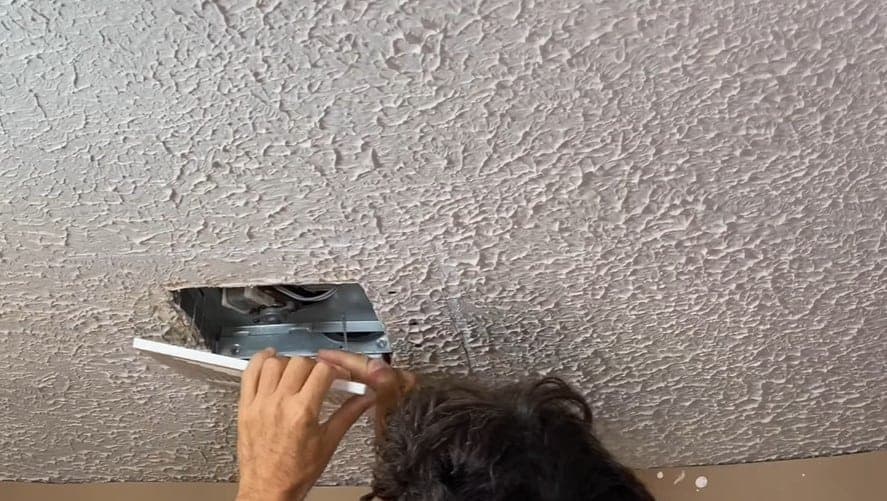
The first step is to turn off the power to your fan! You don’t want to get an electric shock when you start poking around.
Then position your stepladder beneath the fan and climb up, taking your screwdriver and pencil with you.
Now remove the grille covering the fan. In most cases, this will simply be a case of pulling it off. Occasionally, there may be a couple of screws to take out first.
Your new fan should come with its own template. If it’s a rectangle, rather than square, check to make sure you’re putting it the right way round! Then place it against the ceiling and draw around it.
If your new fan is the same size as your old one, this should all be straightforward. If it’s larger, check the position of your ceiling joist before you mark out the template. You don’t want the joist getting in the way of the hole.
Pro tip: If there’s no template, check the manual. That will give you the right measurements.
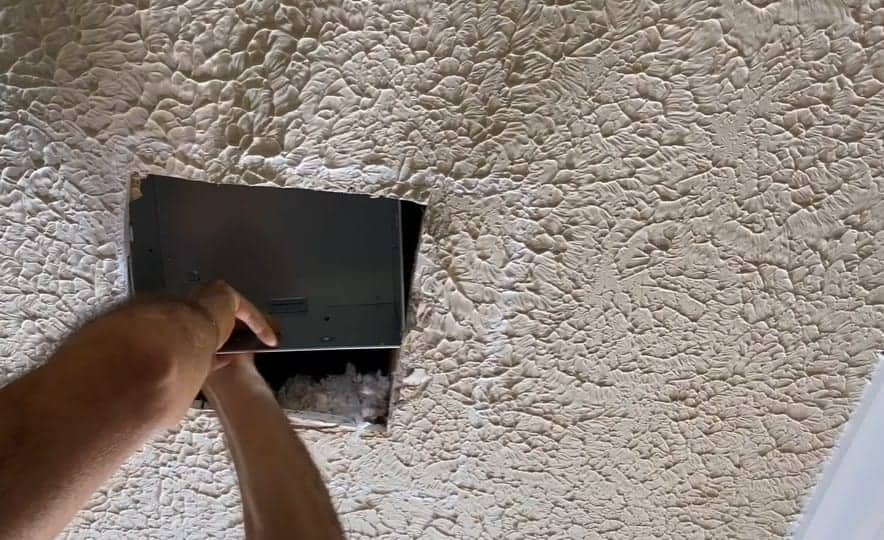
Step 2: Cut out the dry wall
If your new fan requires different housing, it’s now time to cut out the drywall in line with the template. Doing this before you remove the old fan will give you more room to work.
Use a drywall saw to do this. Take your time and be careful. You don’t want to cut through any pipes or wiring by mistake.
When you’ve cut the hole, remove the insert from the middle of the old fan. A firm straight edge like a paint scraper will help you pop it out. You can see how to do it in this YouTube video from The Home Improvement Channel.
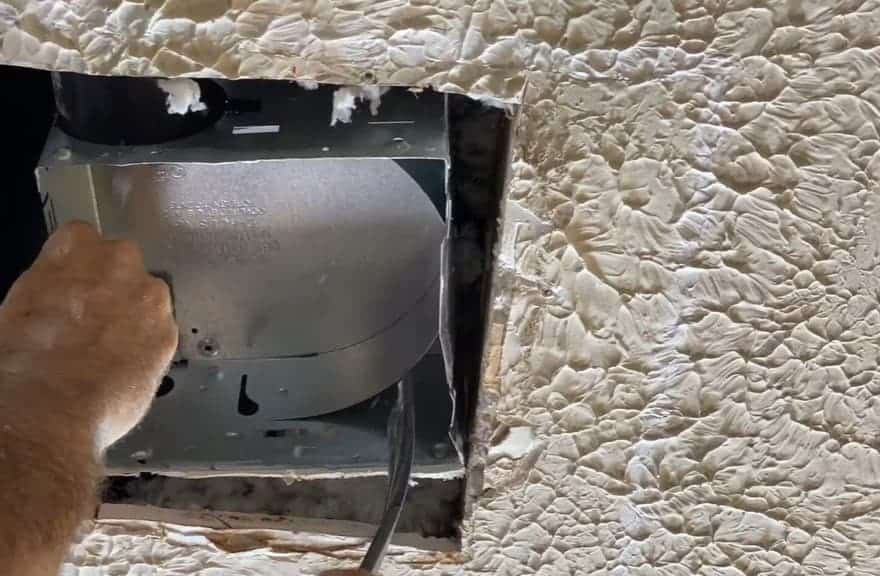
Step 3: Disconnect the electrics
At this stage, you should be able to see the wiring. Pull the wires down towards you. This will allow you to get to the wire nuts and remove them.
Depending on the design of your old fan, you may also have a metal bolt or plastic grommet to remove. This is where you’ll be glad you cut out the dry wall! It will give you extra room to work.
Step 4: Disconnect the exhaust and remove the fan
It’s now time to disconnect the exhaust pipe. This will often be connected to the fan and housing with electrical tape. If it doesn’t peel away easily, take your boxcutter and slice through it.
With that done, check for any screws connecting the housing to your ceiling joists. If there are any, you can unscrew them now. If there aren’t, take your pry bar and slip it between the ceiling and the side of the fan. Then pry the fan free and remove it
Pro tip: If you find the fan is difficult to remove, there’s probably a hidden screw somewhere. Insert your pry bar where there’s most resistance and pop it up. That will usually bring the screw with it.
Step 5: Check your ducting
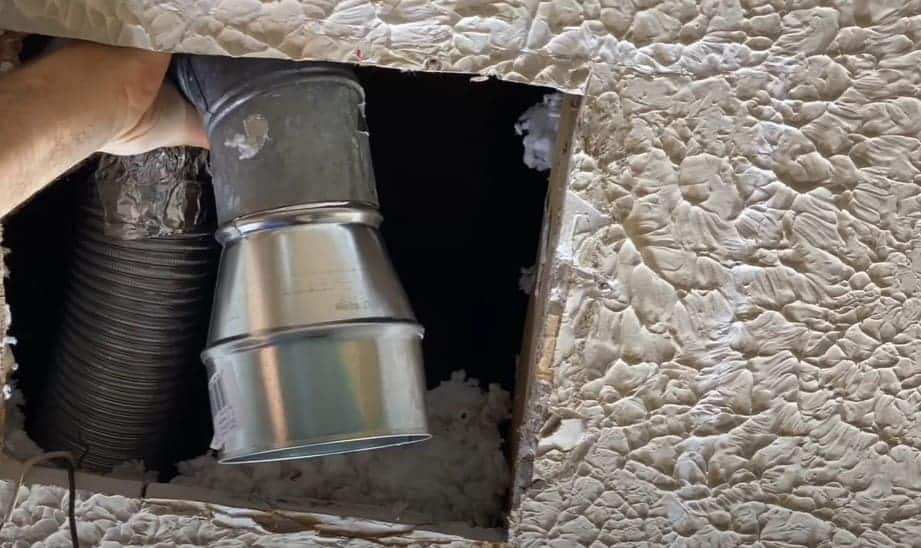
Now you’ll be able to see the ducts running to your fan. Make sure they’re big enough for the capacity of your new unit.
If you have 3-inch ducting and a newer, high CFM fan, the pipes won’t be big enough. The result will be a very noisy fan.
If your new fan has a 4-inch connection, you can buy adapters to bridge the difference. But that won’t take care of the noise problem. If you have a very powerful fan, you’ll need to replace the ducting to get the best results. That’s a topic for another guide!
Supposing your new fan isn’t too powerful for your ducting, you’re now ready to connect it up. If you’re using an adapter, put the small end over the pipes.
Pro tip: If you’re using an adapter, a pair of pliers can help you get a snug fit. Crimp the end that goes over the ducts to ensure it fits nice and tight.
Step 6: Connect up the exhaust outlet
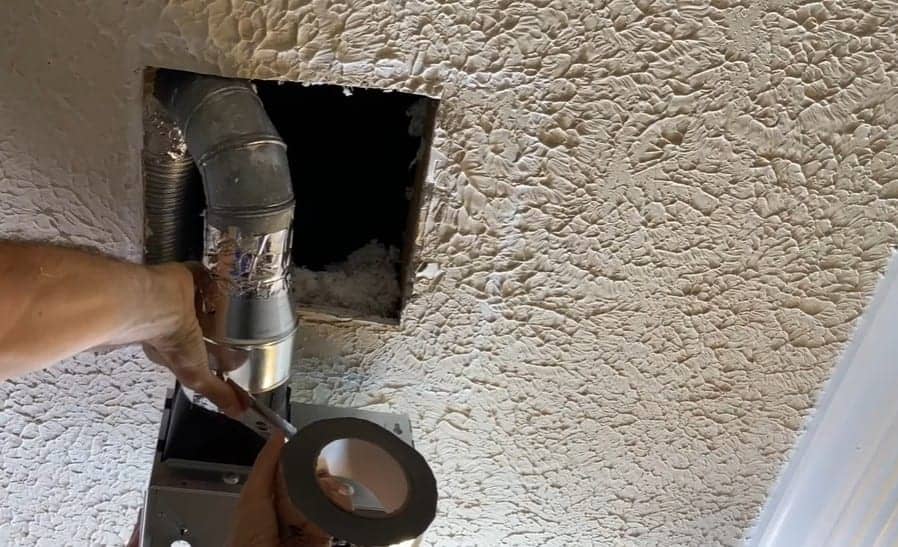
Remove the motor from inside the housing. All you want for this next step is the bare housing.
The first thing to do is to install the exhaust outlet into the housing. Check that you put it the right way round! You want the flap inside the outlet to be closed when the fan is horizontal, as it will be in the ceiling. There’s usually an arrow to tell you which side needs to go up.
You can now connect the exhaust outlet to the duct. If you can get someone to hold the housing while you do this, it will make your life easier.
With the outlet slotted into the duct, wind some metallic tape around the connection to keep it secure.
Step 7: Install the housing
Now that the housing is connected via the exhaust duct, it’s time to get it into the ceiling.
Pull down the flaps at the edges, and slide it up through the hole in the ceiling. Hold it in place with one hand, and with the other pull the wires through the holes in the face of the housing.
Now look for dimples in the side of the housing. These show you where to drill to attach it to the truss. Drill four holes, one for each of the dimples.
Ensure the housing is flush with the edge of the drywall. When it’s in the right place, insert a screw through each hole and tighten it up.
Pro tip: Make sure your screws aren’t more than 2 inches long. You don’t want them to go right through the truss and risk damaging something on the other side.
Step 8: Connect up the electrics
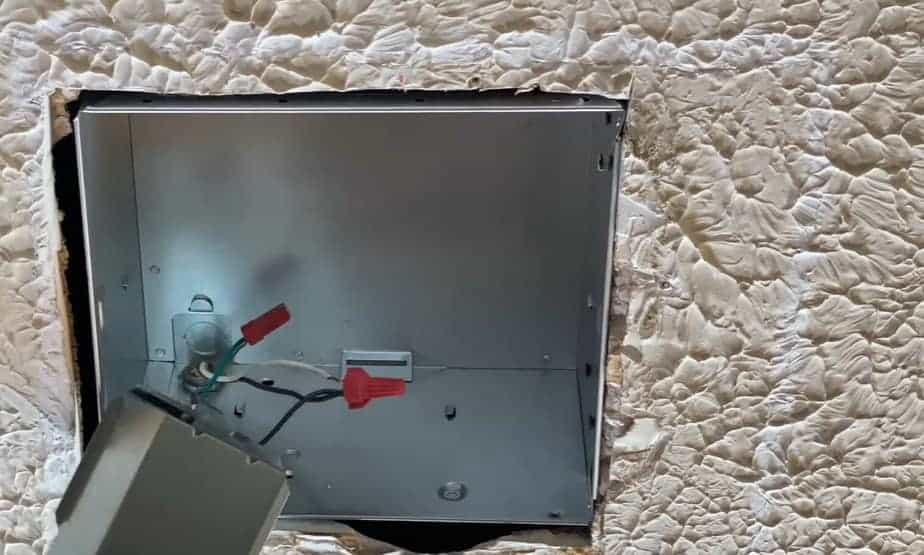
You’re now ready to connect the new electrics back up.
You want to connect the white wires together, the black wires together, and the green wires together. Add the wire nuts over the ends, then push the wires neatly into the corner of the housing.
Slide the cover back into place, taking care not to pinch any of the wires as you do so. Now screw the cover into position so it stays put.
Step 9: Slide the fan assembly into the housing
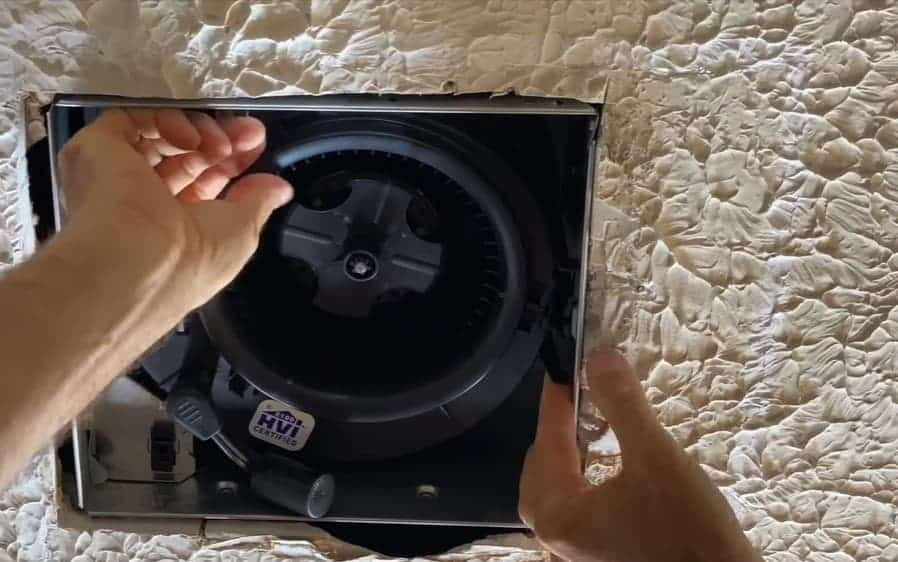
With your housing fixed in place, and the wiring connected up, it’s time to add the fan assembly.
This simply slides into place in the housing. Check whether there are any retaining screws, and screw those into place if there are.
Plug in the fan and test it. It should be running perfectly. If it isn’t, check all the wiring is securely connected.
When all that’s done, the final step is to replace the grille. Your work here is done!
Extra tips
- Make sure you choose a fan with the right power for your bathroom. Fan output is measured in CFM – cubic feet per minute. For bathrooms smaller than 50 square feet, you’ll need a minimum of 50 CFM. For those between 50 and 100 feet, it’s 1 CFM for every square foot of area.
- The more similar your new fan is to your old one, the easier it will be to replace it. If it’s exactly the same size, you’ll be able to miss out most of the steps above. You won’t need to check the ducting or remove the housing.
- Instead, all you’ll need to do is unplug the old fan assembly and slide it out. You’ll then be able to slide the new assembly into place and plug it in. Give it a test, and if everything’s running smoothly, replace the grill. The whole process won’t take more than 5 minutes.
You’re ready to go!
We hope you’ve enjoyed our step-by-step guide to how to replace a bathroom exhaust fan. And we hope it’s demonstrated that you don’t need attic access to do it.
You can make the process quicker and easier by getting a fan the same size as your old one. That will avoid any need to cut into drywall, check ducting or replace the housing.
But if you do need to do those things, just take your time. Nothing here is particularly difficult. If you can, get someone else to hold the fan housing while you tape up the connectors. That will make things easier still.
Good luck with installing your new bathroom exhaust fan!