Bathroom looks incomplete without a sparkling showerhead because when the fixture becomes old, it looks unpleasant to the eyes.
Apart from it changing the overall look of your bath space, a rusty shower head serves as a breeding ground for germs. These microorganisms are linked to conditions such as lung disease. For this reason, if you have a shower that looks old or rusty you need to change it.
Although using a new shower head is a simple solution, it is ideal you consider an energy-efficient low flow model. You will love this variant because it uses less water, thereby reducing your monthly water bill.
However, most people do not have a clue about fixing the fixtures. With this post, I will show you the steps to change the shower head fixtures of any form and size.
Here are the tools needed for replacing a Shower Head
- Plumbers Tape (Teflon Tape)
- Slip joint pliers
- New Shower Head
- Adjustable wrench
Steps Required To Replace That Rusty and Old Showerhead
Step 1. Extract the Existing Showerhead
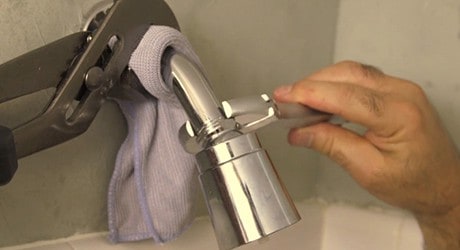
Remove the showerhead by turning it in a counterclockwise fashion. If the showerhead is still stuck, wrap a rag around the pipe that attaches the head to the wall or wall surround. Clamp the bottom of the showerhead and twist until it comes off.
Step 2. Wipe Out Dirt
Clean out the scale, rust, grime, and other dirt from all parts of the shower arm, including its interior. Apart from making the installation process easier, removing the dirt helps provide better space and cleaner water.
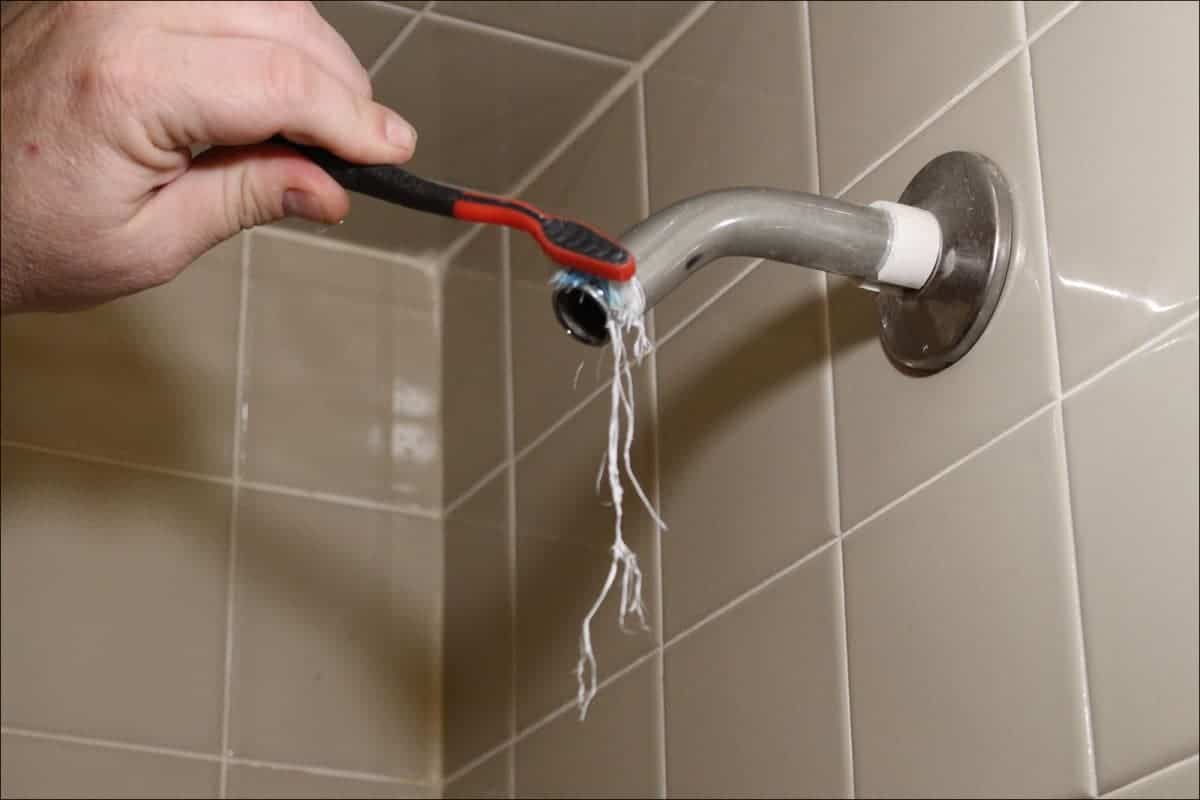
Step 3. Look for the Threads
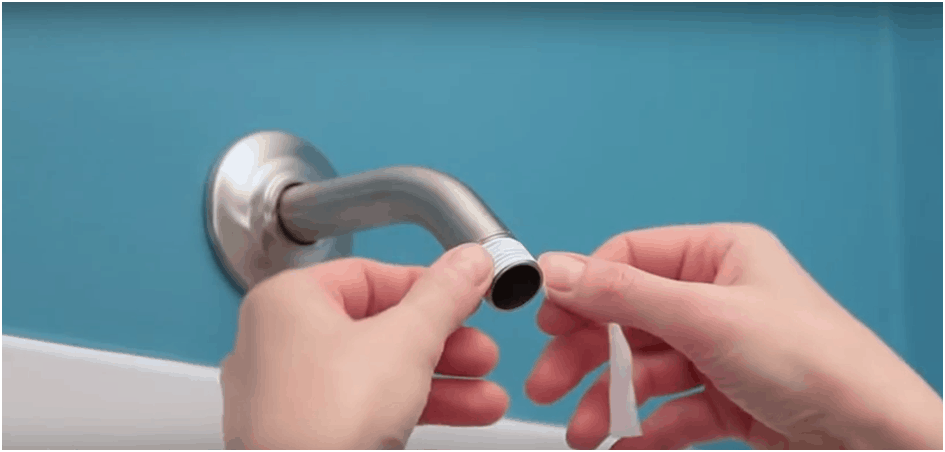
Find the series of linear grooves, also called threads, at the end of the shower arm, and apply two or three passes of Teflon tape over them in a clockwise direction.
Search for the threads or liner grooves at the rear end of the shower arm. Place two passes of plumber tape in a clockwise fashion. Ensure, you press the tape firmly until you see the mark of the grooves.
Teflon tape provides a firm fit while preventing water leakage, especially when you fix in the new shower head. After using the adhesive, keep in a safe place for further use against future leaks.
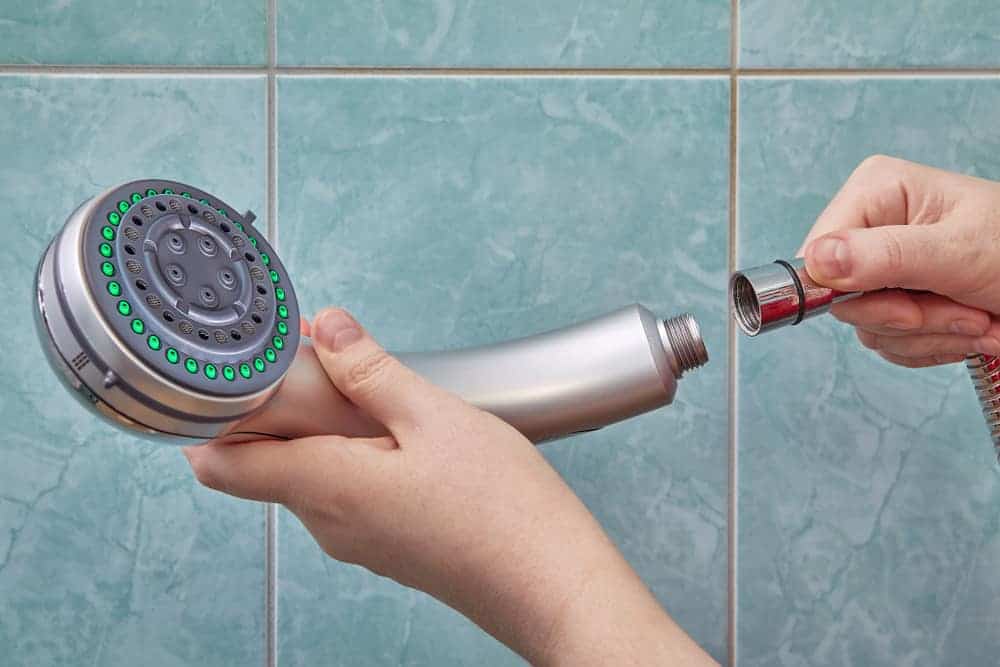
Step 4. Bring in the New Shower Head
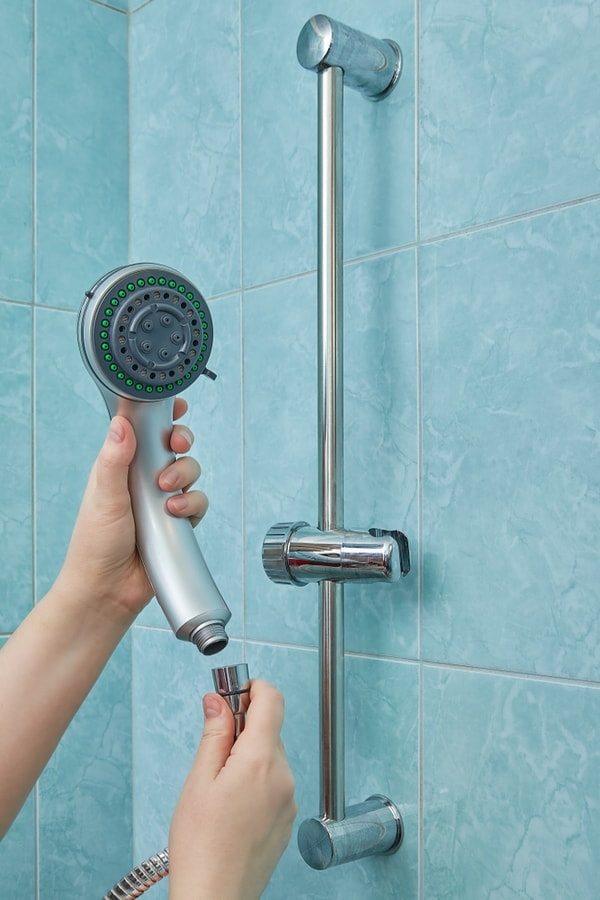
Fixed-mount models such as the Fixed Chrome Showerhead can be installed by hand. Insert into the clean shower arm and rotate until it’s firmly in place. For a perfect fit, follow the instructions provided by the manufacturer.
If you want to replace a handheld shower head, screw in the new mount into the end of the arm. Finally, attach the shower hose to the mount. As recommended earlier, follow the instructions provided by the manufacturer of the new kit.
Step 5. Check and Fix for Leakages
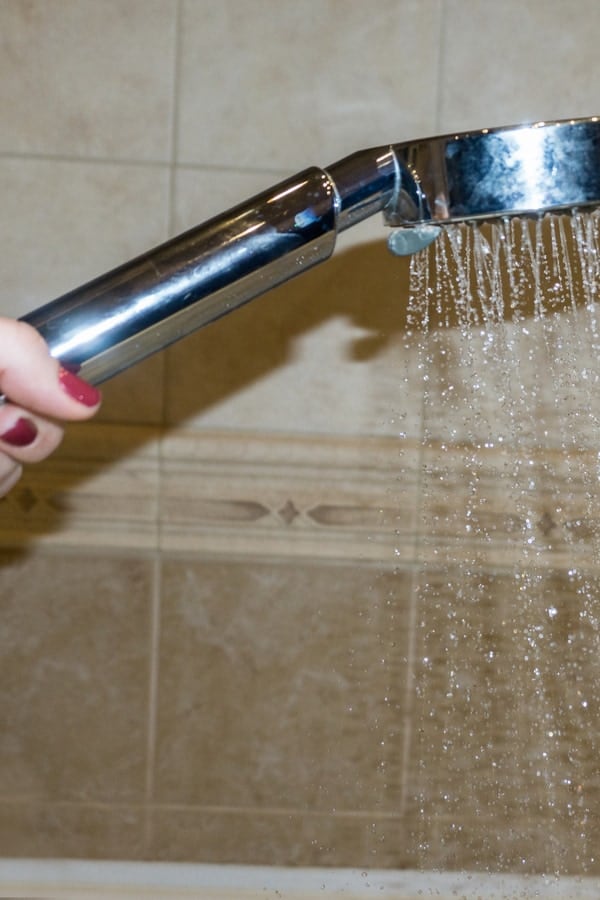
Before you complete the steps to change a showerhead, look out for leakages that might have occurred during the installation process. To do is this, turn on the water for a short period and check the way it flows.
If you see streams on the wrong end of the shower kit, turn off the water and unscrew the head. Add more plumber’s tape and firmly screw it to the shower arm. It’s recommended that you repeat steps 3 and 5 until you have blocked all the points of leakage.
Easy Ways to Install Other Types of Shower Heads
Apart from the models mentioned above, there are various types of showerheads in every hardware store.
So if you are looking for steps to replace a shower head that looks different from the earlier mentioned ones, use the tips below for the following models.
How to Change Dual Showerheads
If you prefer using a handheld shower to a traditional model, you will have to purchase and install a diverter valve and a handheld wall mount. You will also need items such as a wrench, soft cloth, Teflon tape, an old toothbrush, baking soda
Here are the steps to replace dual showerheads
- Remove the existing showerhead by using the wrench to twist the nut behind the showerhead.
- Apply some baking soda on the toothbrush and scrub the threads on the inner arm.
- Wrap some tape around the linear grooves on the shower arm. In a clockwise motion, twist the diverter valve into the shower arm. Ensure that one of the outlets points downwards.
- Attach the new shower head by wrapping the tape around the threads of both diverter outlets. Fix and tighten the showerhead (with a wrench and soft cloth) to the front outlet.
- Set a wall mount for the handheld unit. Install this fixture by screwing or taping the wall mount at any spot on your bathroom wall.
- Wrap the plumber’s tape on the linear grooves of the rear diverter outlet. Then Insert and screw the handheld shower head hose. Place the showerhead on the bracket.
Maintaining a Shower Head
Properly installing a new shower head above your shower chair will ensure water flows perfectly. However, scale buildup can disturb the flow. To prevent this from happening, clean your showerhead as soon as you observe any clogs.
Cleaning a showerhead does not require much effort and time. But some grime might be challenging to handle thereby turning a simple task into a frustrating one.
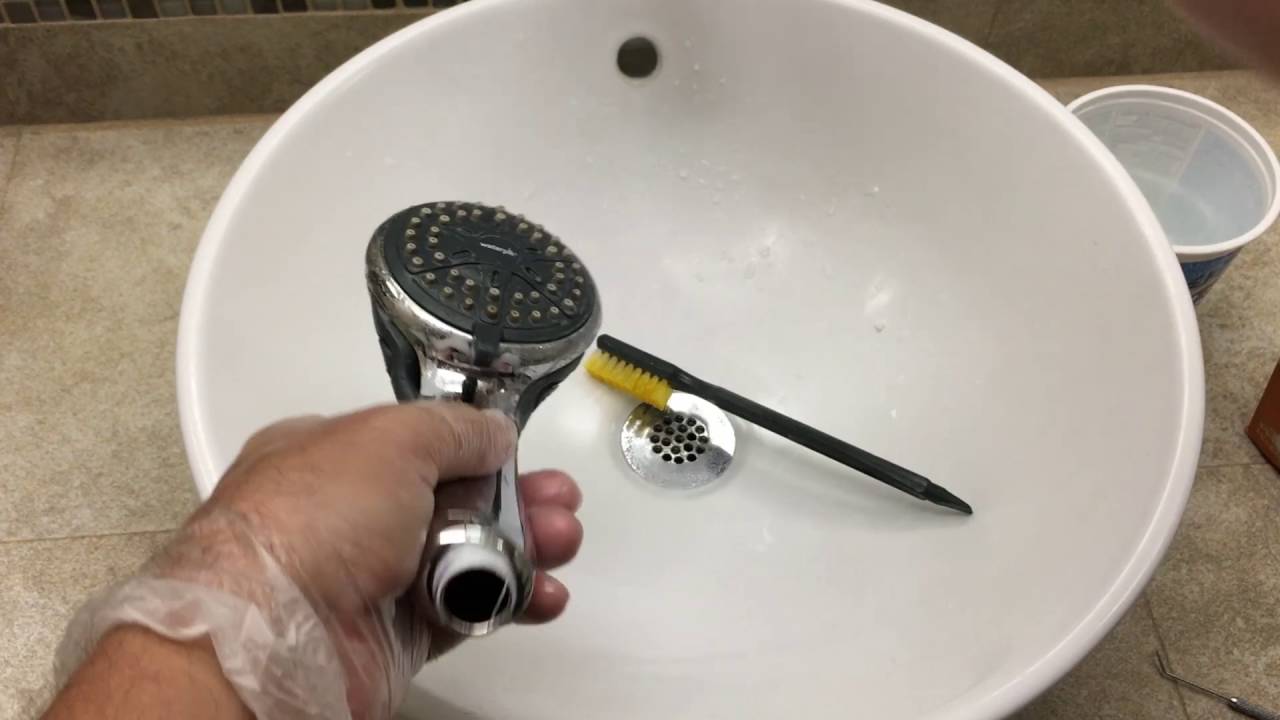
Fortunately, here are some steps with which you can use to tackle tough stains such as mineral deposits. Before using the following tips, you will need a cleaning cloth, pliers, wrench, and a bowl. You should also get some needles/paper clips and distilled vinegar.
- Cover the shower pipe with a rag and hold in place with a pair of pliers. This helps to protect your showerhead and pipe from scratches while offering needed leverage.
- Loosen the nut behind shower head with a wrench and remove the fixture.
- Remove any dirt on the inner groove of the showerhead. Rinse with water for extra cleaning.
- Take the pliers and extract the filter screen in the showerhead. Clean the screen with a brush and all-purpose cleaner or mild soap.
- Soak the showerhead in a bowl of warm distilled vinegar. Leave it in the liquid till the next day.
- Remove deposits in the holes of the showerhead by inserting a needle or straightened paper clip in them.
- Replace the filter screen and shower head in their original positions. Turn on the water at full pressure to remove lingering dirt. Clean the surrounding tiles with a shower cleaner and scrubber.
Wrap Up
Old shower heads can make your bathroom look unattractive and even harm your health. You can avoid these issues by swapping the older fixture for a new showerhead with the earlier mentioned tips. You should also clean the new showerhead.
Are you looking for more ways to install any showerhead? Do you have stubborn stains on your fixture? Use any of our tips to make your shower provide the right amount of water for your bath times.