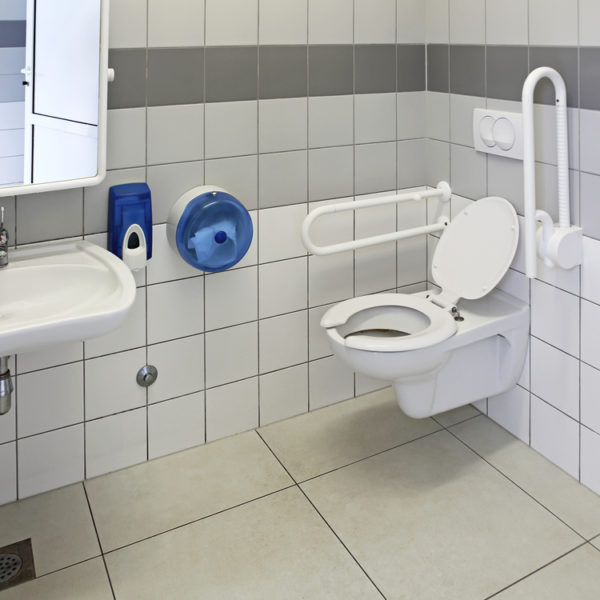
As a homeowner, you must have heard about a toilet flange. But if you haven’t, well, this is a component at the toilet drain pipe surface, which helps to hold the toilet firmly to the bathroom floor.
These components are round and are made from rubber, PVC, or metal. Furthermore, bolts are used to hold them down.
If a toilet flange becomes loose or worn out, leaks might occur, thereby resulting in future damage. If you have this problem in your home, you will need to learn how to replace a toilet flange with the tips offered below. Fortunately, these ideas can be used for dual flush toilets and corner toilets.
Bring Out the Required Materials and Tools
Before you learn how to fix a toilet flange, ensure you have the following items within your reach.
- Toilet Flange: You can get a new unit from your local Home Depot store. But, remember to take your current toilet flange along as this will help you choose the suitable option for your toilet.
- Toilet flange bolts: Purchase some bolts to secure your new flange. Getting a new one is essential because the existing bolts might have become rusty or worn out.
- Wax ring: This product holds the flange to the base of the toilet.
- Wrench: If you want to know how to replace a toilet flange, you will need this tool to loosen the current bolts. You will also use them to remove the ones around the flange.
- Screwdriver: Choose a multi-bit screwdriver to remove the screws on the flushing toilet.
- Putty knife: Get this tool to remove old wax from the flange seal.
Easy Steps on How to Replace a Toilet Flange
Step 1: Take Out the Toilet

Disconnect the toilet from the water supply in your building. Do this by closing the knob at the back of your unit. Then empty the toilet tank by flushing it multiple times.
Before you start the replacement task, remove the hose that supplies water to your toilet. Then get a large open container or towels handy to collect any leaks that might occur.
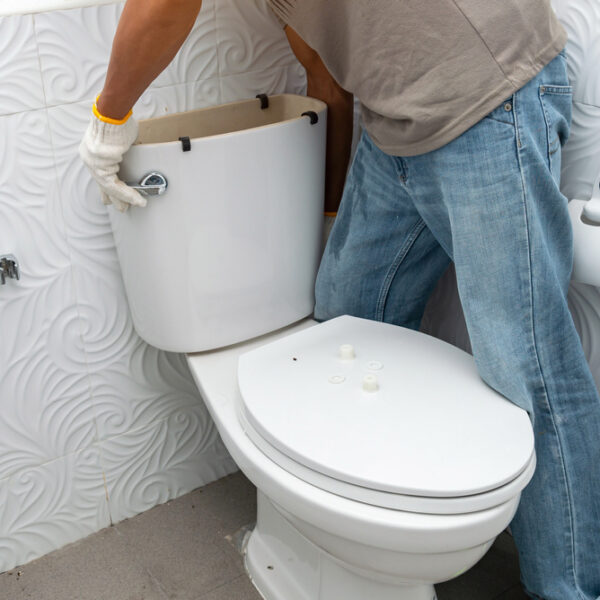
Cover your bathroom floor with a newspaper or tarp. Use the wrench to loosen the nuts that attach the tank to the bowl. The nuts are located on both sides of the tank and its center.
Gently lift the tank from the bowl and keep it away from your work area. Afterward, use the wrench to extract the nuts. Also, since the toilet flange is firmly secured to the down part of the container with a wax ring, hit the sides to smash the seal.
Carry the toilet and place it on the towels and newspapers. Since toilets weigh more than most bathroom fittings, you should find extra hands to help you lift it.
If you can handle the weight, carry the bowl with your legs supporting your weight. Start by standing astride the bowl and hold the spot between the cistern and bowl. Take out the bolts by lifting your toilet from its original position.
Immediately, the toilet is free, carry it slowly, and place it on the towels or newspaper. Try to have a rag to clean any leaks that might occur during this process.
Step 2: Block the Outflow Pipe with a Rag
Firmly shove a rag (an old shirt or towel) into the pipe to prevent your bathroom from having a nasty smell. Do not stuff it far into the pipe so that you can easily take it out.
Alternatively, you can block the pipe as soon as you take out the existing flange. But if you block it at this point, you will stop small items such as bolts and screws from falling into the pipe.
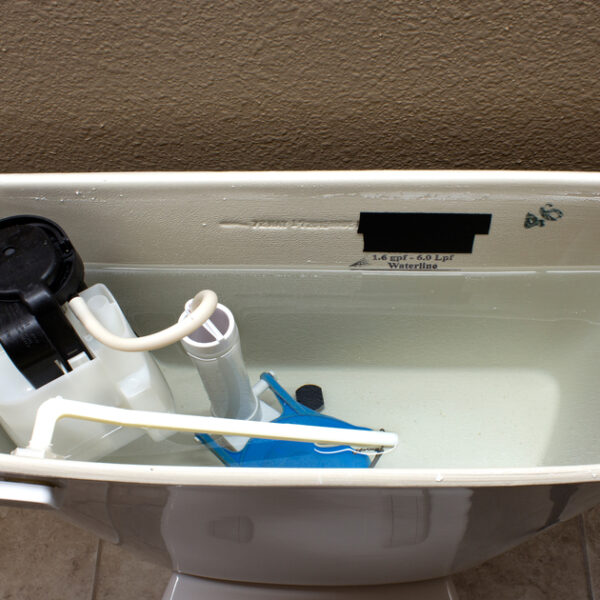
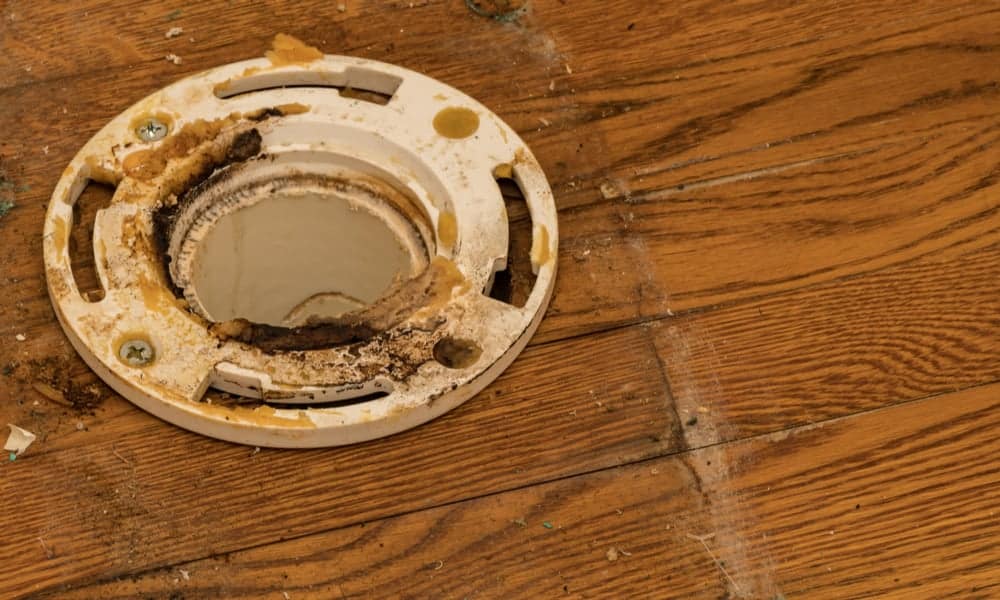
Step 3: Clean Out and Examine the Toilet Flange
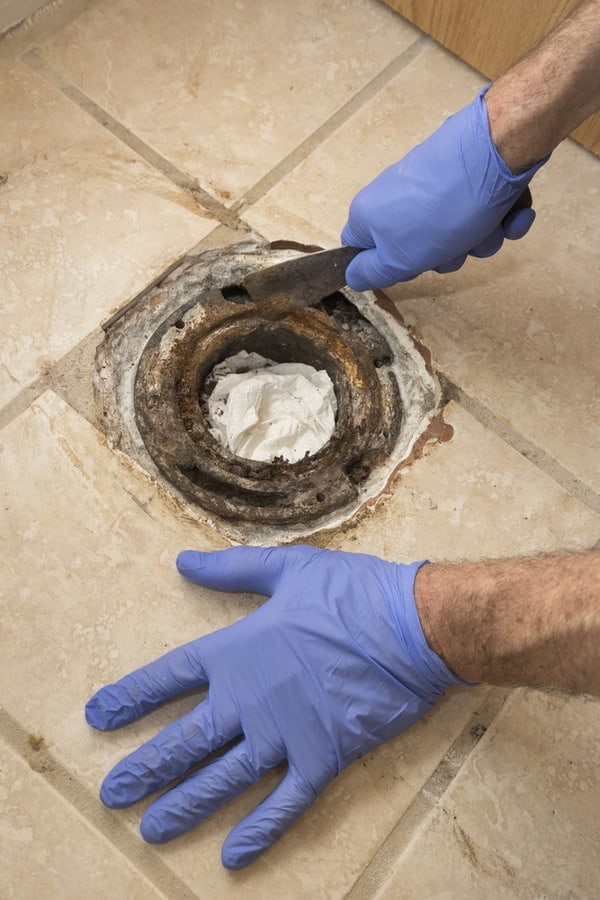
Look for the defective wax ring of your toilet. Here, it seals the connection between the bottom of your toilet and your flange. If you see it, use a putty knife to scrape it off.
As you work, chunks of wax will stick to the knife. Remove them by wiping your tool with a towel or old newspaper.
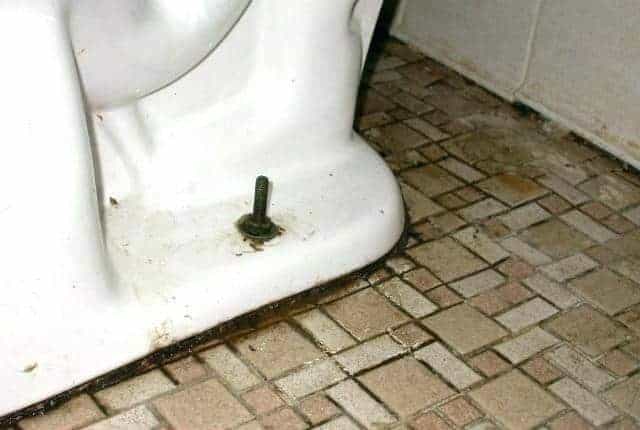
Move to the screws that secure the flange to the bathroom floor. Loosen them and keep them in a safe place for future use. If the screws on your flange kit get missing, you can use these as emergency replacements.
If you use a PVC flange with a gasket seal, extract it by loosening its screws and removing it from the outflow pipe. Next, wash in fresh water and dry with an old towel or rag.
But if your toilet uses a PVC flange that is sealed with a gasket, take it out from the outflow pipe. Rinse with fresh water, dry with a rag, and check for signs of damage. If you see any cracks or chips, consider fixing a fresh wax ring. But if it looks out of shape, consider getting a new flange.
Step 4: Install the New Flange
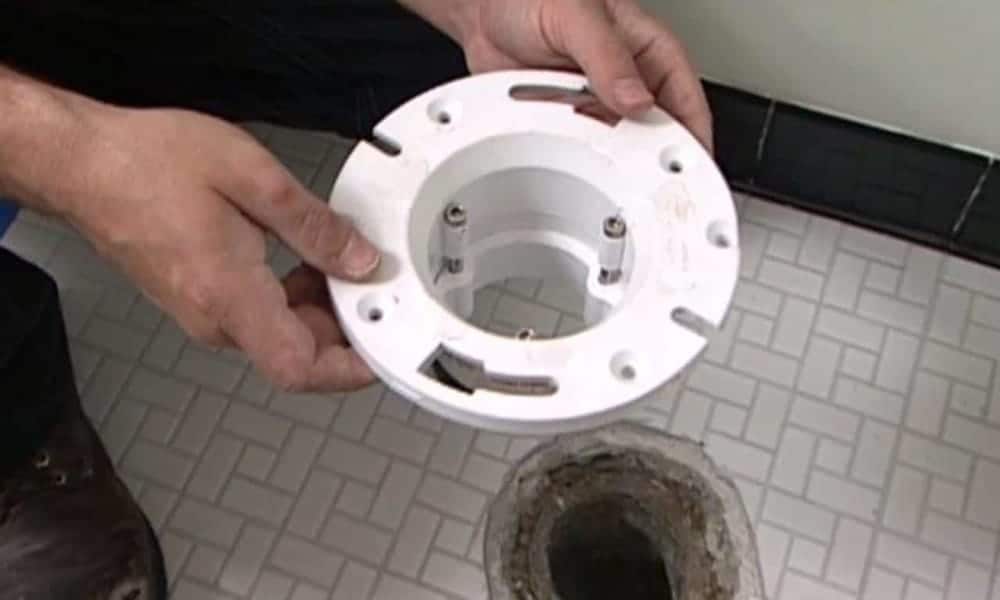
Insert the bolts inside the new flange. Take out and set aside the nut and washers on each bolt. You will notice channels on each side of the flange lip.
Insert two bolts into their corresponding holes. Try to set these items on positions across from each other.
If bolts are not included in your replacement kit, reuse the ones from the previous flange provided they are in perfect form.
Attach the new flange to the outflow pipe. Try to allow it rest on the floor while the neck of the flange should fit comfortably into the pipe.
Place the flange so that the bolts that shoot are directly opposite each other. Look out for the rubber gasket on the inner circle on the flange. This piece builds a seal against the inner part of the overflow pipe.
Look out for the state of the outer edge of the closet flange. If it is not on the same level with the floor, then it has suffered water damage. As a result, you will need to fix your bathroom flooring before moving to the next step of our guide.
Step 5: Set Up the New Flange
Insert the screws into the flange lip and bathroom floor. Drive the tool into screws to secure them into the pre-cut holes in the flange lip. Use clockwise movements when turning the tool.
If the existing pilot holes are in poor condition, create new ones with a drill. If you also notice that the holes are too large for the new screws, tap plastic wall anchors into them with a mallet.
Then fix the fasteners through the flange’s edge and its anchors. Normally, a flange replacement kit has more than 3 screws. However, your unit might boast of four or more screws.
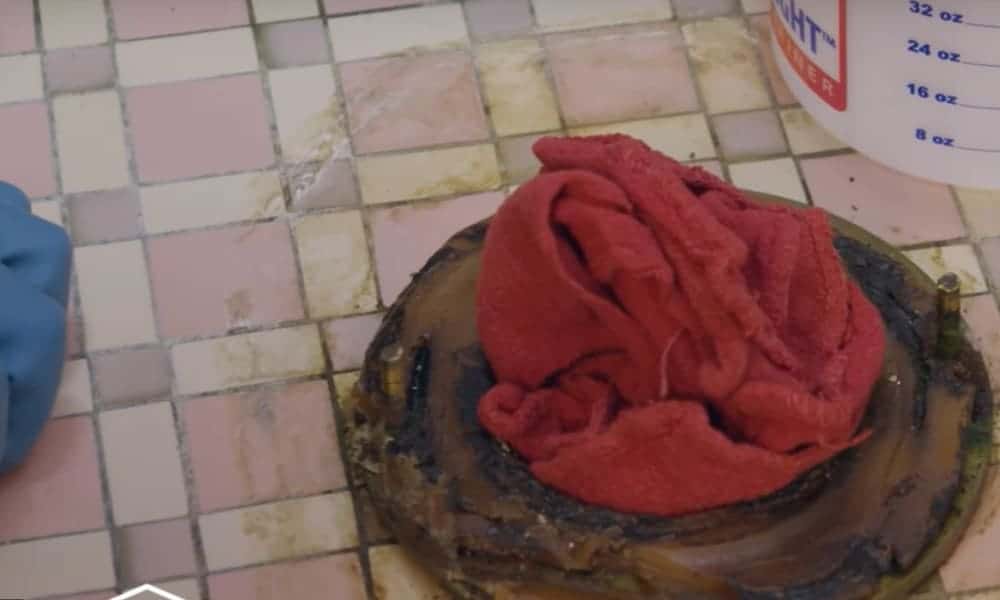
Remove old wax chunks and weak fasteners. Next, take out the rag from the outflow pipe and toss it into the garbage can.
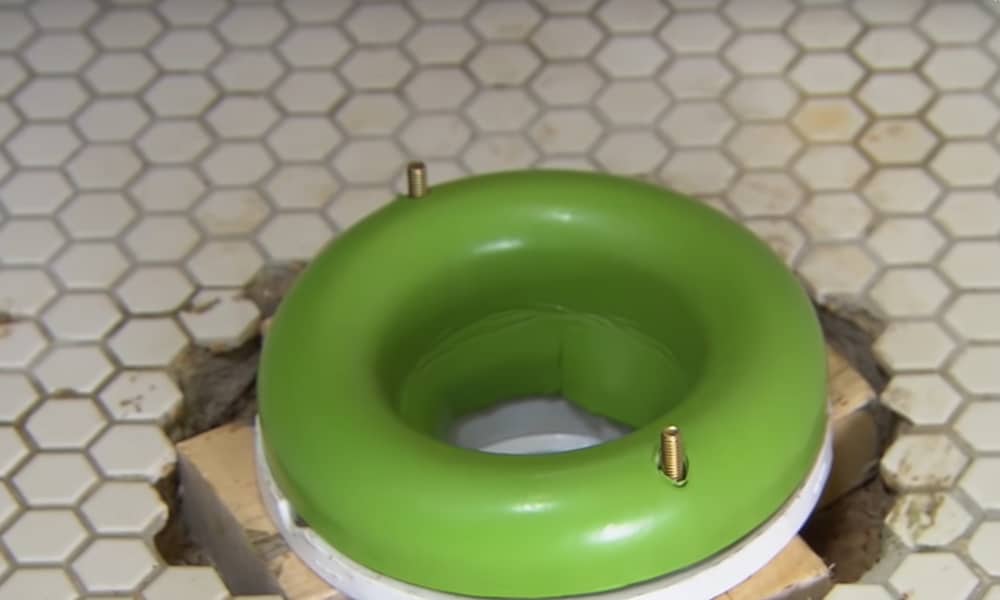
Tip the toilet to one side and set the replacement ring in position. Push the round edge of the ring above the tube stub underneath the toilet. Use firm touches but do not change its original shape.
Experts provide a sturdy lock that surrounds the water closet with this method. But if you prefer another way, you can place the rounded edge of the wax ring on the toilet flange.
Next, place the toilet on top of it. If you are working with the latest gasket inspired wax ring, put its circular part on the closet flange. Then set the toilet on the material.
Step 6: Install the Toilet
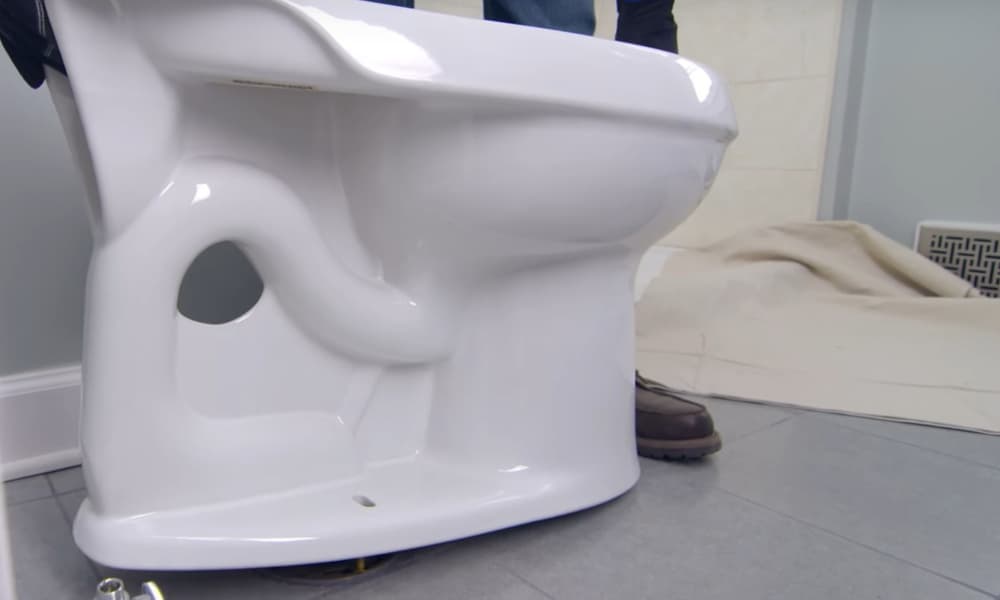
Put the toilet on the flange. Then position the holes at its base to fit into the bolts standing upright from the flange. Immediately the toilet lands on the flange, you should push it down firmly next to the back of the bowl rim to change the shape of the wax ring, and seal the attachment.
You could use the above steps if you pushed the wax ring to the toilet base. You can also use them if you pressed the wax ring at the upper part of the flange.
Place a plastic washer on each bolt then add a metal one. Next, tighten the nuts with your hands before making them extra secure with a socket wrench or crescent.
If provided, snap a plastic over the bolts, and if they are long, bring them to the required size with a hacksaw. That way, the plastic caps fit perfectly.
Insert the couplings at the braided end of the metal hose to the bottom space of the toilet tank. Tighten the connections with your hands and use a wrench or pliers to make it tighter. Generally, metal couplings are designed to be tightened with tools, while the plastic models can be secured by hand.
Step 7: Restore the Water Supply
Turn on the water supply by rotating the valve with counterclockwise movements. As soon as you open it, you will hear water running into the tank.
If the tank gets filled, examine for possible leaks or drips between the toilet tank and the supply line. Also, look out for leaks by flushing the toilet several times. If you notice any water trickling out, reinstall the toilet or contact your local plumber.
Ways to Know a Faulty Toilet Flange
Knowing if a toilet flange has issues can be difficult, especially if the item hides under your dual flush toilet or corner toilet.
However, even if you use a compact toilet for a small space, some signs can point to a faulty toilet flange. Since you have known how to change a toilet flange, here are reasons to replace your existing unit.
Leaks from the Underside of the Toilet
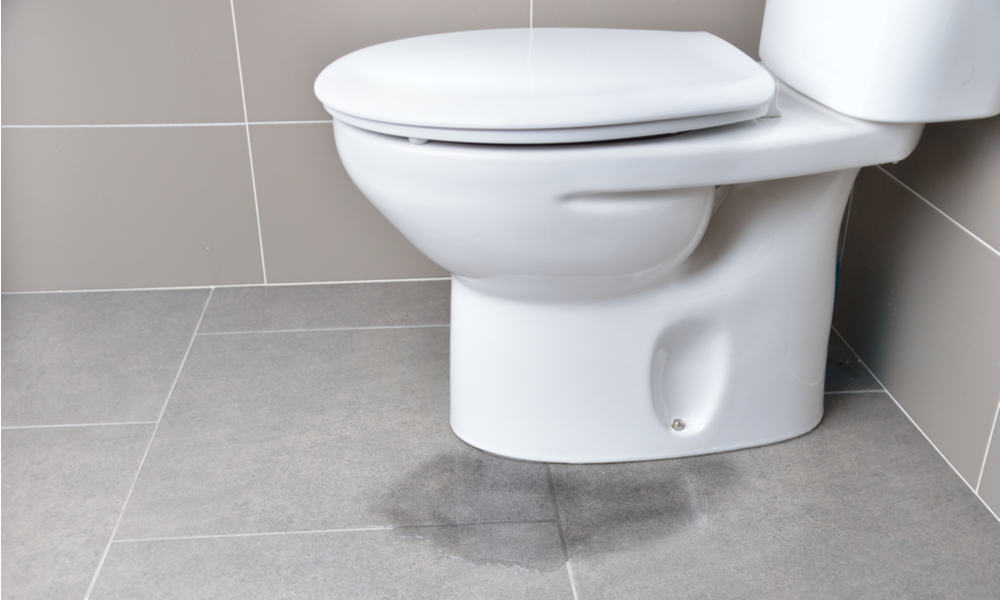
A good time to learn how to repair a toilet flange is when your toilet leaks at its base. Normally, a cracked or a wrongly sized flange is the main problem that leads to these leaks. Furthermore, if you recently installed the toilet, the leakage might be caused by any of the issues mentioned above.
For older leaky with recent leaks, cracked flanges are the usual causes. With that said, you can quickly fix this problem with the steps provided above on how to replace a closet flange. You will also need to install a fresh wax ring.
Loose Toilets
Does your toilet move back and forth? If yes, then broken or wrongly-placed bolts on the flange might be the cause of the problem. Also, a cracked flange that is free from its bolts can lead to shaky toilets.
Wrap Up
Faulty flanges can cause many problems for your toilets. These include water leaks, shaky units, and damaged flooring. However, you can handle these problems by fixing a new flange and wax ring with our guide.
Luckily, these steps do not require much time. They also need a few tools and materials.
If you have any questions after reading this article, feel free to drop them in the section below.