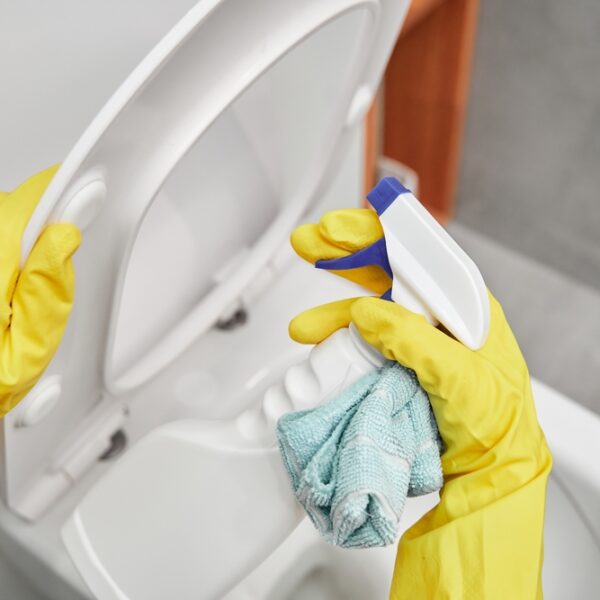
Most of the time, we don’t give much thought to our toilets. We use them when we need to do our business, but other than that, we just kind of forget they’re there and take them for granted. Until they go wrong, that is, at which point they can cause us a great deal of stress.
Possibly the most common toilet-related problem is when the tank starts to lose water, and it’s an issue that most people are familiar with. However, the good news is that it’s usually easy to fix, so in this post, we discuss the question, why is my toilet tank losing water?
How do toilets work? – An introduction
Before we look at how to diagnose potential problems with your toilet tank – also known as the “cistern” – we need to take a step back and talk about the basics of how toilets work.
When not in use, water sits in the bottom of the toilet bowl, and it also sits in the tank, ready for the next flush.
When you flush the toilet, it lifts the flapper, allowing water to pour from the tank into the bowl, washing the water and any waste there into the S-bend. This initiates a syphon action that then sucks everything away down the drain.
When all the water from the tank has emptied into the bowl, water stops flowing into the drainpipe. At this point, air is introduced into the pipe, breaking the syphon effect. Then, due to the configuration of the S-bend, the water in the bowl returns to the same level as before.
After flushing, water then flows into the now-empty tank from the supply line, and because the flapper has returned to the “closed” position, water no longer flows from the tank into the bowl.
The tank continues to fill until the ballcock or float system blocks the flow of water. When this happens, the tank is full and ready for the next flush.
Why is my Toilet Tank Losing Water? Several possibilities
What we’ve just described is a toilet in good working order that’s functioning correctly.
However, problems can arise at each point of this process, causing toilet tank leaks that allow water to flow into your toilet bowl.
In the worst cases, the tank won’t even refill since water simply flows directly into the bowl, resulting in a large amount of water loss – leaking toilets can waste up to an estimated 200 gallons of water per day.
So now let’s look at how to diagnose the problem – and what to do to fix it.
1. Problem with the supply line
When dealing with any plumbing problems, you should always work through the possibilities to eliminate the different causes one by one in a logical order.
This means when faced with a leaking toilet tank, the first place to look is the water supply line.
How to diagnose it
Start by checking the supply line where it meets the toilet. Touch it with your fingers to see if any water is dripping out of the pipe where it meets the tank and check on the floor to see if any drips are collecting there.
How to fix it
If the supply line is leaking, it probably means the nut is loose. This is easy to fix – simply tighten it with your fingers and then tighten it further with an adjustable wrench.
Once you have done this, place a bucket beneath the nut and leave it for half an hour or so before coming back to check it. If you can no longer feel water around the pipe where it joins the tank and no water has collected in the bucket, you have fixed the problem.
If not, the nut could be leaking because the nylon threads have been damaged. You can check this visually by removing the nut and looking inside. (Don’t forget to turn off the water supply first.) If you think this could be the cause of the leak, change the nut and test again.
Tip: Don’t tighten the nut too much because doing so may damage the nylon threads, and the excess pressure may also damage the porcelain of the toilet.
To avoid this, only tighten the nut a quarter-turn more than you can tighten it by hand.
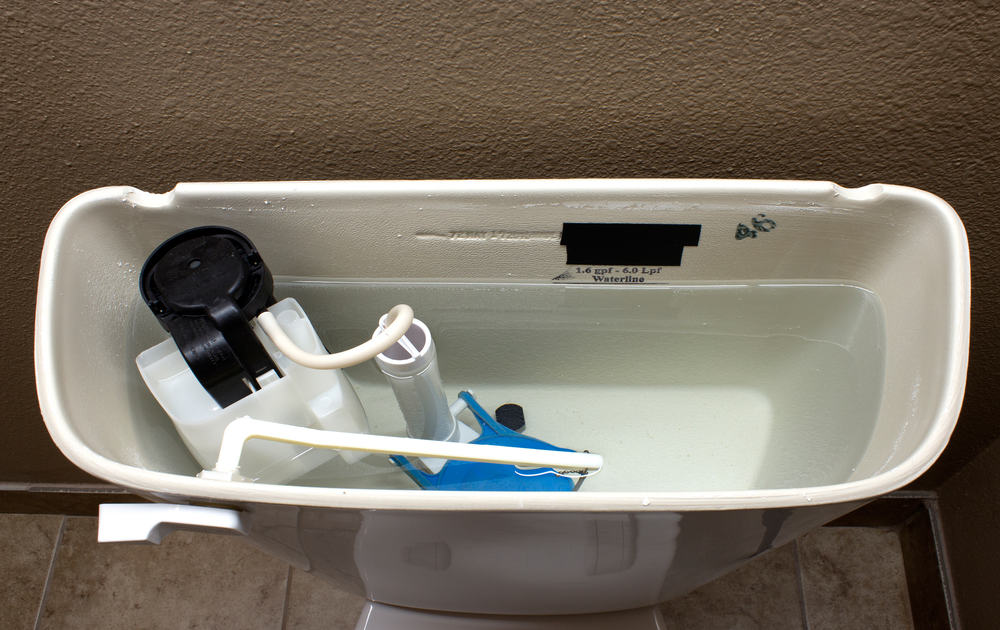
2. Ballcock or vertical float
The next part to check is the ballcock or vertical float that stops water flowing into the tank when it is full. Ballcocks are the more old-fashioned version. They’re easy to spot – if you have one, your tank will contain a large plastic or metal ball attached to an arm.
If you don’t see one of these in your tank, it means the water level in the tank is probably regulated by a vertical float. These are attached to the shaft of the fill valve but essentially do the same thing.
If the ballcock or vertical float is not functioning correctly, water will continue to flow into the tank after it is full, and this water will then flow down the overflow into your toilet.
How to diagnose it
This problem is easy to diagnose. If you look into your toilet bowl, you will see a constant flow of water going into the bowl, even when you haven’t just flushed the toilet.
If you lift off the tank lid, you will see that the tank is full almost to the top and that the water is disappearing into the overflow tube, a vertical pipe on the opposite side of the tank from the fill valve.
How to fix it
Fixing the ballcock or vertical float is a simple and inexpensive job, and often requires no more than readjusting the level of the float.
- Ballcock system
If you have a ballcock system, start by checking the float level – it should sit about two inches lower than the overflow.
Next, turn off the water supply at the shutoff valve and flush the toilet to empty the tank. You can use a sponge or towel to mop up any remaining water at the bottom of the tank.
After this, loosen the float by unscrewing the screws that hold it in place.
Adjust the float by moving it up or down as required and then tighten the screws again.
Turn the water supply to the tank back on and allow the tank to refill. When the tank is full, check to see if the water is still going down the overflow pipe. If it isn’t, the job is done. If the water is still overflowing, you may need to adjust the level again.
Tip: If you adjust the level and still can’t stop the water overflowing, you may need to replace the whole ballcock system.
They aren’t expensive to buy and are easy to fit, making it a simple job for anyone with basic DIY skills to complete.
- Vertical float
Adjusting a vertical float system is just as easy as adjusting a ballcock system.
Start by turning the water off and flushing the toilet to empty the tank.
Next, find the float release clip to release the float and then adjust the float to the correct height. When it is at the right height, tighten the release clip again.
Turn the water back on to test the level. If the water is still overflowing after several attempts, you may need to replace the whole fill valve, something that’s also cheap and easy.
To do this, simply buy a new fill valve with a vertical float and follow the instructions on the packaging.
3. Leaking flapper
A leaking flapper is another of the most common reasons for a tank to lose water. The flapper is the part that blocks water and prevents it from flowing into the toilet.
When you flush the toilet, you lift the flapper and allow the tank to empty into the toilet bowl. When the flush has finished, the flapper returns to its place, which stops water flowing into the bowl and causes the tank to refill.
However, if the flapper is damaged or worn out, some water will be able to trickle through to the bowl, even when you don’t flush the toilet.
How to diagnose it
When toilet flappers start to wear out, the seal becomes compromised, and a small trickle of water will start dribbling into the bowl – although the tank will still fill normally. At this stage, it may be practically imperceptible, so you need a way to test it.
To do this, add a few drops of food coloring to the water in the tank. Come back half an hour later, and if the water in the bowl has started changing to the same color as the water in the tank, you know the flapper is to blame.
In more serious cases, water will flow directly from the tank into the bowl, and the tank won’t even be able to fill up.
If this happens, it will be obvious without the need for any test because you will have an empty tank and will be able to see the water flowing directly into the toilet bowl.
How to fix it
If your toilet has a traditional flapper with a chain, it’s an easy job to remove it and then fit another one. Another common flushing mechanism is the more modern plunger/piston fill valve type, and if you have one of those, it’s even easier to replace.
- Traditional flapper with chain
With a flapper on a chain, start by turning off the water supply to the tank and then flush the toilet to empty the tank. Remove the lid from the tank.
Next, unclip the flapper chain and gently pull the flapper free from the pegs on either side that hold it in place.
If you know which type of flapper to buy, you can purchase one in advance to fit right away – but if not, take the old flapper to the hardware store when you buy a replacement.
Clip the new flapper in place over the pegs on either side. Double-check to make sure it’s firmly secured so it won’t come loose after a few flushes then reconnect the chain.
Push the handle to flush the toilet and check the length of the chain – then adjust the length if necessary.
Once you’re happy that everything is in place, turn the water back on and allow the tank to fill. Flush the toilet to check if the flapper is working and then let the tank fill again.
Check that no water is leaking from the tank into the bowl, and if there are no problems, you can replace the tank lid and the job is done.
- Plunger/piston flush valve
A plunger/piston flush valve mechanism is a vertical tube with a flush button on the top. Rather than a flush handle, to flush the toilet, you press the button to activate the piston, which lifts up, allowing water to flow from the tank into the bowl.
To replace one of these, start by turning off the water to the tank and then empty the tank by flushing the toilet.
All you have to do after this is remove the old unit, usually by turning it counterclockwise, lifting it out, putting the new one in place and securing it by giving it a clockwise turn.
Turn the water back on and test, and if everything seems to be in working order, you can replace the tank lid and the job is done.
Tip: Although replacing the whole mechanism should cost no more than $10-20, you can also check the gaskets before opting for a new mechanism because sometimes replacing these is all you need to do.
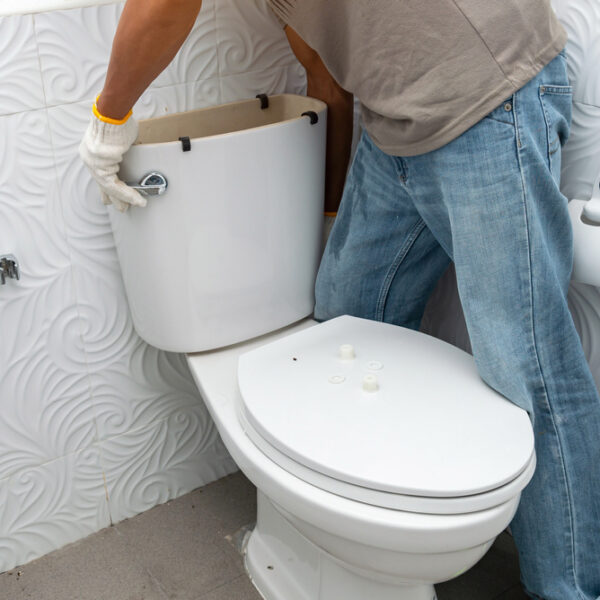
4. Leaking tank bolts
One last part to check is the bolts that fix the tank to the toilet bowl. They are located at the bottom of the tank on either side, and if they come loose or the washers wear out, water can leak through the holes into the bowl below.
How to diagnose it
It’s hard to confirm if this is the cause of the problem, but if you can’t find any other reason for your leak, checking the tank bolts is a good idea.
You can inspect them by turning them with your hand and also visually. If they feel loose or if the washers look old and worn out, there’s a good chance this is the root of the problem.
How to fix it
This is a very easy problem to fix. If the bolts are loose, simply tighten them. You will be able to do this using a screwdriver or a wrench to turn the nuts and bolts as required. To access them, you will need to turn off the water and flush the toilet to empty the tank first.
If the problem is due to the washers, simply remove the bolts, replace the washers and then fix the nuts, bolts and new washers back in place.
5. Related problem – toilet bowl losing water
A similar but separate problem is when you notice your toilet is losing water not from the tank but from the bowl.
If this happens, there are two main reasons – either you have a leaking toilet or you have a clogged vent.
To find out which it is, start by running water from the faucets in your bathroom. If you hear a gurgling noise in your toilet, it means the vent is blocked.
If there is no gurgling, close the faucets again, fill the bowl, make a note of the water level and then wait for half an hour to an hour.
When you return, check the water level. If it has dropped, it means you have a cracked toilet or a leaking pipe.
How to carry out repairs on a toilet bowl that’s losing water
Here’s what to do about these two issues:
1. Vent
Plumbing systems need air to function correctly, and to understand why, think about what happens if you put your finger over one end of a straw.
The liquid in the straw can’t flow out of the other end, even if you hold it upside-down, and the same effect occurs in your pipes on a larger scale if there is no air in the system.
Air in a plumbing system comes from a vent, which is usually found on the roof. However, these can often become blocked if debris gets inside, and when this happens, you need to unblock them.
To do this, you need to climb onto the roof, taking all precautions not to fall.
Start by washing the vent out with water from a garden hose. However, if this doesn’t work and the water backs up, you will need to unblock it with an auger.
Once the vent is unblocked, you should find that your toilet bowl no longer loses water.
2. Cracked toilet or leaking pipe
If you have established that the problem is due to a leak, you should inspect the toilet to see if it is cracked. Even a tiny crack can result in a leak, and unfortunately, the only way to rectify this is to buy a new toilet.
If the leak isn’t due to a cracked toilet, it may be down to a cracked pipe, which is much harder to locate. In this case, you will need to call in a professional plumber to take care of the repairs.
Leaking tanks are common and easy to repair
As we have seen, toilet tanks losing water is a common problem that most people face at some time. However, the good news is that it’s usually an easy problem to diagnose – and one that even beginner DIYers should be able to fix without help.
However, a toilet bowl losing water is another matter, and unless the problem is due to a blocked vent, you may need to consider replacing your toilet or calling out a professional to find the source of the leak.