An extractor fan is essential to avoid damp in your bathroom, as well as to keep it smelling sweet. So if your trusty bathroom fan has stopped working, you’ll want to replace it fast.
If you’ve never done it before, don’t be deterred! We’re going to walk you through how to replace a bathroom fan, and we’ll do it step by step. Whether you’re a confident DIYer or just starting out, we’ll give you the information you need for a successful installation.
So step this way for a fresher bathroom!
Step by Step Guide on Replacing Bathroom Fan
Step 1. A word of warning
We’re talking here about replacing a fan. Installing one for the first time is a whole other ballgame. You’ll need the right wiring, and we don’t cover that here.
And before you get started, check whether you need a permit for this kind of work where you live. Some jurisdictions will require the work be done by a licensed contractor.
And even if that’s not necessarily where you live, you may still need a permit. If you do and you go ahead without one, you’ll probably breach your home insurance conditions. If something goes wrong, that could make it a very expensive business.
A quick call to your local authority will establish what you need before you get started.
Step 2. Choosing the right replacement
The next thing to check is how your fan is powered. Some will be hardwired into your electrical circuit. Others will have a plug.
If you’re not sure, take the cover off the fan and check. You’ll want to get a new fan that’s powered in the same way as the one you’re replacing.
Once you know which type of fan you need, check how powerful it needs to be. To do that, you need to know the volume of your bathroom. That will determine how much air the fan needs to move.
Measure the height, width and length of your bathroom in feet and inches. Now multiply the measurements together. That will give you the volume of your bathroom in cubic feet.
Fan power is measured in CFM, or cubic feet per minute. If you’ve got a smaller bathroom, you won’t need a fan that has a high CFM rating. The opposite is true if you’ve got a large bathroom. As a rule of thumb, a fan with 90 CFM will handle an average bathroom.
Power often means noise, so the other thing to check is how loud the fan is. Look for models with a noise rating of 2 sones or less. That will mean you don’t wake up the whole household if you use the bathroom at night.
Step 3. Prepare properly before you start
Save yourself time and hassle by getting your tools together before you get started. You won’t need anything special – just a screwdriver, drill, circuit tester, drywall knife, wire connectors, and HVAC tape.
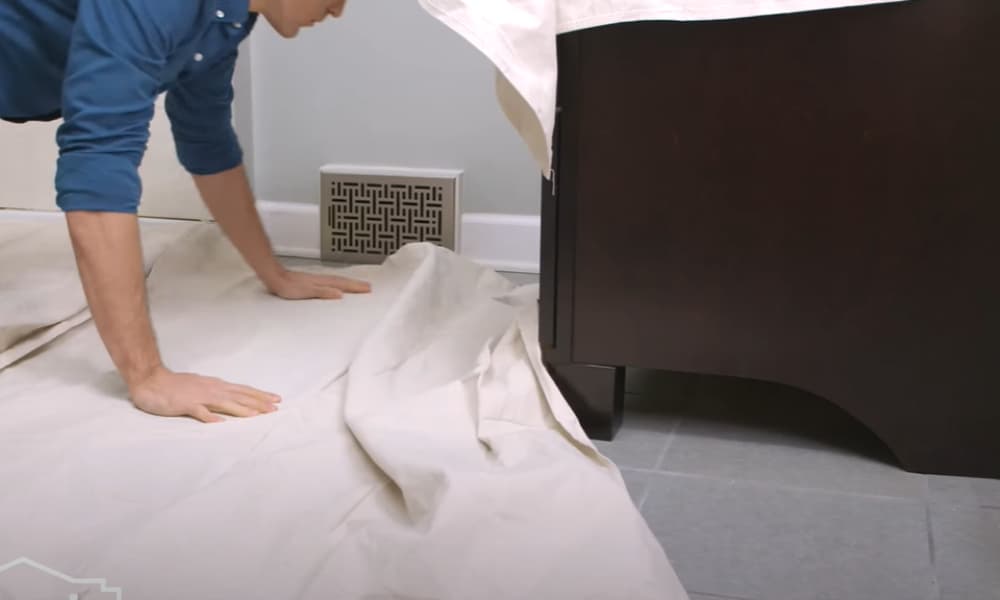
When you’ve assembled everything, protect your floor and fixtures by draping a decorating cloth over them. Once you start working in your ceiling void, you’ll be surprised at how much debris falls down.
Finally and most importantly, cut off the power to your fan. It may be on the same circuit as your bathroom lights and shaving point, or on a separate one. Your circuit box should be labeled appropriately. Double-check the power is off by trying to start the fan before you start work.
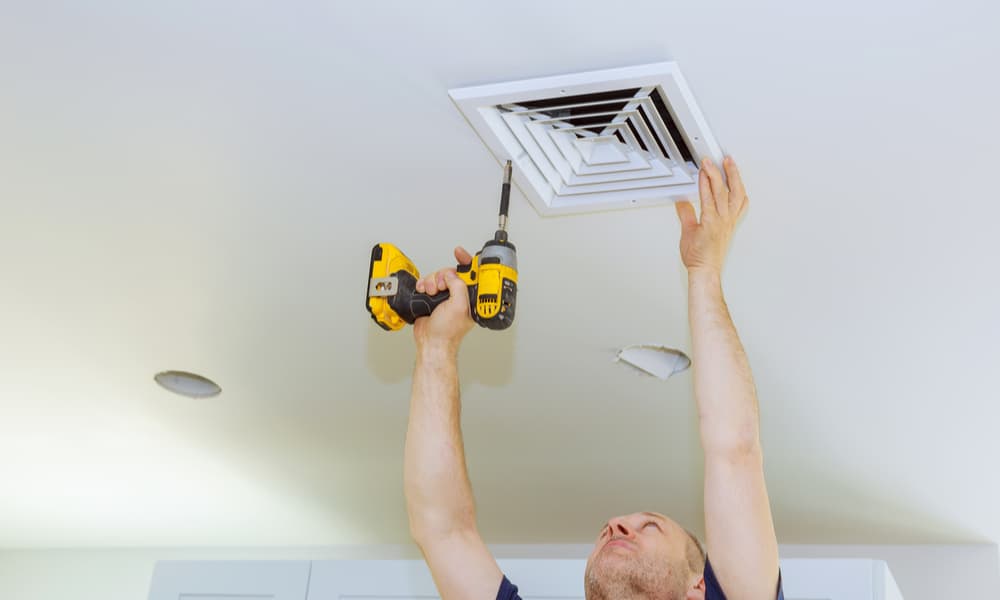
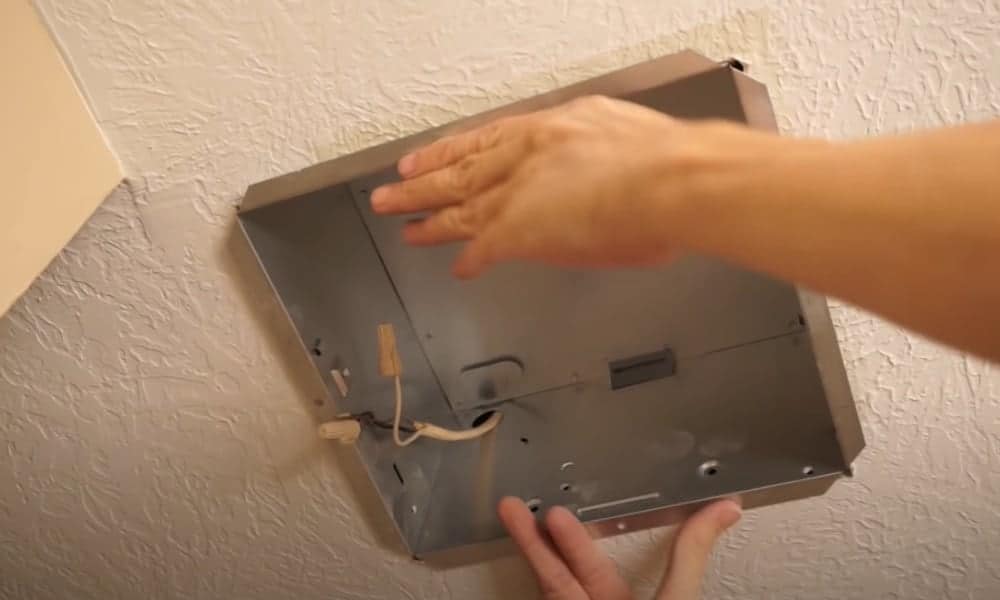
Step 4. Remove your fan cover and detach the wires
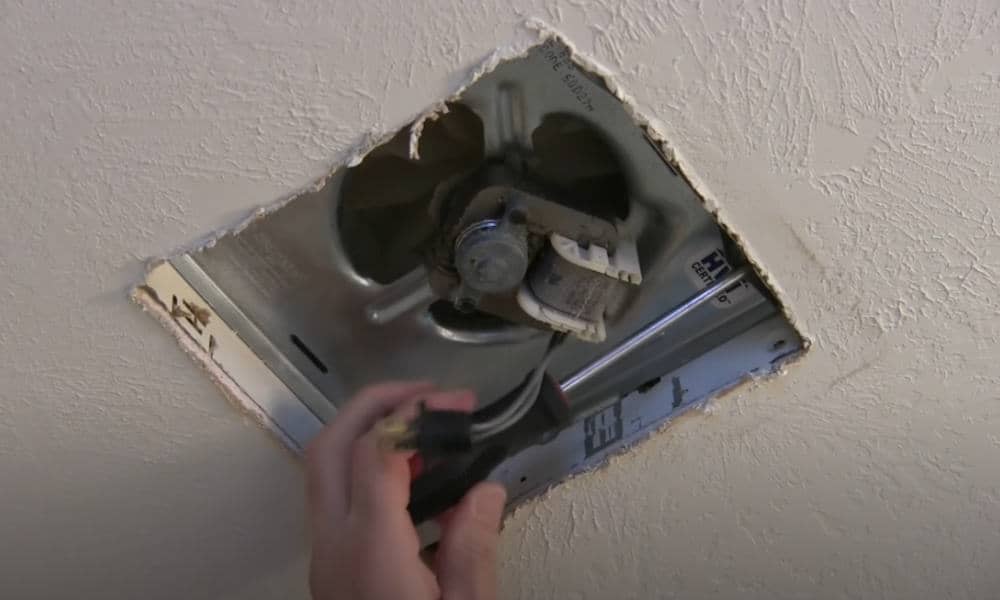
The next step is to remove your old fan. Take a look at the cover to see how to do this. If you can see screws, get out your screwdriver and remove them.
If there’s no sign of any screws, the cover will snap into place. There may be a tab to press on to remove it. If not, just grip it at either side and give it a sharp tug. If that doesn’t work, prise it off by using a flathead screwdriver as a lever.
Now that the wires are exposed, use your circuit tester to make sure there’s no voltage running through them. If everything’s clear, you can start to remove the wires from the plastic connectors.
If you can’t see the connectors, remove the junction box from the fan housing. The connectors will be inside.
And if you’ve got a plug-in fan, just look for the plug. The socket will probably be attached to a ceiling joist. When you’ve found it, simply unplug the fan.
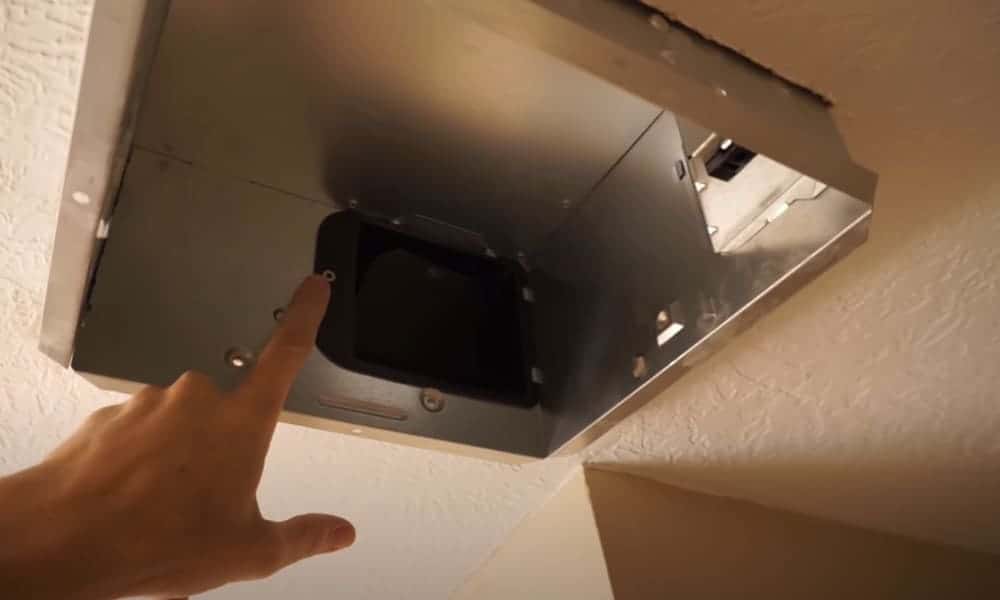
Step 5. Disconnect the pipe for the vent and remove the fan housing
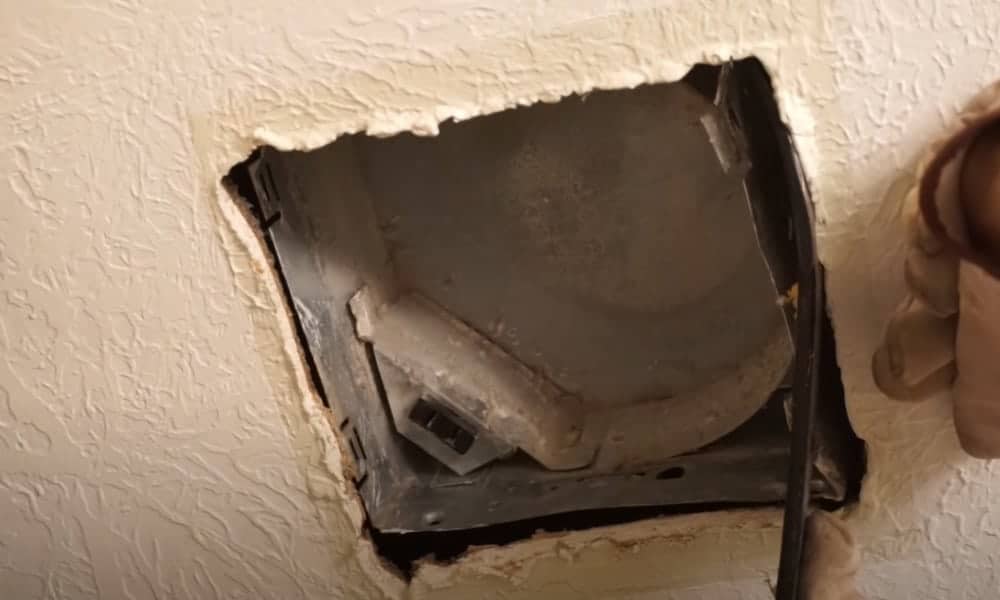
The vent pipe is a piece of flexible tubing that runs from the fan housing to a vent in the roof. It will be attached by either tape, screws or a clip. Remove whatever is attaching it and then give the tube a gentle pull so it comes out of the housing.
Now look for the screws that hold the housing in place. Depending on where they are, you may or may not be able to unscrew them from below. If you can’t see them, head to the attic and remove them from there.
If your housing screws in from above, you may have some extra work to do. If you’ve put flooring in your attic, you’ll need to remove it. And if you haven’t, you’ll need to place a board between the ceiling joists to kneel on as you work.
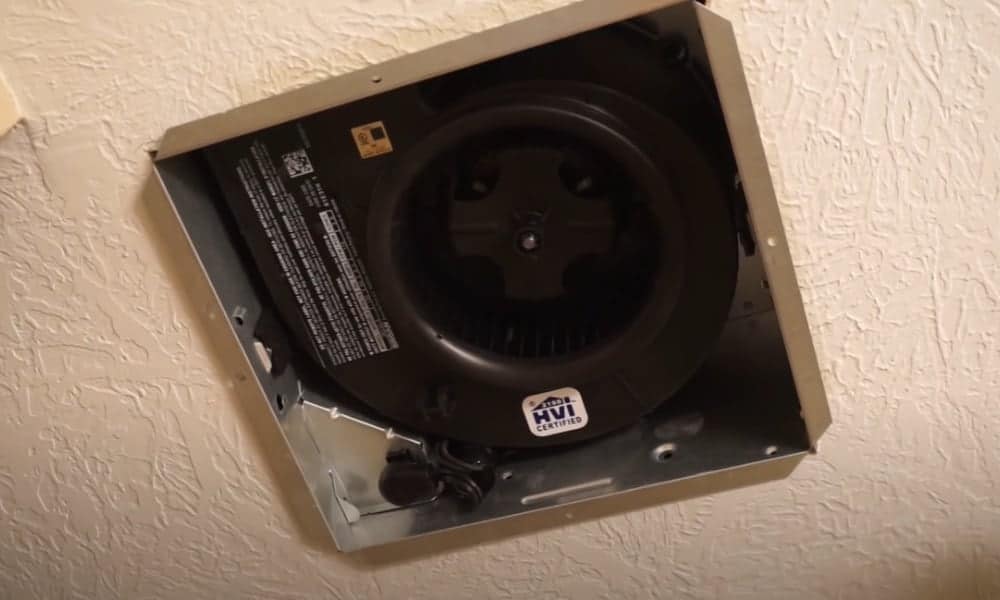
Wherever the screws are located, this part of the process will be a lot easier if you can get someone to help. Ask them to hold onto the housing while you unscrew it. When the screws are out, just pull the housing out of the ceiling.
Step 6. Adjust the hole in the ceiling if you need to
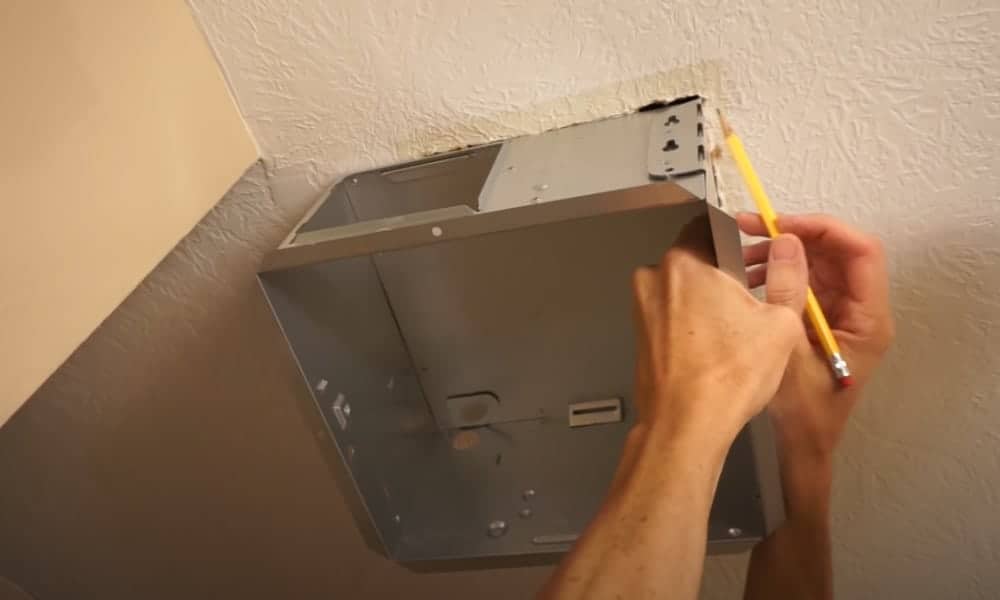
Now that your old fan has gone, it’s time to install the new one.
Start by checking whether the existing hole in the ceiling is the right size and shape. If not, don’t worry. You can install a fan that’s either bigger or smaller than the old one.
If your new fan is bigger, use your drywall knife to enlarge the hole. Use the new fan as a template for the opening. Draw around it with a pencil and then and simply cut along the line.
If the new fan is smaller than the old one, just patch in the space around it using filler.
Step 7. Fix your new fan housing in place
The next step is to get the housing for the new fan in place. This is usually a fairly simple case of screwing in some brackets to the ceiling joists.
As with removing the old housing, some designs will allow you to do this from below. Others will need to be screwed in place from the attic. Read the instructions that came with your fan carefully before you start.
Again, your life will be easier if a friend can hold the housing while you screw it into position.
Step 8. Reattach the vent pipe to the new housing
Now it’s time to reattach the vent pipe you removed from the old fan housing earlier. Look for the round duct connector in the new housing.
If you can’t see it on the housing, you’ve probably got a model where you’ll need to attach it there yourself. Take a look at the installation instructions to see if that’s the case. If it is, search the box for the duct connector and follow the instructions to attach it to the housing.
Once the connector is in place, slide the pipe over it and wrap some HVAC tape around the join. Don’t skimp on the tape – you want it to stay secure.
Step 9. Reconnect the wires
Now you need to connect your new fan housing to the power supply.
If you’ve got a fan with a plug, just push it into the power socket. That’s your work done!
But if there’s no plug, look for the junction box on the side of the fan housing. Unscrew it and you’ll see three different colored wires.
Pull out each wire in turn and find the one in the ceiling that’s the same color. Place the two wires of the same color together and join them up using plastic connectors.
When that’s done, push the connections into the housing again, and replace the cover of the junction box.
Step 10. Put the fan cover on

The final step is to put the cover over the fan. This will make it look neat, as well as stopping dirt and dust interfering with the mechanism.
You’ll either need to screw the cover in place, or simply push it into position. Check your instructions – or just look for screw holes in the cover.
When that’s all done, turn the power back on. Your great new fan is now cleaning the air in your bathroom. Give yourself a big pat on the back!
All done!
We hope our guide to how to replace a bathroom fan has proved that this doesn’t have to be difficult. Check any local requirements and permits, then assemble your tools and take things step by step. You’ll have your new fan up and running in no time.
And if you’ve installed your own bathroom fan, please share your experience! Add your comments below and tell us how it went.