When painting your bathroom, it’s vital that you also apply paint to the back of your toilet. However, this spot stands as one of the toughest points to touch up with paint because it is hard to move your hands easily in this area. Also, this part tends to gather dust and dirt.
Luckily, it’s possible to brighten behind your toilet even without lifting it out the tank. With this guide, we will show you how to paint behind the toilet. Moreover, this project will require a few minutes and can work for even a compact toilet in small spaces.
Tools Required for Painting behind Your Toilet
If you want to paint behind any water closet, including a flushing toilet, you will need some tools.
Such items include:
- paintbrush (1-inch wide)
- interior paint primer,
- high gloss interior paint
- painter’s mask
- tape
- mini roller
- large trash bag
A Step-By-Step Guide on How to Paint Behind Your Water Closet
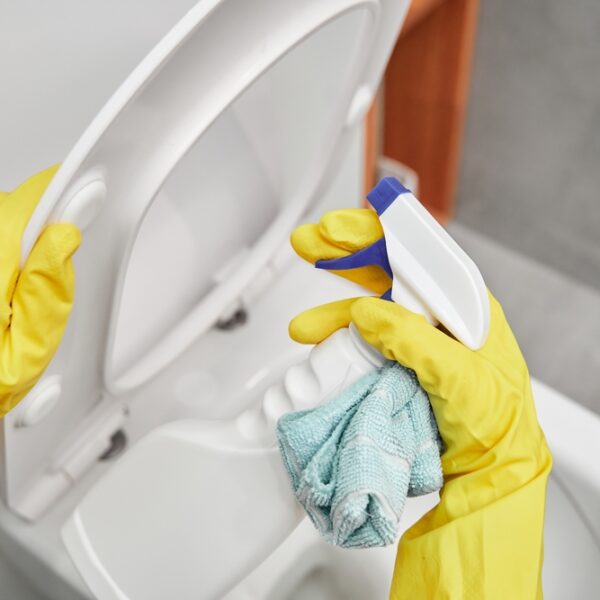
Step 1: Take off the Toilet Tank Lid and Place in the Trash Bag
Take off the lid of the toilet tank and take it outside your bathroom. Afterward, place the trash bag over the open basin. To keep the bag in position, lay some painter’s tape on the plastic and porcelain underneath.
By laying the bag over the porcelain, you will prevent accidental paint marks on your toilet and its seat. As soon as the paint dries up, you can remove the bag and replace the lid.
Step 2: Ventilate Your Bathroom
When painting the toilet, focus on allowing enough air into the room. In a closed room, painted surfaces emit offensive odors that cause several problems ranging from fainting to blurred vision.
To avoid this scenario, open the windows to the bathroom. If the room does not have an opening, consider using its door and the windows in the closest place.
Step 3: Protect the Flooring from Paint Marks
The best way to paint behind a toilet involves covering the floors. With this tip, you can avoid potential paint spots on your bathroom flooring. To do this, place a huge plastic wrap on the floor and at the back of the water closet.
You can get such items from your local hardware store at affordable prices. Just check the retail outlet that sells painting supplies.
Step 4: Swap Your Clothing for Old Worn Out Clothes
Apart from staining your bathroom, you can also spill some color on your clothes. That means you will need to wear old clothes for this project as paint can ruin the fabric.
After using the work clothes, do not toss them into the trash can. Instead, launder them and keep in storage for any future painting project.
Step 5: Use a Mini Roller
Since you will paint behind a tight spot, a mini roller comes as an ideal tool for the job. Get the item with a width of 3/4 inches for a perfect fit for any water closet.
If you don’t which to get, go for the one with smallest brush. The reason is that the least sized rollers tend to move freely behind toilets.
Step 6: Place the Roller into the Prepared Paint
Top a container with some paint – you should use a rolling tray for this task. Cover the brush in paint, but do not let it drip.
To prevent possible spills, aim to make small coats with the brush. If you have a drippy brush, this means it has too much paint.
At a comfortable angle, roll the brush on the wall behind the toilet. Usually, you should move the roller from top to bottom. But this depends on the amount of room between the bowl and wall.
If you find easy to move your hands, paint from side to side. Since the brush has an extended angle, it should be most parts, especially at the back of the toilet.
Step 7: Apply Paint Gently with Back and Forth Movements
Start painting the spot will non-drippy roller. Move the brush backward and towards while painting from top to bottom. For a perfect finish, you should know how to paint behind a toilet carefully.
At regular intervals, dip the roller into the paint. Ensure to produce light coats on the tool. Notice any drips from the brush? This means it’s heavily coated.
Leave the first coat for at least 6 hours before painting the next one. Check if the paint has dried by placing a finger carefully on the wall. If you have paint on your skin, then you should wait for an extra hour.
As the first coat does not cover the wall, you must use more paint to ensure a complete paint job. When you have a dried first coat, apply the next one.
Step 8: Take off the Trash Can Bag and Return the Lid on the toilet
Wait for an hour for the final coat to dry and check by lightly touching the wall. If there’s no paint on your hand, pull off the plastic bag and replace the lid of the toilet.
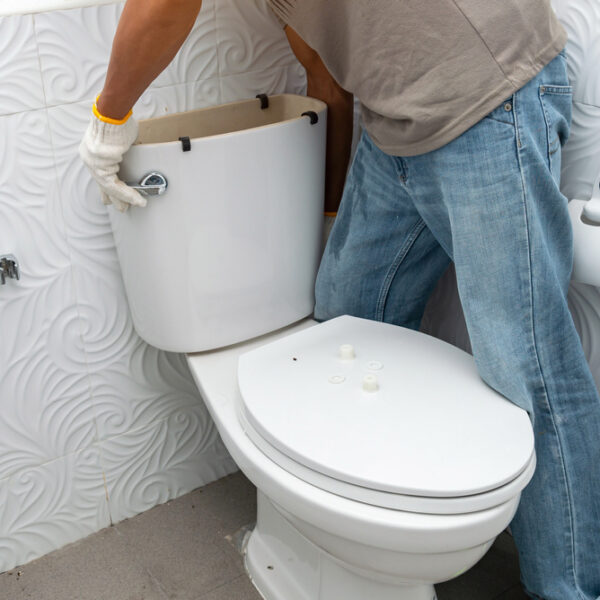
Removing the Tank to Paint behind the Toilet
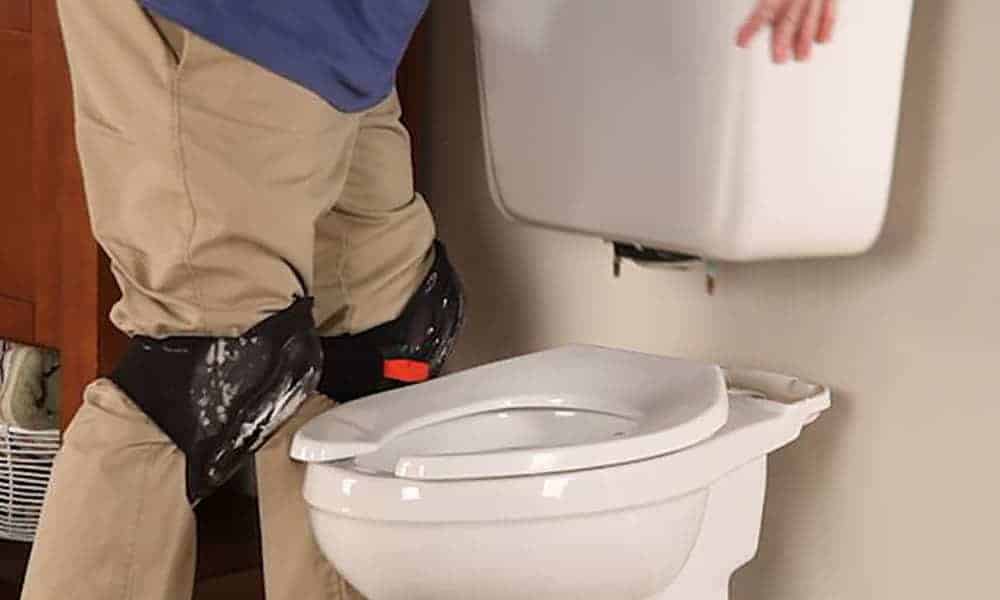
Some toilets have tight spaces that will not suit any of the steps mentioned above. There’s the need to remove the tank of the toilet to paint such spots. Use the following guide to know how to paint behind a toilet without a tank.
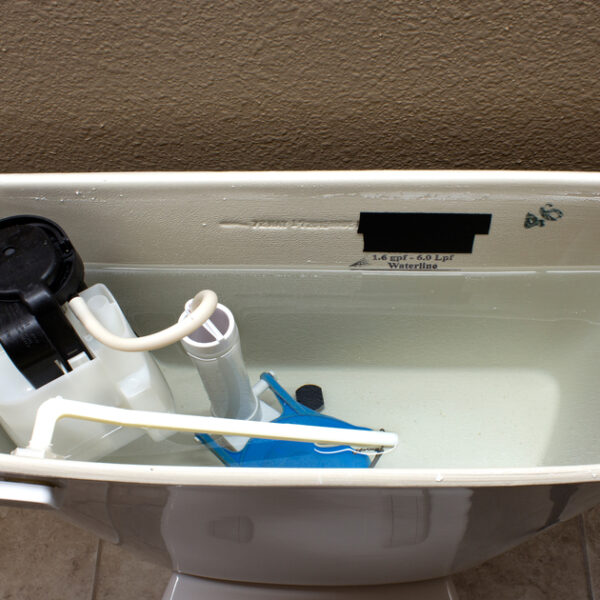
- Lock the toilet stop to disconnect the tank from the main water supply. Then, take out the water in the tank by pulling the toilet handle.
- Move to the bottom of the tank and pull the water hose. Next, unscrew the nuts that secure the container to the water closet.
- Extract the tank from the toilet and start the paint job. Take maximum care in handling the fragile basin to avoid cracks.
- After removing it, apply colors on the wall with the mini roller.
Why Should I Paint the Wall at the Back of My Toilet?
Learning how to paint behind a toilet without removing the tank helps you get a complete bathroom interior decoration. Find below some of the perfect reasons for slapping paint on this part of your bathroom.
- It enhances the look of your bathroom. Since it provides a brighter space, you will feel comfortable, mainly when you use it.
- Surely, Painting around the toilet make it looks pleasant at all time when your eye set at that spot.
- Also, knowing how to paint around a toilet keeps the wall sturdy, thereby leading to several years of use.
Important Tips when Painting the Toilet Behind
Although knowing the easiest ways to paint behind a toilet will give you better result. But there important you should when carrying out this task.
Always start by cutting off the water supply and flush the toilet to drain the tank. When you have an empty tank, lift it with care from the water closet, and start applying paint.
Currently, most tanks have features that allow easy installation and removal. If you feel confused with any of the tasks, you can go through the supplied manual. Overall, you can know how to paint behind a bathroom toilet without calling a professional.
Wrap Up
Adding paint to the spot at the back of your toilet comes as an essential task. To perform this project, cover the tank and floor with plastic bags.
Then use a mini roller to reach all the tight corners. Work on this area with light coats and allow it to dry. Finally, take out the wraps and return the lid to its original position. If you have a space that’s too tight, remove the tank before painting around it.
I hope you enjoyed this article. Please feel free to drop any comments and share this post with your friends on social media.