There are many different types of shower valves, and they come in different sizes and faucet types. Although the two handle shower valve is seen as an old-school shower valve, most people still use them in their bathrooms.
Just like most shower valves, this type can also have leaks. As soon it begins to leak, quickly call a plumbing company, or you fix it by yourself. In this post, we will learn how to replace two handle shower valve.
Below are tools you will need when replacing your shower valve, and the steps to replace two handle shower valve.
Important Tools You Need
The first thing you’ll need when replacing a faulty or old two handle shower is a cover plate. However, when buying a cover plate, ensure that you choose one that is scald-proof. Bear in mind that installing two-handled shower valves can sometimes be difficult (but not impossible).
Below is the following equipment you need when carrying out a two handle shower valve replacement.
- New shower valve
- Soldering torch
- Jigsaw
- Pipe fittings
- Conversion plate
- 4-in-1 screwdriver
- Slip-joint pliers
How to Change a Two Handle Shower Valve
If the need arises, use the following steps below as a guide when replacing a two-handle shower valve.
Step 1. Turn off Water Supply
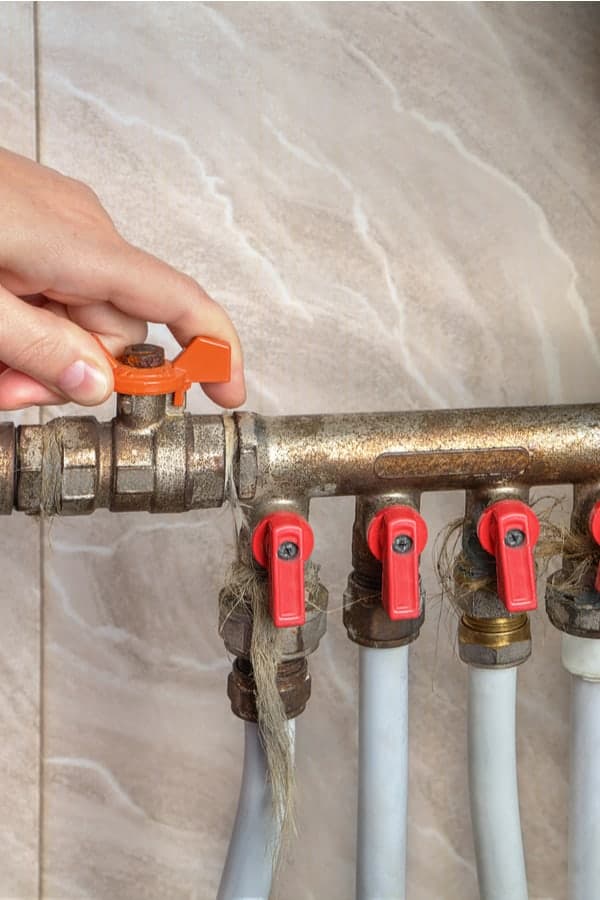
When it comes to plumbing tasks, the first thing to do is to turn the water supply off. Turn off the water in your bathroom before replacing your shower valve.
Afterward, open the tap to free up the pressure in pipes. When this is done, you can go ahead to replace the valve.
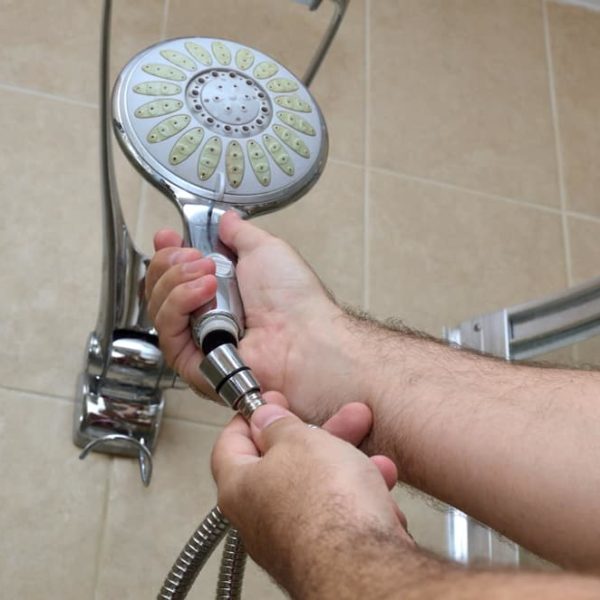
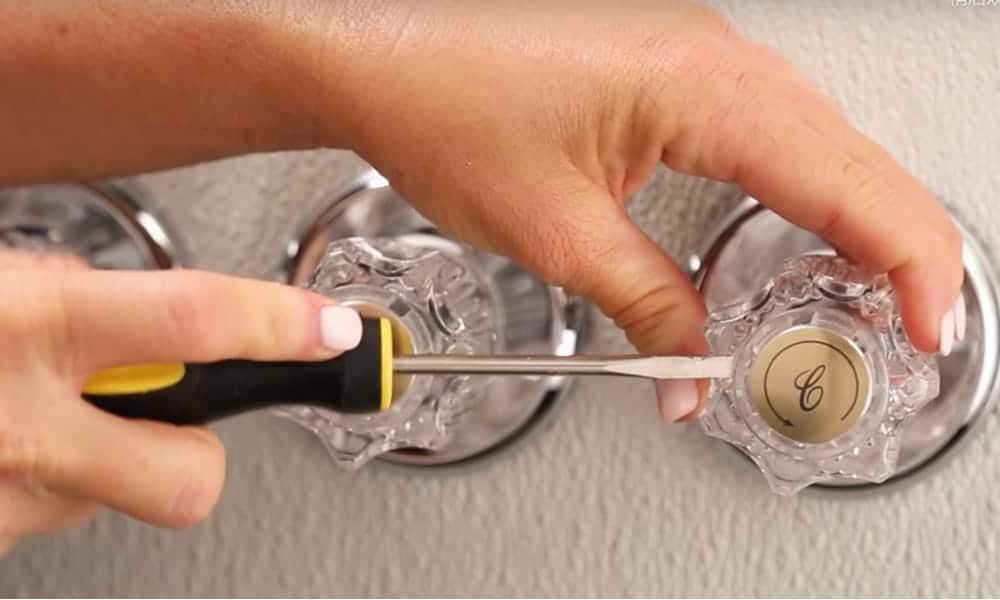
Step 2. Remove Handles and Stems
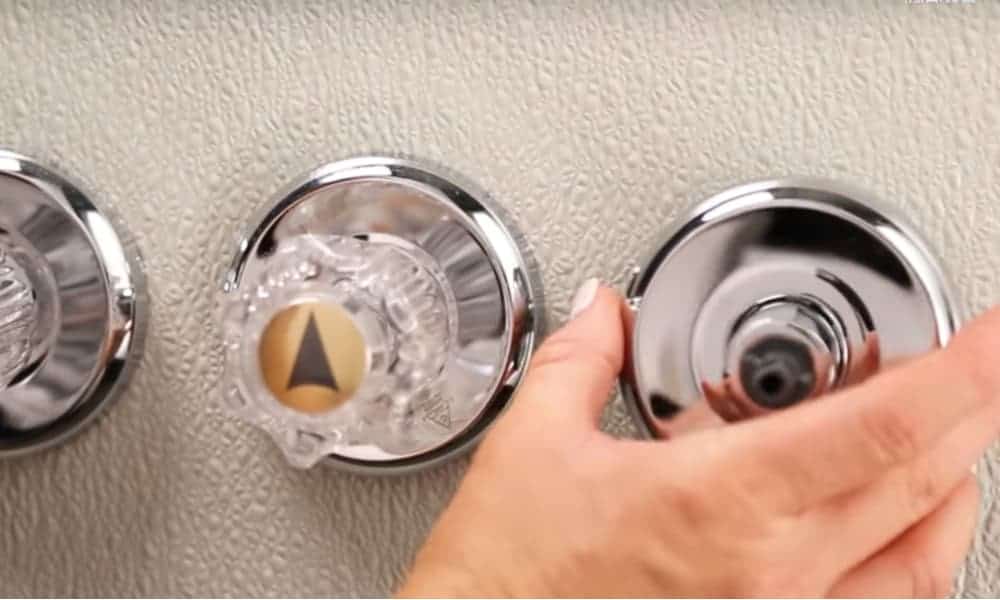 With the use of the right tools, carefully remove the handle cover. Depending on the type of valve, you can use a screwdriver, Allen key, or an adjustable wrench.
Ensure that you put all pieces in a little safe box. If any goes missing after dismantling, it could affect the overall replacement. Once you have removed the handles successfully, quickly take out everything that links to your valve.
Start by carefully removing its stems from all sides. The tools best for this particular job include an adjustable wrench, screwdriver, and wrench.
The stems usually come in the shape of a screw, allowing you to screw them out. Most of its stems come with sleeves at the handles. Hence, remove the sleeves to get to the stem.
If it a plastic stem, take the screw out and remove the stem. Ensure to keep them in a safe place as you will need them when making a replacement.
Step 3: Take out The Faulty Valve
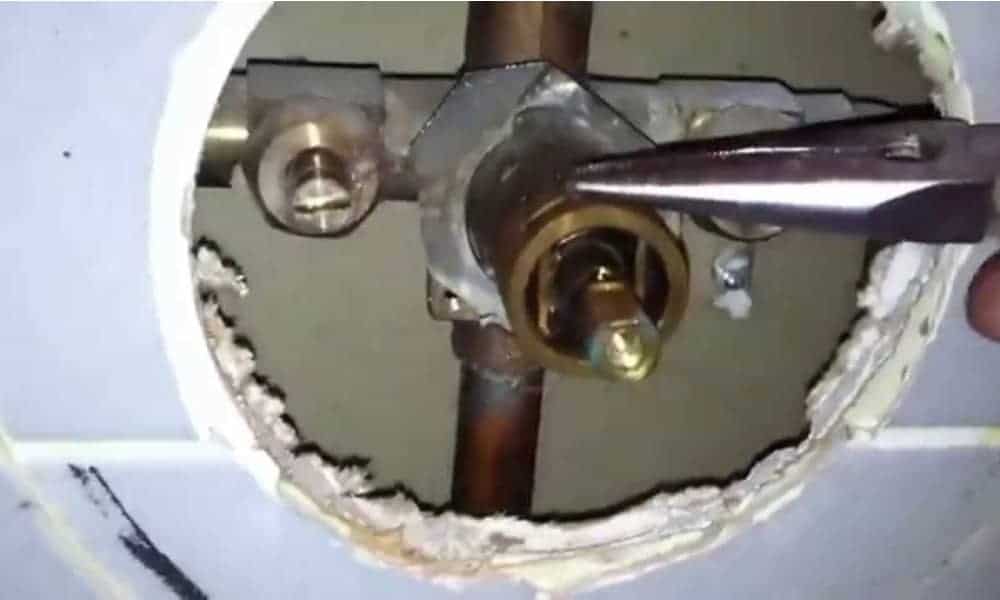 After taking out the valve and all its components, the bathroom construction will determine your next step. If you can get around the wall, this will make the job a lot easier. But, If you can’t, create a hole that can allow you to move while making a replacement.
To remove an old or faulty valve, carefully detach it from both the cold and hot water pipes. Also, if any, separate the pipe supplying water to your shower head. Unscrew them with an adjustable wrench.
After taking out the old or faulty valve, ensure you keep the old fitting in a safe place for future use. When you’re taking out the old one, make sure to apply proper care.
Step 4: Replace the Faulty Valve and Shower Faucet Parts
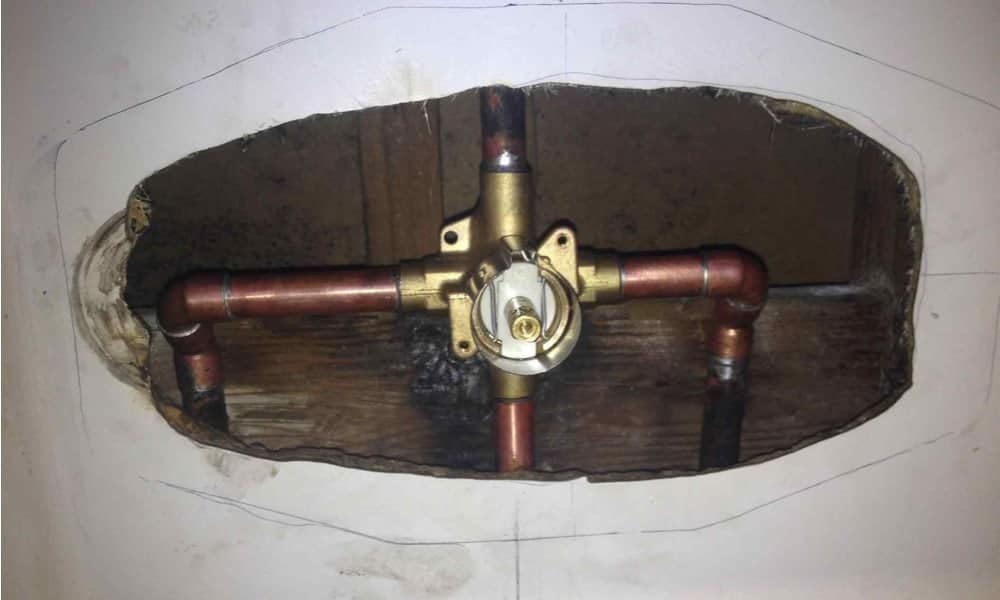 Get and install a brand new valve in the same position as the old valve. With the right tools and fittings, screw the fresh valve into the pipes. Ensure that you connect the exact way like the old one because a single mistake can create problems.
Use Teflon tape to wrap the couplings and adapters with it. This wrap up will help to deter future leaks. Ensure that the left water line pipe connects to the left vent, and the right water line connects to the left vent. In case you get the right fittings, you will get the valve ready and running in a few minutes.
If you will be using PEX tubing, ensure you measure exactly a colon. Also, link tubing to all vents with the use of female threaded couplings and adapters for all pipes. It is also a great way to add small tubing or change the previous one to get the right fittings.
For a neat cut, remember to use only the PEX tube cutter. Also, remember to wrap all adapters in Teflon taping to avoid future leaks. Leaks might occur if you don’t do it properly.
When everything is in the right place, the next thing you will do is to fix the valve in the same position as the previous one. Connect the new valve firmly to its exact position. When you have done this, then place your two handle shower valve. You can do this by putting back all stems, handles, and all other parts.
Step 5: Switch on the water supply
Try out the fresh valve by switching on the water supply. Turn both handles to let the water out. If the job is successful, then you won’t find any leak.
Common Problems with Shower Valve Replacement
Having seen the steps to replace two handle shower valve, let’s see some common problems that come with its replacement. Always bear in mind that there are problems that could arise when carrying out a shower valve replacement. What this means is that you might end up spending much more, and this isn’t what you want.
Although making a shower valve replacement is an easy task, it becomes challenging when you don’t have access to the inside wall. A problem such as this happens due to the construction of your bathroom or shower. With that said, you are left with no other option but to remove bathroom tiles or tear down walls.
Another huge problem is if you don’t know how to replace shower valve body. You may also run into problems when your old shower pipes are made from hard steel as they are hard to cut through.
Wrap Up
Replacing your shower valve doesn’t have to be a difficult task to carry out. With this guide, you should know the right steps, tools, and materials to use when making a replacement.
You can do a great job when changing that old shower valve, follow the above steps to replace two handle shower valve. However, if you still find it challenging, seek the help of any professional plumber close to you.
Are you still finding it difficult to replace your shower valve? Well, you can go ahead to leave a comment below for our team to assist you.