Putting a new portable cooktop in place of a rusty spiral kind electric cooktop is harder than you think. It is not just a small work you can do it by yourself and neither is it an easy project.
Much planning is required because the replacement will cost a large amount of money for the equipment and installation. Luckily, you can install this unit easily by following these steps on how to replace an electric cooktop.
Step-By-Step Guide on How to Replace an Electric Cooktop
Step 1: Take Out the Former Electric Cooktop
Taking out the present cooktop is the first thing you should do if there is any. But if there is none, then carry on with the next thing.
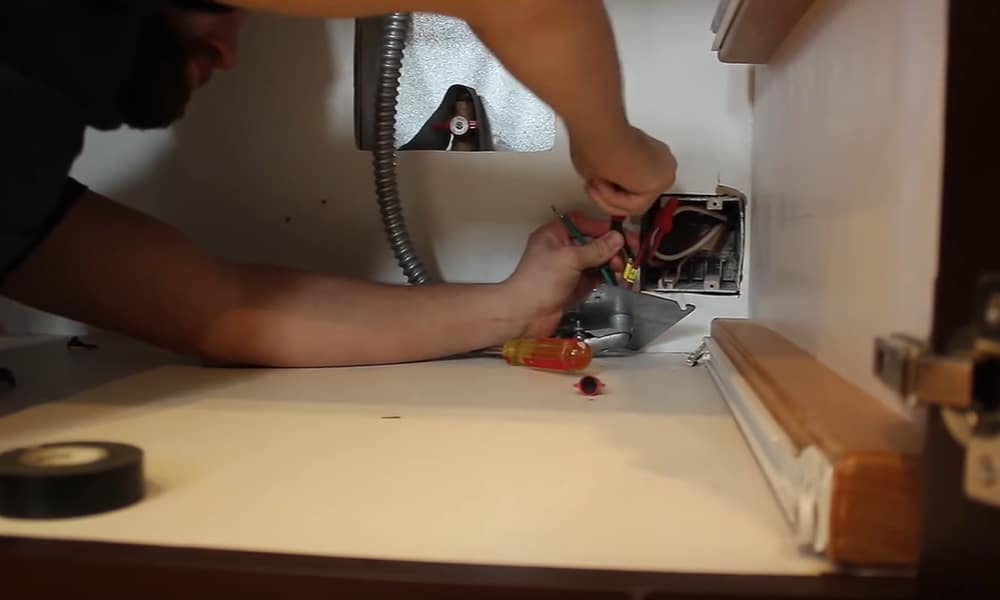
To remove it, you have to cut off any flow of electricity around the area of the old cooktop to avoid electrocution. Also, you remove any binding substance and all connecting cables disconnected before moving the cooktop.
After you’ve turned off the power as a precautionary measure, endeavor to check the connection with a tester to know if there’s still current in it. Stroke the tester on the positive or negative cables, and if it glows, then there is still current. Hence, you should disconnect it well.
Also, take note of all the patterns in which the cables were connected, make a mental picture of it. Or better still snap it because that’s the same way you will wire the new cooktop. Call for assistance to raise the gadget out of its position.
Step 2: Make Adequate Space for the New Cooktop
Endeavor to create sufficient space for the new cooktop. The standard area is usually indicated in the maker’s handbook for that particular cooktop, and you should follow it properly. However, the general approved space requirements are 0.76m above and 0.6m around it.
Step 3: Pick the Suitable Connection Box
The connection you choose must be suitable for the electrical requirements of a cooktop, but that’s if you have many. Ensure that the voltage of both the old or new cooktops is the same.
A standard cooktop would need a connection box of 240volts as it has a voltage range of 30-50 volts
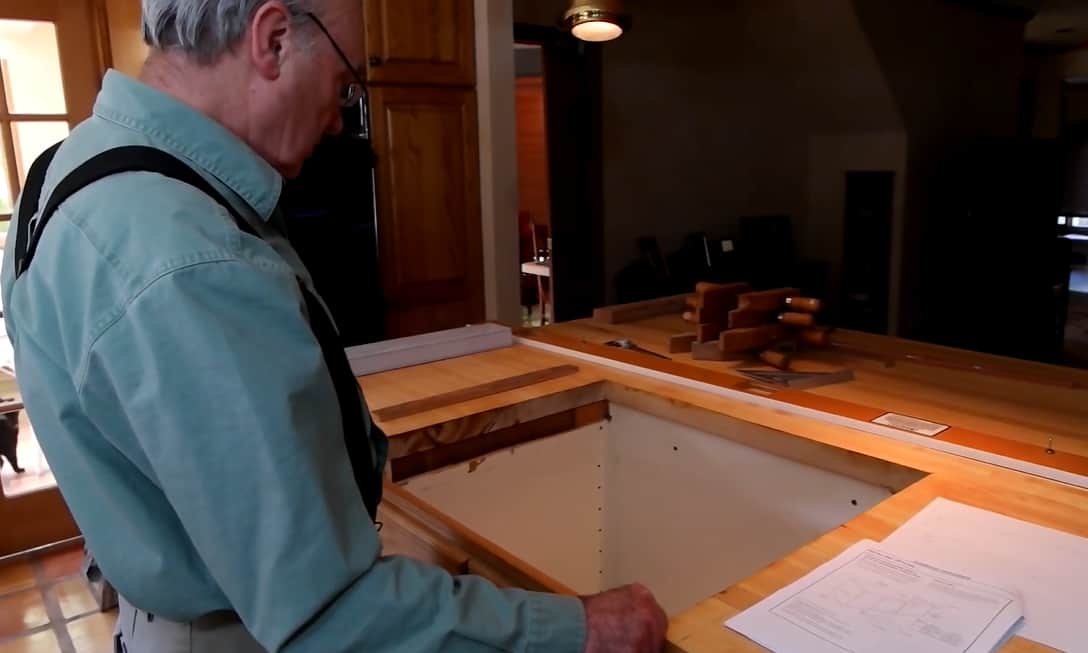
Step 4: Get the Measurement of your Cooktop Opening

You should endeavor to get the measurement of the cooktop opening in your kitchen so that you will buy a new one that suits you. Measuring it will help when replacing, but if you are putting it for the first time, use the dimension of your new cooktop. Then add 125mm-225mm on all sides to cover the extension of the countertop.
Step 5: Arrangement for the Countertop Cutout
To make things easy, look for a cooktop that has a matching installation piece and cutout size with the old one. It’s advisable to get a new cooktop with the same manufacturer as the old one. This gives you the advantage to request for stuffing to cover up any space created by a larger sized cutout.
In the case that the cutout is smaller, you should call help from a professional because it’s always dicey to try to enlarge a cutout. But if you insist on doing it yourself, which you should do, of course, beat the ends with a diamond wheel or grinder. Find a way to reduce the dust and liquid that drops from it, but do not create a new cutout.
Ensure that the edges of the cutout are spherical, especially if your current countertop has a solid surfacing. Avoid utilizing a jigsaw instead look for a swoop router together with a sole-fluted bit of 1.5cm diameter and a 1-cm shank. Employ a professional to handle the task, so you don’t make it messy.
The method is different if the countertop surfacing is plastic; use a 1.2cm drill bit and round mouth saw or maybe a jigsaw.
Step 6: Modify the Countertop Opening to Match Cooktop

When modifying the opening for the cooktop, factor in a 1-3cm extra for the extension. But if the installation is a fresh one, you will need to make an opening with the appropriate dimension. You should do the same if it is tinier, which means you need to expand it to fit the cooktop.
In the process of expanding or making a new opening, it may be too enlarged. Hence, all you need to do is to stuff in iron chips. Use them to chuck up the extra space.
Ensure you don’t cut the counter region with tiles on it. Use a wet saw to circumvent instead.
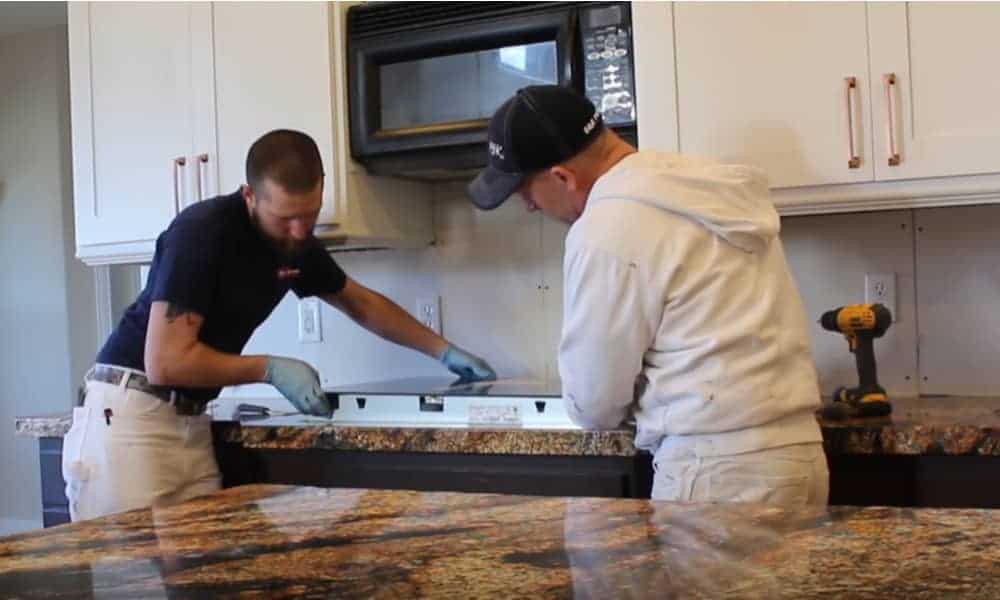
Step 7: Disassemble the Units Attached to the Cooktop
You should do well to disassemble the new cooktop and detach any of the supporting components like the covers and detachable burners. Fix in the thread clamps that clasps the cooktop firmly to the countertop.
Attach them from the top of the cutout end and fasten them with the pins. Use two-sided glue tapes if your countertop surfacing is that of granite.
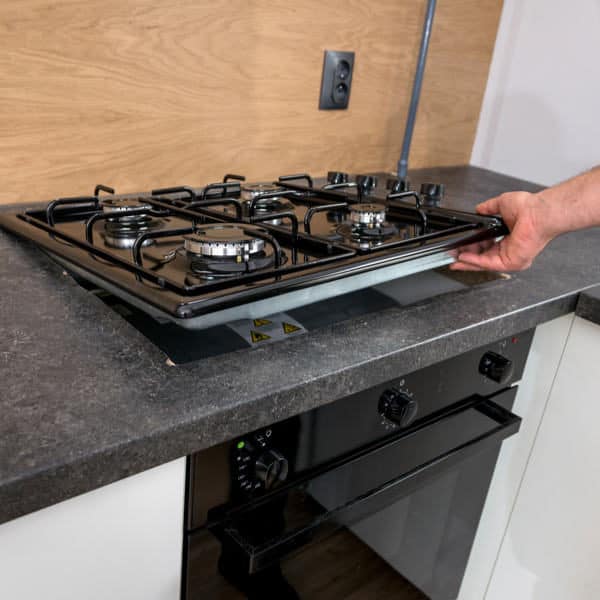
Step 8: Hang the Cooktop in Its Position
First, pass the electric cables into the holes created for it. Afterward, hang the cooktop into its position, pressing it into the thread clamps.
Carefully push it down until it clicks into the clamps. Then place back the tiles you removed, if any, so that it rams with the edges of the installed cooktop. Due to the fastener, you are required to wait at least a day before commencing again.
Ensure it dries before putting the cooktop to prevent it from getting messy. Then reconnect the electrical cables to the power source using the pattern of wiring used in the old cooktop.
Ensure that there is no electricity flow yet to avoid electrocution. Afterward, connect the cables using the picture you took initially.
The positive and negative cables (red and black) are the ones that supply power to the cooktop. Make sure you connect it to their corresponding terminals on the connection box. Then connect the neutral cable (white) to its corresponding terminal in the box; don’t also forget to connect the earth wire (green).
You should bind all connected cables with a cable nut, which works like a small lid that separates the wires from brushing each other. The reason is that it could cause short-circuiting. Hence, intertwine the cables before capping them with the cable nut.
Step 9: Attach the Detached Units
You should attach back any components you detached during the mounting of the cooktop. Parts like the detachable burners and covers should be positioned to complete the installation process. Switch on the electricity to check if the cooktop is functioning fine. If yes, you can use the cooktop without stress.
Precautionary Measures for Installation
- You should abide by the National Electrical code of conduct for Alloy cables. Ensure that all-aluminum cable connections are fused with the special connecting tools provided in this code of conduct. Also, you should follow the procedures by their stipulations.
- The inappropriate joining of alloy cables (aluminum, copper, or lead house cables) could lead to fire outbreak or electrical short-circuit. Endeavor to follow the laid down guidelines in the makers guide for installations.
- When passing the cables through the opening, avoid wriggling them so that you don’t alter the arrangement. Also, be careful not to expose any of the cables from the tube.
- Any work that involves wiring should be exposed where the eye can see, do not stuff cables into walls or ceilings or hidden places. .
- Ensure to connect all cables to their corresponding terminals and do not attach it to another cable to avoid an electrical explosion.
- Cooktops come with a polyester spacer at the peripheries, and it enhances the way it positions the cooktop on the opening. Ensure that the polyester is not removed so that the cooktop doesn’t emit too much heat to cause a fire. Attach the back with glue if they start falling off.
- Try not to position a wooden kitchen unit directly above the electric cooktop. Instead, place a range hood vent at about 13cm below the kitchen unit. This reduces the potential of a fire hazard occurring during usage.
- Go through your manufacturer’s instruction carefully and particularly study the service prevention checklist. This list contains device malfunctions that do not come from deficient installation or equipment in the accessory.
- You could contact the manufacturers for complaint, compliment, or any other issue using the assistance cell numbers and address in the manual. You could do this either by calling or writing to the address.
Wrap Up
It’s a more demanding task to replace a cooktop than to replace an electric stove or hot plate. The precautions required here are plenty. Any mistake could lead to electrocution or fire outbreak, which might make you consider calling the experts. However, if you still want to DIY always remember
- To switch off all electrical power flow before doing anything around an electrical cooktop
- Ensure that all cable connections are appropriate and according to the original pattern
- You might want to wear some personal protective equipment when working with electric cables.
If there are unanswered questions you have, you can ask in the comment section.