If you’re planning to give your bathroom a facelift, changing the mirror can be an easy way to do it. What’s more, you don’t need to be a DIY expert to tackle the job yourself!
Whether your mirror is attached with glue or clips, we can help you take it down. Our step-by-step guide to how to remove a bathroom mirror will get it done in no time. And you won’t need any fancy tools for the task either.
So if you’re ready to learn a new skill, read on! Here’s what you’ll need…
Tools for bathroom mirror removing
- Cardboard to protect your fixtures and fittings
- Duct tape
- Suction cup handles – optional, and available to rent. A good choice if your mirror is very large or heavy.
- Another person to help
For mirrors attached to the wall with glue:
- Hairdryer or small heat lamp
- Long putty knife
- Sturdy gloves
- Strong, sharp wire – picture wire or piano wire work well
- Pry bar (also known as a crowbar)
For mirrors attached to the wall with clips:
- Screwdriver (most mirrors use Phillips-head screws, but check what screws are used in yours)
How to remove a bathroom mirror
Step 1: Prepare the area
Mirrors are heavy, so make sure you protect the surrounding area from any knocks or bumps. Thick cardboard is a good choice for this. Lay it over anything close to the mirror – that’s usually your wash basin and vanity unit.
You may want to cut a smaller piece of cardboard too and bend it over your faucets. Just don’t cut corners when it comes to the sink – porcelain is far easier to chip than a metal faucet.
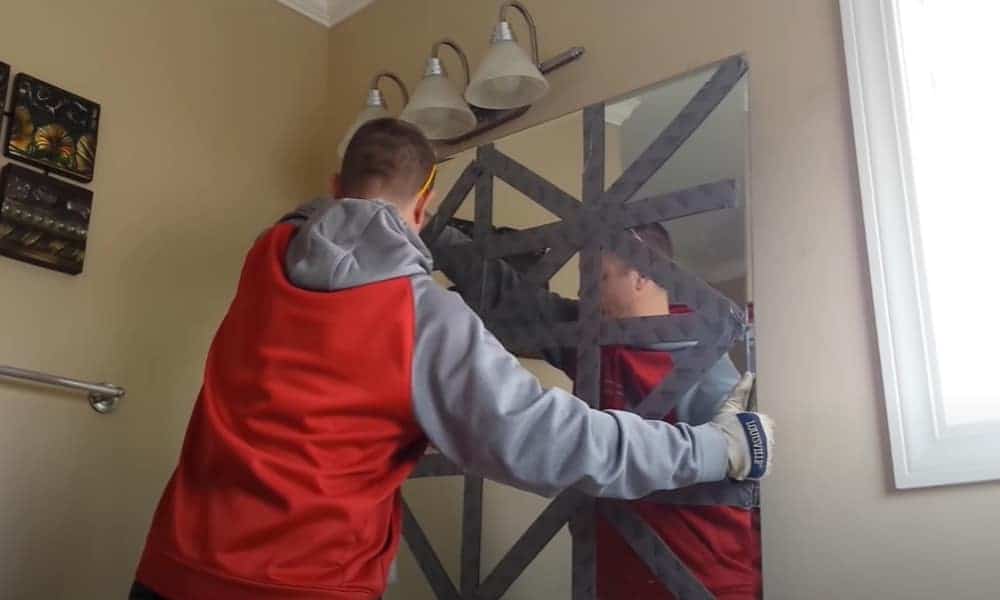
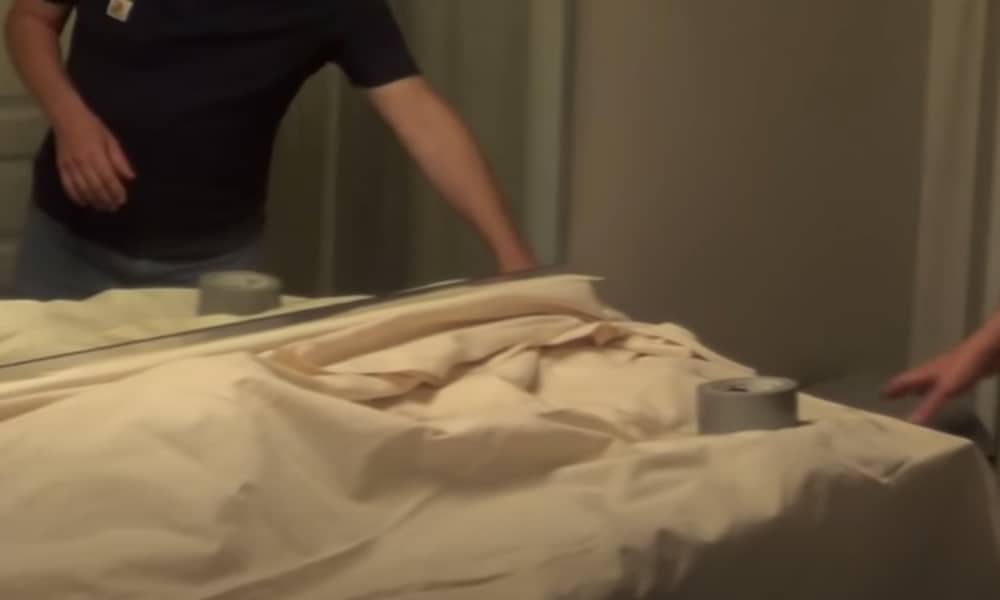
Step 2: Protect the mirror
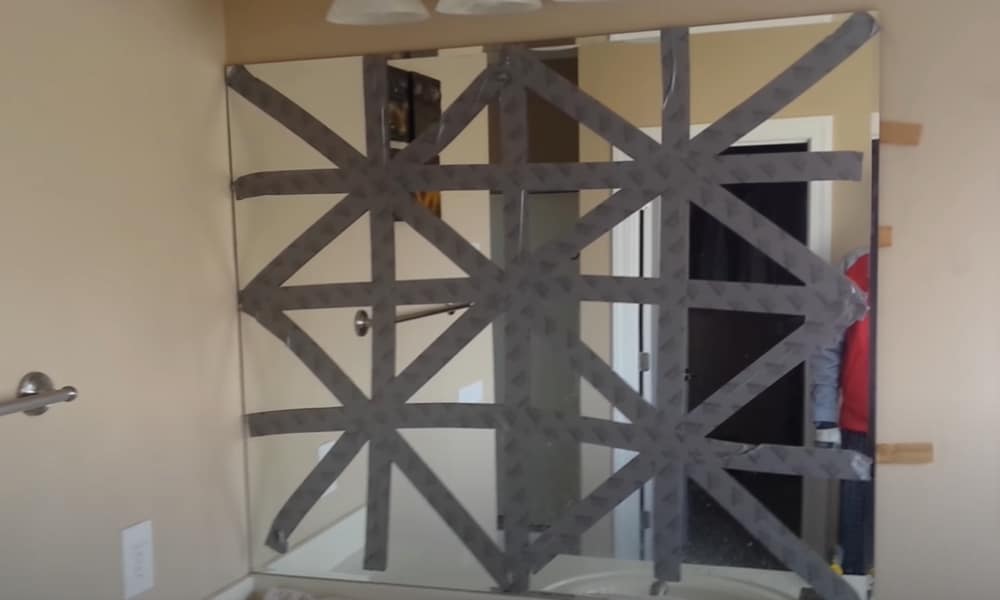
Everyone knows that glass mirrors are fragile things. Removing a large mirror can lead to cracks or worse – so minimize the damage if that happens.
Take your duct tape and run a strip all the way along the top of the mirror. Now repeat with another strip directly below it, overlapping the first strip slightly. Continue until the whole mirror is covered in duct tape.
This will protect you and your bathroom from any glass splinters if the mirror breaks.
If your mirror is glued to the wall, follow steps 3a and 4a. If your mirror is attached to the wall with clips, follow steps 3b and 4b.
Step 3a: Loosen the glue
If your mirror is attached to the bathroom wall with glue, you’ll need to loosen the adhesive.
Before you start doing this, make sure you’ve got someone to keep an eye on the mirror as you work. You’ll be focused on what you’re doing, so you need someone else to watch in case it starts to slip.
If you’ve rented suction cups with handles, this is also a good time to attach them to the glass. This will help you and your friend grab the mirror quickly if it starts to move.
Now plug in a hairdryer or small heat lamp and move it over the surface of the mirror. The heat will make the glue more flexible.
Pro tip: If you installed the mirror yourself and know where the most glue is, focus the heat on those areas. If not, try and apply the heat evenly across the surface.
Step 4a: Pry the mirror from the wall
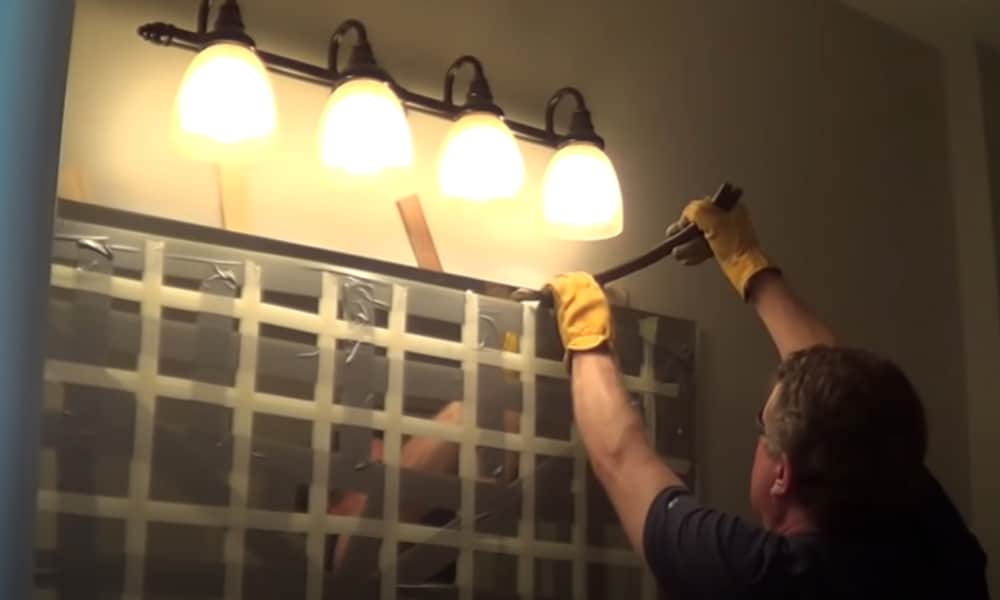
Take your long-handled putty knife and slip the blade under the edge of the mirror. Slide it down so that the blade cuts through the glue at the sides of the glass.
Now it’s time to use your long piece of wire. Put on your gloves first, to avoid any cuts. Hold one end of the wire in each hand and slip it behind the mirror. Now saw it back and forth to cut through the glue.
Remind your spotter to keep their eyes peeled as you work! At this point, the mirror will start to come away from the wall.
If you need to, use the hairdryer or heat gun again to loosen up the glue some more.
When most or all of the glue has been cut through, it’s time to use the pry bar. Slip the end under the edge of the mirror and lever the mirror from the wall.
Depending on how much glue has been used, you may be able to remove the mirror using only the pry bar. This YouTube video shows you how.
Now go to step 5.
Step 3b: Remove the side clips and loosen the bottom clips
Use your screwdriver to remove the clips from the side of the mirror. If you find the screws turn but don’t coming out, they’re probably going into the drywall rather than a batten. If that happens, take hold of the screw with your fingers and pull it out.
Set the clips and screws to one side. You may want to put them into an envelope to avoid losing them.
Now take your screwdriver again and loosen the bottom clips – but don’t remove them! If you take them out, the mirror may slip and get damaged.
Step 4b: Remove the top clips
Ask your helper to hold the side and bottom of the mirror whilst you unscrew and remove the top clips. You should also press on the surface of the mirror with one hand, whilst using your screwdriver with the other. That will help prevent the mirror from slipping.
When the top screws are out, it’s time to move the mirror. To do that, go to step 5.
Pro tip: If you’ve hired suction cups with handles, position these on the mirror before unscrewing the final clips. Your helper should take a firm hold of one of the handles. Position the other where it will be easy for you to grab it when you’ve finished unscrewing the clips.
Step 5: Take the mirror off the wall
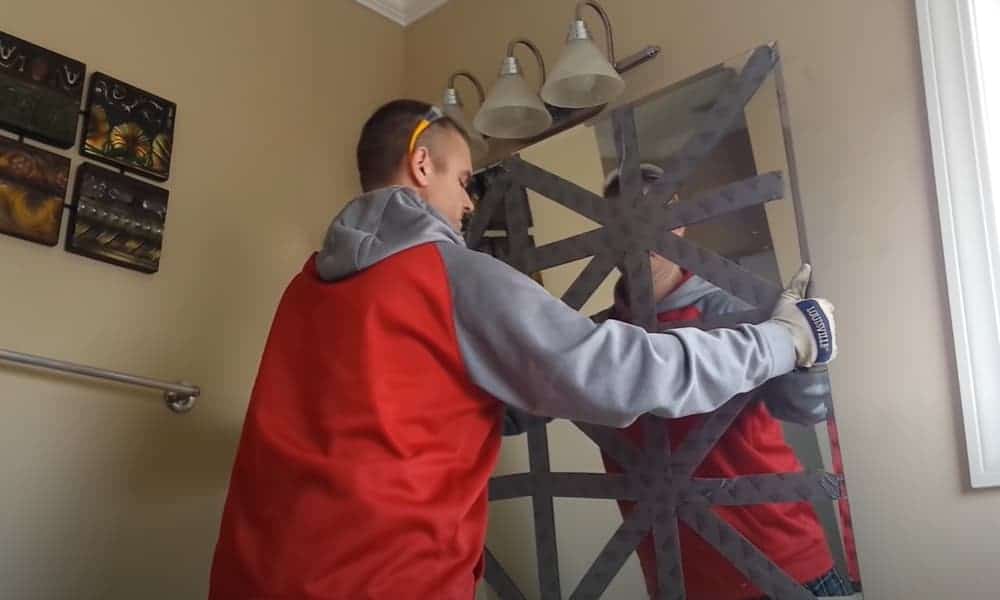
Now that your mirror is no longer attached to the wall, you can take it down. Be very careful – it will be heavy.
If you’ve hired suction cups with handles, this part of the process will be easy. If you haven’t, get your friend to use both hands to hold one end of the mirror. Take the other end yourself, again using both hands.
Make sure you support both the top and bottom of the mirror. If you don’t the glass may crack under its own weight.
Finally, remember to store your any clips and screws with your old mirror. That way it can be reused in future, by you or someone else.
Pro tip: Make sure you and your helper know where you’re going to put the mirror after you’ve removed it! You want to minimize the time you’re struggling with a heavy load.
Step 6: Repair any damage to the wall
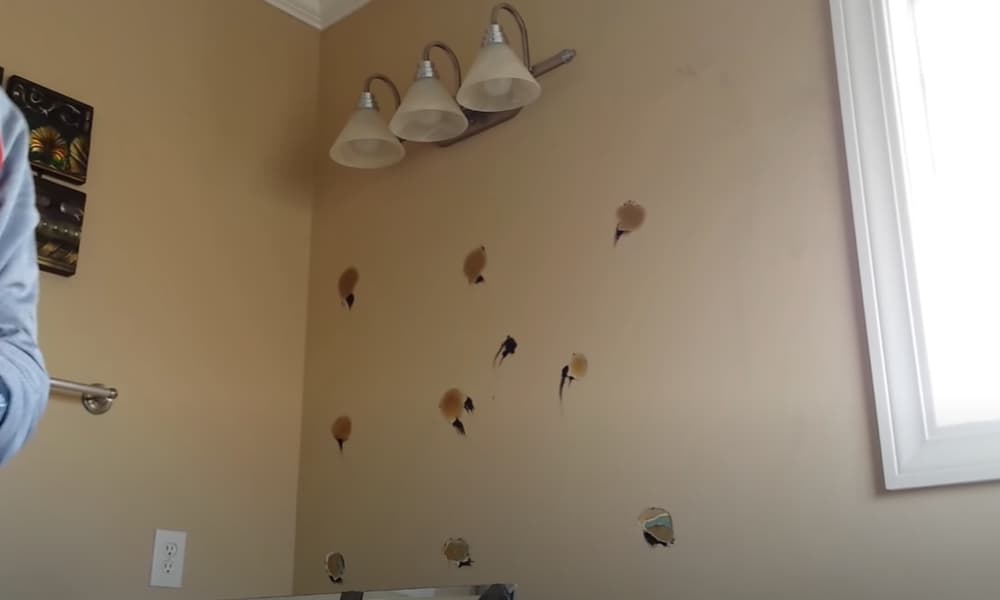
Removing a mirror, particularly one that’s been glued on, may cause some damage to your wall. If that’s happened, here’s what to do.
Start by using your putty knife to gently scrape away any remaining adhesive. You can also use a razor blade – but handle with care and keep your gloves on!
Use a utility knife to score through the drywall paper, forming a circle around the damaged area. Then peel away the paper. This will help the patch blend into the wall around it.
Lightly sand the area and apply a thin coat of primer. Then apply a thin layer of spackling compound. You can use a drywall taping knife, but if you don’t have one, a putty knife works almost as well. Wait for the first layer of spackling to dry before applying further layers.
Build up the layers until they’re level with the rest of the wall, then sand the surface smooth. Apply primer and you’re ready to repaint the wall.
Extra tips
Don’t skimp on the duct tape when you’re preparing your mirror for removal. The more you use, the better you’ll be protected if there’s a slip while you’re working.
Use sturdy gloves throughout to avoid any risk of cut hands. The edges of mirrors can be sharp, and the weight when you’re carrying them means it’s easy to injure yourself.
When you’re using your pry bar, it’s a good idea to place a wooden shim under the end. That will stop it from damaging the wall as you press against it.
Small traces of mirror adhesive on the wall can be removed by rubbing gently with a dry Scotch rubbing pad. For larger quantities, use a putty knife or razor blade. Be as gentle as possible to avoid damaging the wall.
Let’s get to work!
That brings us to the end of our guide to how to remove a bathroom mirror. Whether your mirror is secured with glue or clips, we hope you’re confident about how to take it down. Just remember our safety tips to make sure everything goes according to plan.
If you’ve used this guide, or if you’re planning to, we’d love to hear what you think! Drop us a line and share your experience. And if you’ve got your own pro tips, please comment and tell us about them.
Let’s make outdated bathroom mirrors a thing of the past!