Most people are familiar with the experience of a sink clogging up. At first, the water starts to take a little bit longer to drain, but after a while, it needs even more time – and sometimes it reaches the point where it won’t drain at all.
If this happens to you, the only solution may be to remove the stopper to unblock the drainpipe. However, the good news is, this is a simple job that anyone can do with just a few simple tools – and if you need to try, here’s how to remove a bathroom sink stopper.
If you’re are looking for a preview of what we’re going to be talking about, you can also check out this video before reading on.
Tools required to take out bathroom sink stopper
Before you attempt to remove the bathroom sink stopper, you need to assemble a few basic items. Here’s the list of what you’ll need.
- Wrench or pliers – Depending on how tightly the nut is fastened, you may need a wrench or pliers to loosen it.
- Flashlight – A regular hand-held flashlight may be useful because otherwise, you might not be able to see what you are doing beneath the sink.
- Brush (e.g. old toothbrush) – Not necessary to remove the sink stopper itself but may be useful if you want to clean it.
- Regular detergent – Some regular bathroom cleaning detergent will also be helpful if you want to clean the stopper.
- Vinegar – Vinegar can come in useful for cleaning the stopper – although it is not necessary if you don’t have any at hand.
- Bucket – A regular bucket. This is useful in case of the sink leaks when you unscrew the nut.
- Hair clog removal tool – When you have removed the stopper, you can use a hair removal tool to pull out any hair and gunk that is blocking the sink. These are inexpensive tools in the form of a long piece of plastic with hooks for pulling hair out of sinks.
- Drain cleaner liquid – Again, not necessary for removing the stopper, but once the stopper and all the gunk are out, it’s a good opportunity to clean inside the drainpipe before you put everything back in place.
How to Remove a Bathroom Sink Stopper?
Once you have all the tools prepared and ready, here are the steps you should follow to remove the bathroom sink stopper.
Step 1. Try removing the stopper by hand
Some stoppers can be removed by hand without the need for any special tools or techniques. Simply try lifting up the stopper and turning it. This may be all you need to pull it out.
Step 2. Remove items from under the sink
If you can’t pull the stopper out, you will need to go underneath the sink to release it – so the next step is to remove everything that’s stored below the sink to give you enough space to work in.
Pro tip: Make sure you remove anything from under the sink before you start working. You might think this takes extra time, but it will be far less awkward to work if you have enough room to maneuver.
Step 3. Locate the horizontal plunger rod
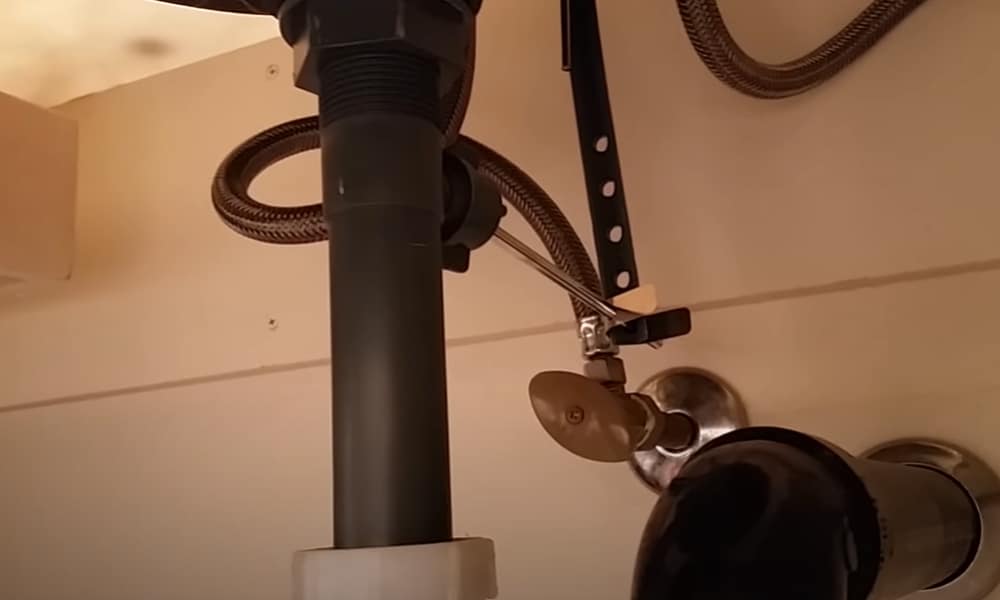
Take your flashlight and put your head under the sink. You need to find the horizontal rod that connects the stopper to the strap. It should be easy to identify – it is a rod that’s connected to the vertical strap, the piece of metal with holes in.
Step 4. Locate the clip attaching the rod and the strap
When you have found the rod and the metal strap it is connected to, you will see that they are fixed together by a small metal clip.
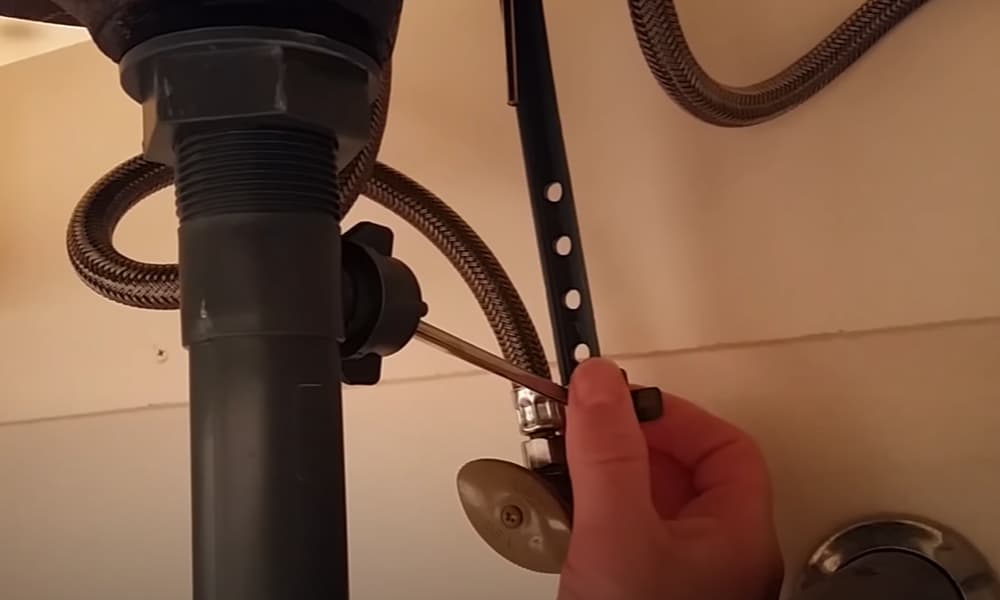
Remove this clip so that the rod and strap are no longer connected and place the clip somewhere safe so it won’t get lost.
Pro tip: Take note of which hole in the strap the rod is fitted to before removing the clip. This way, you will know how to put it back together. If you think you might forget, use your phone to take a photo.
Step 5. Unscrew the pivot nut
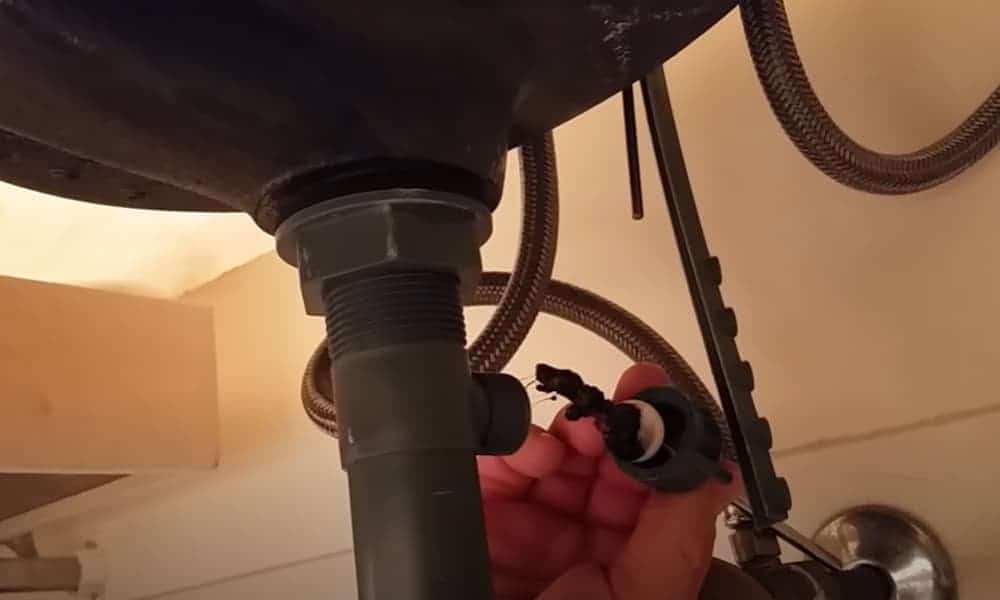
The other end of the rod you just detached from the strap should be attached to a pivot nut, and now you need to unscrew this.
At this point, it is a good idea to place a bucket under the sink to catch any water that comes out when you loosen this nut.
With the bucket in place, try to loosen the nut with your hands. If it doesn’t come loose, you will have to use the pliers or wrench to get it loose.
Pro tip: When you loosen the nut, be ready for some water to come out, especially if your drainpipe is blocked. It will probably be quite dirty, so try not to get it in your face!
Step 6. Remove the stopper
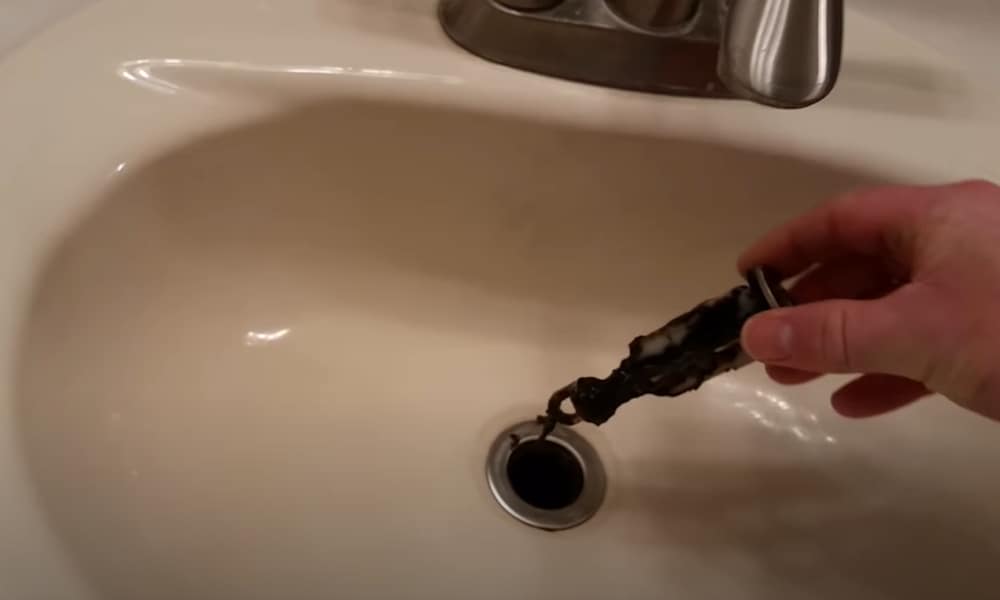
The stopper should now be free so you can just pull it out from the sink by hand.
Pro tip: If your sink was blocked, the stopper will probably be covered in gunk and quite disgusting. However, once it is out, this is a great opportunity to give it a good clean. Pull as much of the gunk off as you can buy hand, and then continue cleaning with a small brush.
While it is out, you may even decide to clean it further, so use the detergent and vinegar along with some warm water to soak it before putting it back.
Step 7. Remove hair with the hair remover
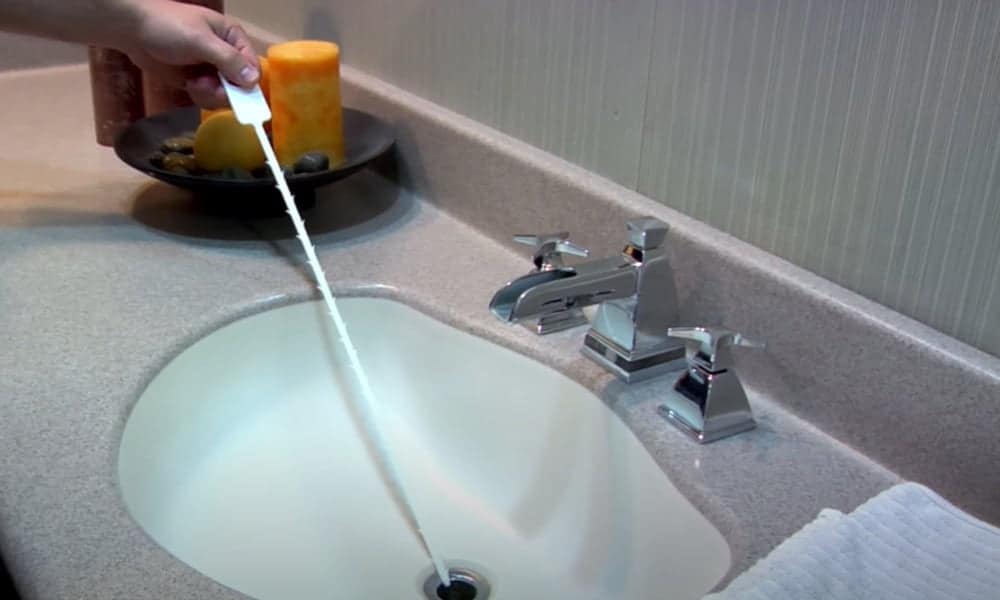
Before replacing the stopper, you should take the opportunity to pull any hair and gunk out of the hole. Use the hair remover tool for this – you should have no trouble pulling most of the clogged hair and other gunk out of the sink.
Step 8. Consider washing it down with a drain-cleaning product
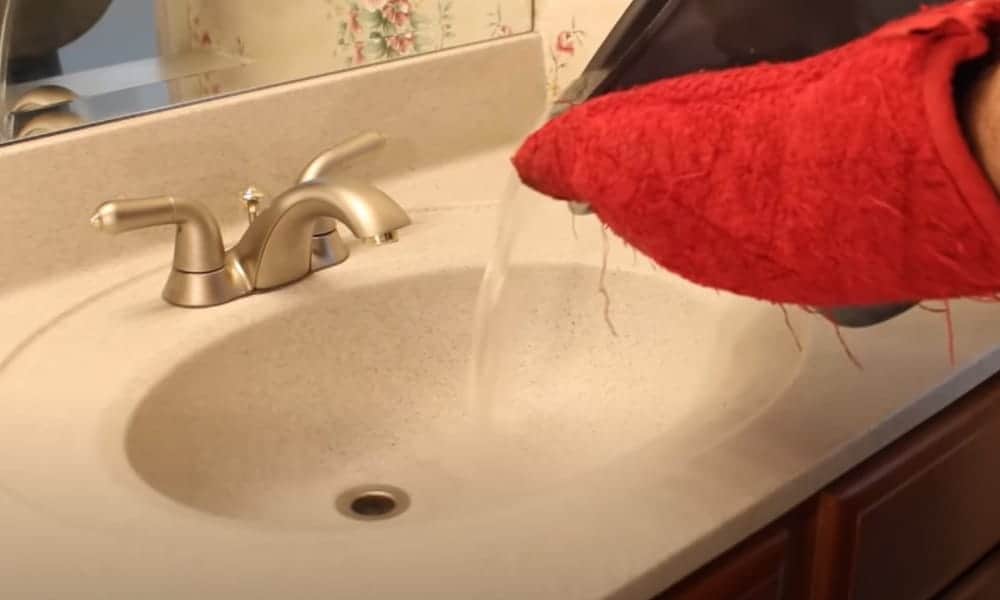
Before putting the plug back in, this is a good chance to give the drainpipe a thorough clean, particularly if it was especially blocked before.
Follow the instructions on your drain cleaning product, pour it into the drain and leave it to do its job. After it has been in there for long enough – usually at least ten minutes – flush it down by pouring hot water down the sink.
The water should flow away easily, meaning you have successfully unclogged your blocked drain.
Step 9. Put everything back into place
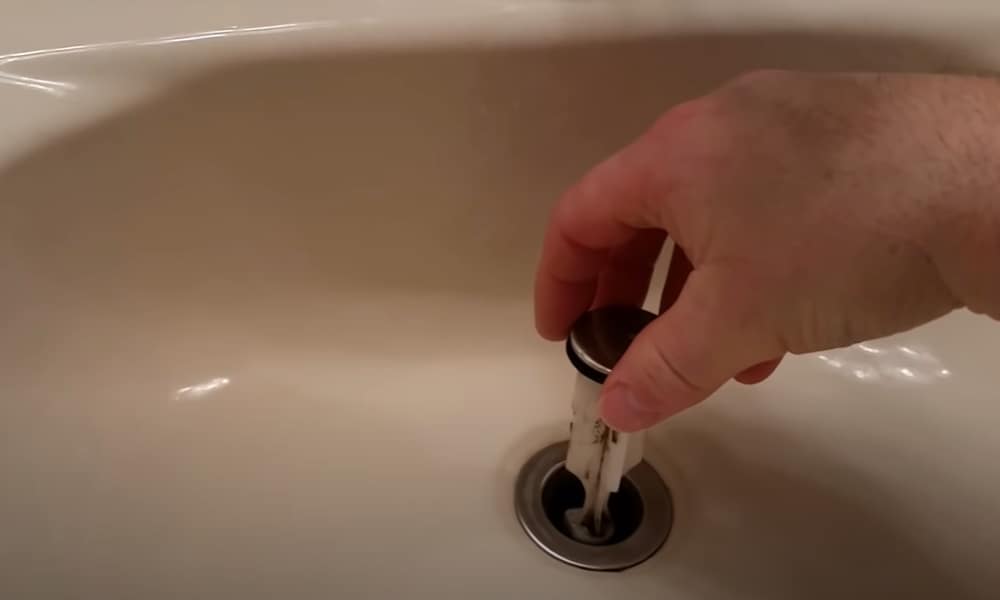
Once you have cleaned everything up and unblocked the drain, it is time to put everything back the way it was, so simply follow the same steps in reverse order.
First, put the sink stopper back in the hole. Next, go under the sink and screw the nut back into place, tightening again with the wrench or pliers as required.
When the nut is tightened, reattach the rod to the strap using the clip that you removed earlier. When this is done, come out from under the sink to test the stopper.
If it moves up and down as normal when you push and pull the level, you have successfully fitted it back into place. To finish, put everything back under the sink, wipe everything down with a cloth – and the job is finished!
Extra pro tips
Here are a few extra tips that will help you make a success of this job.
Find matching parts if you need to replace them
If you are replacing parts of the mechanism and not the whole thing, make sure you find parts that match exactly. You may be able to remove the old parts and take them to the hardware store with you to ensure you find exactly the parts you need.
Prepare a tray to keep the parts safe as you work
When doing this kind of job, it is easy to mislay the small parts that you remove. For this reason, it is a good idea to have a bowl or a tray ready to place the parts in so they don’t get lost or fall down the sink.
Wear rubber gloves
Sinks become blocked due to tangled masses of hair and all manner of other gunk, and when you pull it all out, it can be fairly unpleasant. If this is something you don’t want to be touching with your bare hands, it might be a good idea to wear a pair of rubber gloves while you work.
Take action earlier rather than later
If you notice that your sink is beginning to drain more slowly, it’s natural to wait and hope that it will sort itself out by itself. However, this rarely happens, and once a sink starts to drain slowly, the problem will only get worse until you do something about it.
This means it’s best to take action earlier rather than later – since if you leave it, the job will be harder and more unpleasant when you do get round to taking care of it.
A simple operation that can save you some cash
Calling a plumber out is expensive, regardless of the work they need to do. Fortunately, many jobs are easy enough to do by yourself, and with this guide, removing a bathroom sink stopper should now fall firmly into this category.