Shower valves can get damaged, you have to get a replacement immediately to prevent water from leaking out completely. While this is a serious concern, you can fix it without seeking the help of a professional plumber. All you need is to pay attention to details and make sure nothing is left out.
Once shower faucets drip water, things get messy, and you to have to know how to replace a shower valve to prevent water damage. A plumber can do a quick fix, but taking some easy steps to replace the shower valve yourself isn’t a bad idea. It is a way to save money and gain useful skills at the same time.
Essential Tools and Materials
Here are some of the materials and tools you need to have handy. You will also need these tools when you want to fix a faulty showerhead or shower filter.
- Good screwdrivers
- A brand new shower faucet valve
- Utility knife
- Pliers
- A mini-hacksaw
- Allen-wrench
Replacing a Faulty Shower Valve
Step 1: Block the Shower Drain
The first thing to do is cover the drain with a cloth while you fix the faulty valve. Covering it also helps to prevent screws from falling off and getting lost. Keep all removed parts and screws in one place to use them again when needed.
Step 2: Cut Off Supply of Water
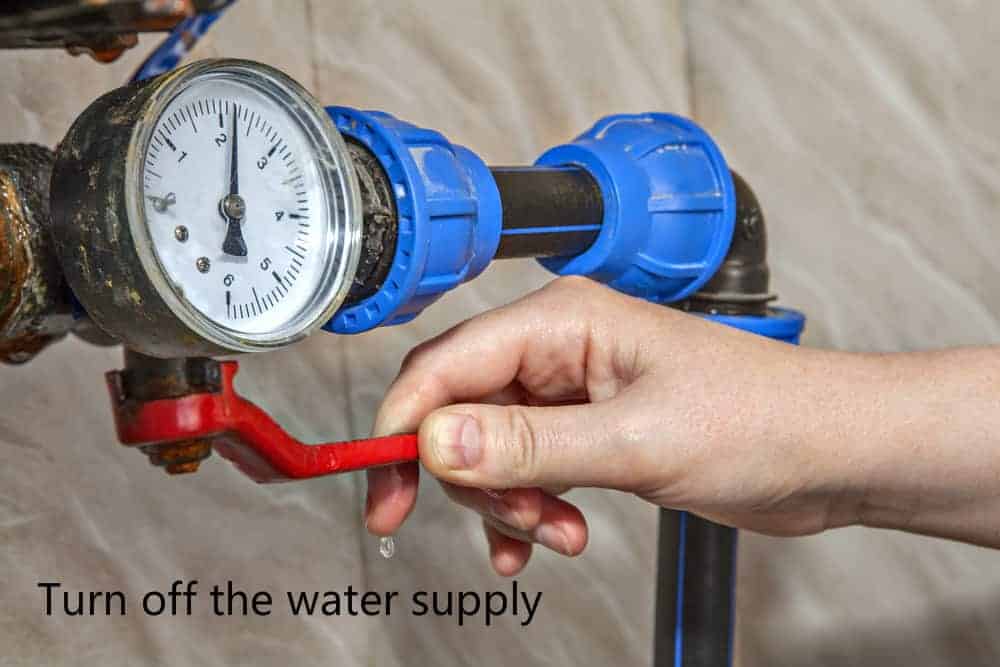
The next step is to switch off the water flowing into the shower to prevent more leakage. Find the handles that control the flow of water and turn them clockwise. Some water stops use screws so you will need to use a screwdriver to turn them a little to the left.
Water stops are usually at the right or left side of your valve cartridge. Turn off both the hot and the cold water stops if the two are present. If there’s no other way of stopping the flow of water, cut off the main house source of water.
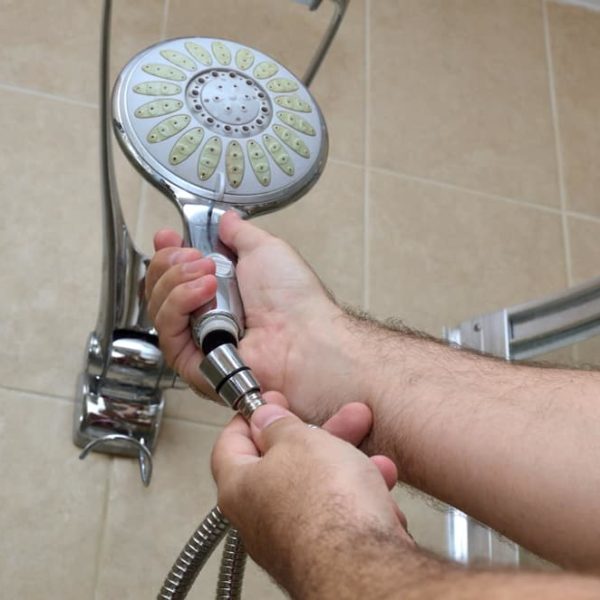
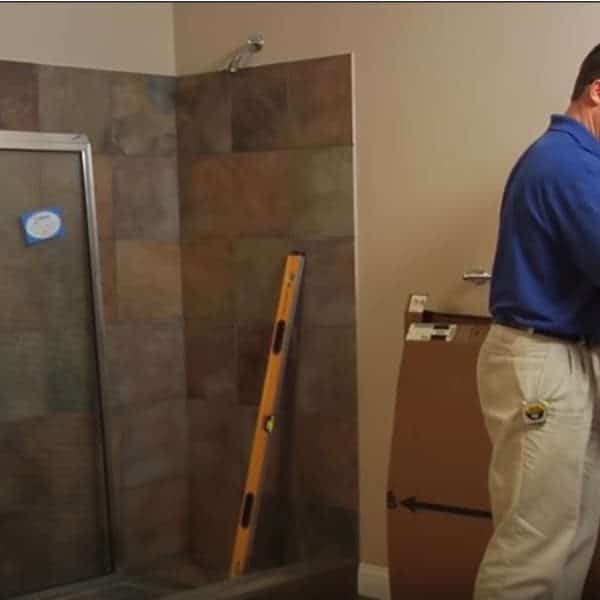
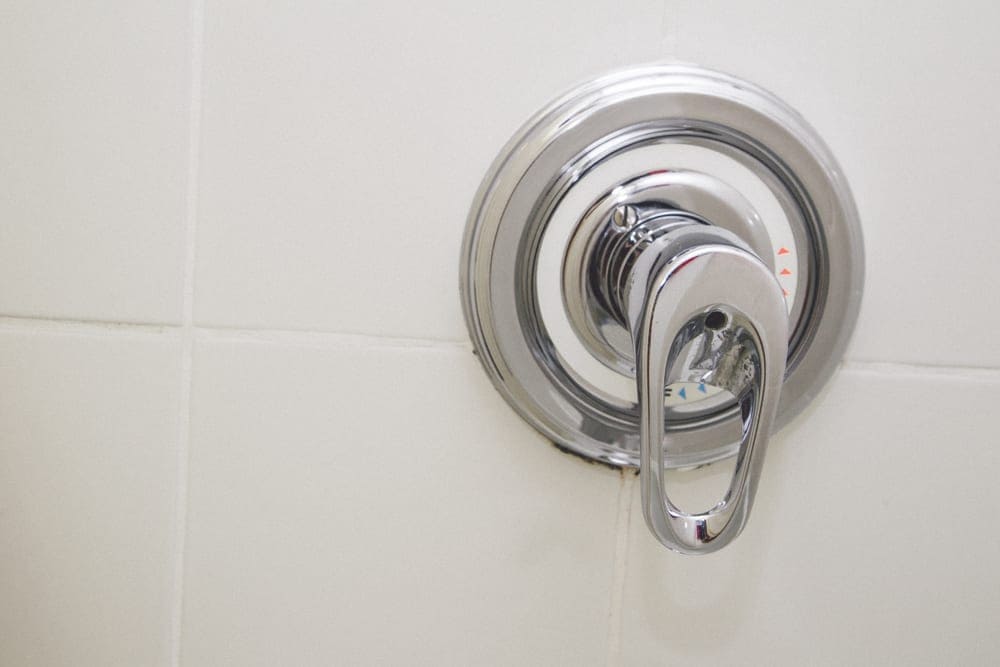
Step 3: Remove the Handle
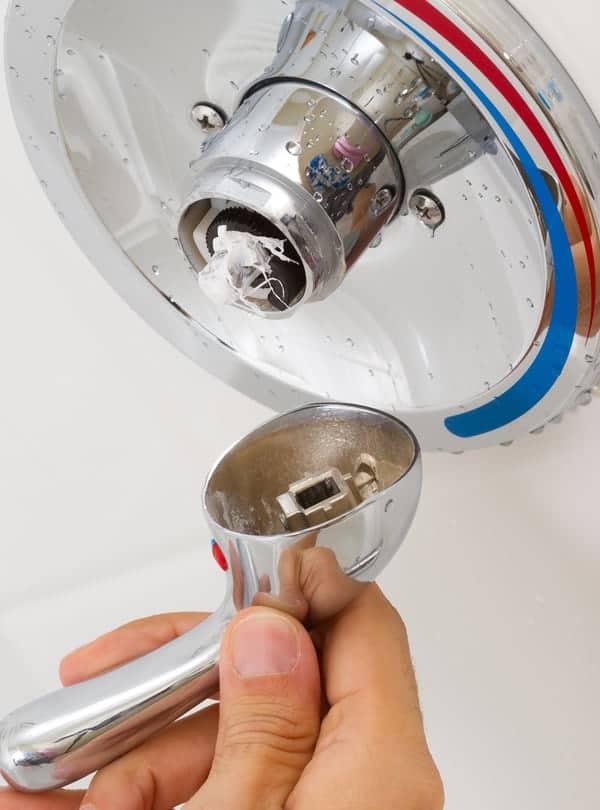
With the help of a hex, remove the handle of the shower head faucet. There are different models of showerheads, and each requires a different hex key. Apart from the handle, use screwdrivers to remove the other parts of the showerhead.
Pay attention while taking steps to replace a shower valve, so you don’t lose any parts in the process. Check the opening in the wall to see if it is big enough.
If you can’t do it from the inside, go to the back of the bathroom and make a bigger hole. The reason is that you will need enough space to uninstall the old valve and installing the new one.
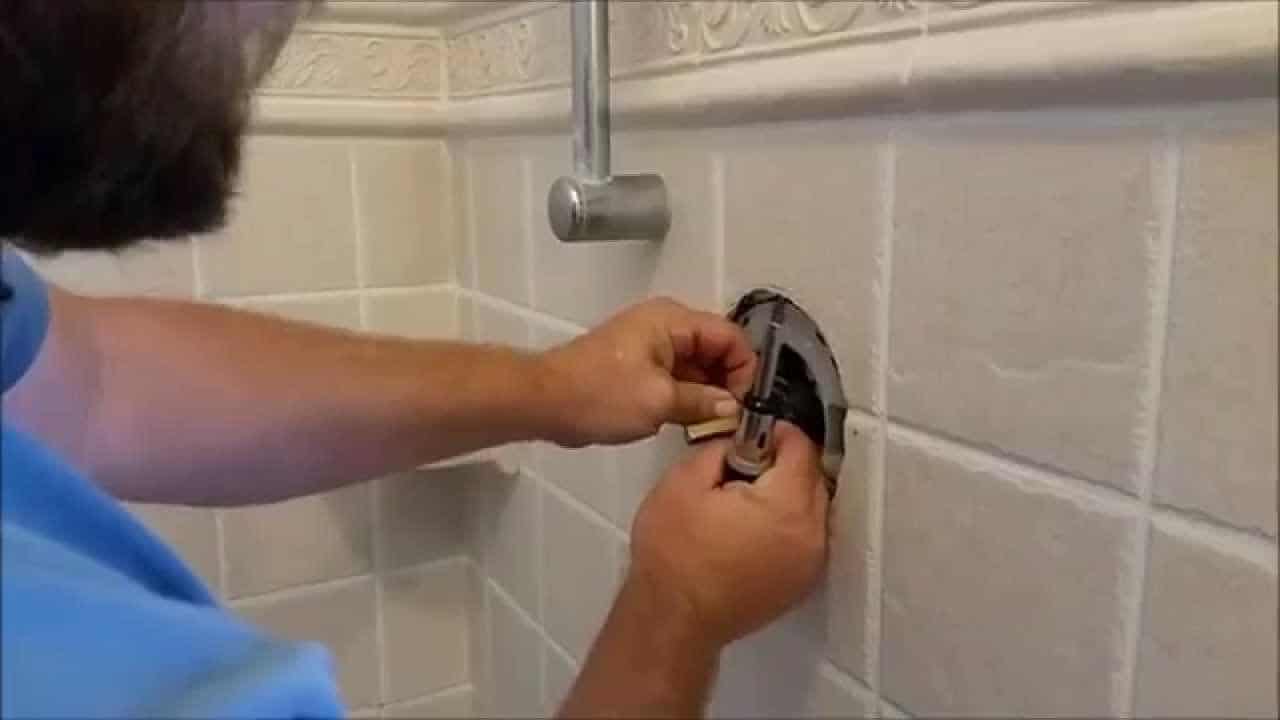
Step 4: Loosen the Trim Plate
Unscrew both sides of the trim plate and remove it from where it is secured to the wall. Keep it where you can find it when you will want to fix it back. Soak the trim and the handle in vinegar to remove and make them look new once again.
You may find a layer of caulk around the edges of the trim plates. Remove the caulk if it is glued to the trim plate and the screws to the wall.
In case you want to buy some, caulk is sold online and in home improvement stores. When visiting a store for your purchase, keep in mind that some parts may have a different name. For example, shower trim plates go with the name Escutcheon trim plate.
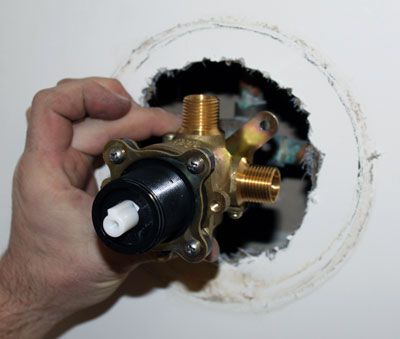
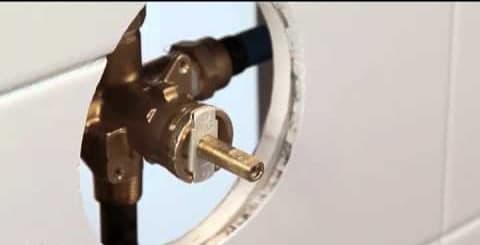
Step 5: Remove the Old Valve
When you remove the trim plate, there will be a visible opening in the wall. It is usually about 12 inches or 30 cm, but you need to widen the hole a little. If the wall is made of tiles or glass, cut the hole until you get the right size.
If you are not sure about the size of the hole to create, ask a professional plumber to do it. You can also search online on how to replace a shower valve assembly or steps to install shower valve. The information on the verified home improvement site will contain how to cut a hole into the bathroom wall properly.
However, the handle and trim plate should be able to cover the hole properly. The trim plate should serve as a guide to the size of the hole to make.
Remove the clip that holds the shower valve in place with needlenose pliers. Pull out the clip and keep it in a safe place.
If the valve clip is still good, use it when installing a new cartridge. New cartridges come with valve clips, but there’s nothing wrong with reusing a good old one.
Sometimes, retainer nuts hold some valves in place, and you have to use a wrench to unscrew it. After that, you may proceed to remove the faulty valve.
Use pliers to pull out the valve from the wall by firmly gripping the metal end of the cartridge. If the valve cartridge gets stuck, try to wiggle it a little before pulling it loose. Once it is out, place it in a safe place, or throw it away if you don’t need it anymore.
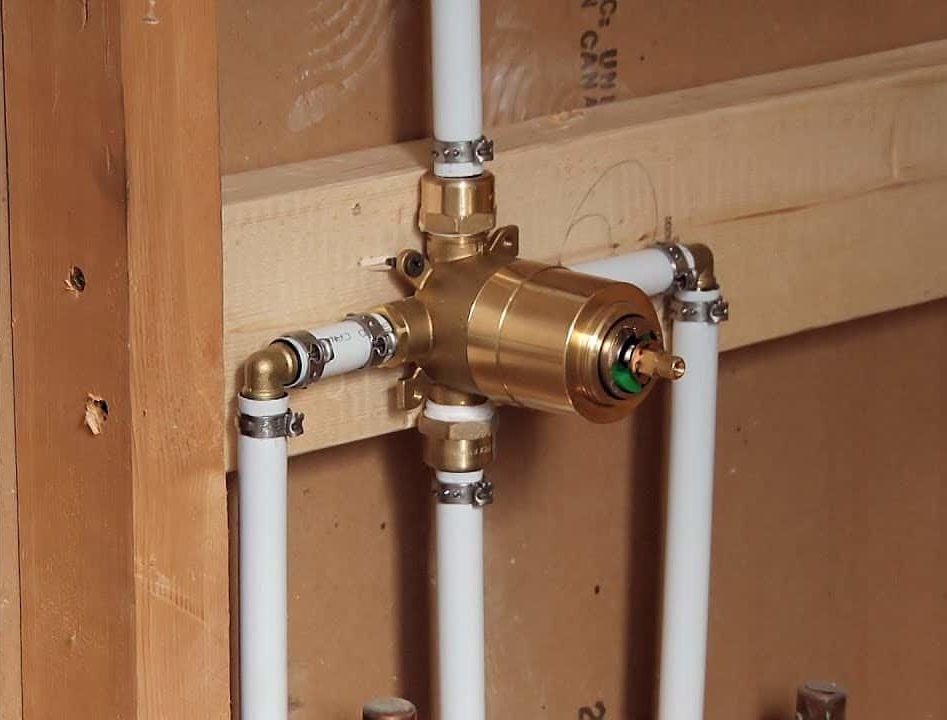
Step 6: Fixing a New Valve
Hold the metal end of the new cartridge with pliers and slide it into the hole where the old one came out. Wiggle it a bit until the wall holds it firmly in place.
If the hole in the wall is too small, check to see if the valve cartridge is the right size. Make sure you didn’t buy the wrong match, as that would be a big mistake.
Put the metal clip in place on the valve with needlenose pliers. It should fit into the same position as the one on the old valve.
Connect the water pipe to the new valve and get ready to test it. Remember valve cartridges are heat-sensitive; use extra care if it needs some soldering.
If there is noticeable severe rust and corrosion, change the entire valve assembly along with your tub.
Step 7: Attach the Water Supply
If you have PEX tubing, use Teflon tape to wrap around parts of the male thread. After you have done that, go on to install the female thread fittings.
With the help of an adjustable wrench and pipe-crimp ring fittings, connect it to the PEX tubing. You may prefer to join the PEX pipe with coupling and pipe-crimp fittings. This way, you join things at any location as long as you get the correct measurement on the PEX tubing.
Soldering skills are important if you are joining copper pipes to the valve. Calculate the length, cut the pipes in the right places but be sure you can do it all by yourself. If the old pipes are still good, use them and move to the next task.
Make sure that the pieces are clean and dry before soldering. After cutting, clean all pipes and fittings properly. Use sand cloth if possible, and use Teflon tape to connect both male and female threads.
By now, the entire task should be complete, and you are ready to connect the hot and cold water supply. Don’t forget to also fix the PEX pipe to the drop-ear elbow located above.
Step 8: Test for Leakage
If everything is set, it is time to turn on the water supply to the bathroom from the source. Observe the system for a while to see if there are any possible leakages. Running water through the pipes also removes leftovers from soldering and cleans the inside of the pipes.
Step 9: Switch on Water Supply
Now it is time to let water flow throughout the entire bathroom. Go to the source that supplies water to the whole house and turn the handle.
Step 10: Return the Trim Plate and Handle Back in Place
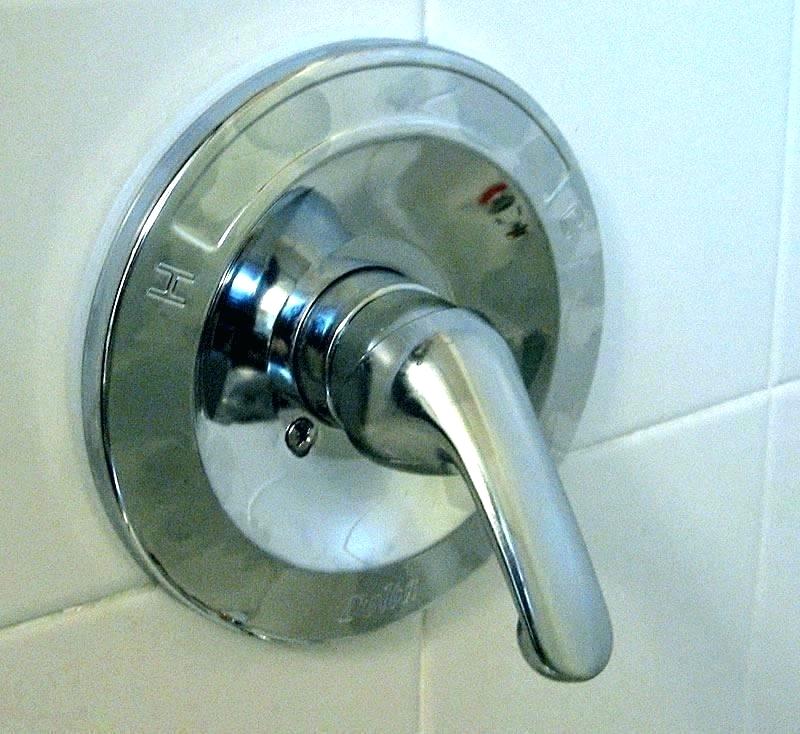
Put the trim plate back to the hole, screw it in place, and apply a layer of caulk around the sides. Attach the handle and screw it in position, and make sure it’s working efficiently. Next, bend over and remove the cloth blocking the drain.
Wrap Up
Although you need good skills on how to replace a shower valve stem, there are some things you can do yourself. How to replace shower valve cartridge is not a difficult task. With a little patience and simple skills, you will learn steps to replace shower valve.