If your bathtub has a showerhead, your shower valve redirects water from the showerhead to the tub faucet. When it’s not working, water simultaneously pours from both outlets. It’s easy to fix, so let’s learn how. Shower valves have two parts:
- A tub spout for filling the tub.
- A diverter gate – the little knob you twist, turn, or pull to direct your water.
The most common diverter types are:
- Tee-valve – a single faucet with a pull-up knob
- Two-valve – one faucet with a knob that turns water hot or cold
- Three-valve – two faucets, one for hot water and one for cold
Option 1 – Clean your spout
Sometimes, the diverter gate gets stuck. When you try to turn it or pull it up, it refuses to budge or makes squeaky, grating noises. If you do manage to pull it up, it may stick at the top and refuse to push back down. This is probably due to accumulated dirt, grease, and limescale.
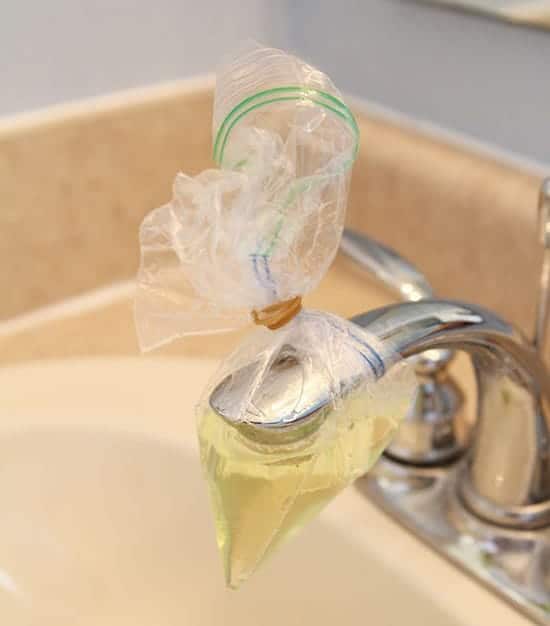
- Step 1: Mix a batch of white vinegar. It has to be enough to completely cover the spout.
- Step 2: Pour your vinegar into a plastic bag. If you like, you can mix the vinegar with water.
- Step 3: Wrap the plastic bag around your spout, submerging the spout.
- Step 4: Hold the bag in place using a rubber band, string, or shoe-lace.
- Step 5: Leave the faucet submerged for three or four days, checking it once a day.
- Step 6: Once the spout looks clean and shiny again, pull the diverter gate to see if it works.
Cleaning your spout with vinegar is good for the environment, because vinegar is organic and non-toxic, unlike harsh bathroom cleaners. It also saves you the cost of buying replacement parts, so it’s a pocket-friendly way to fix your shower leak.
Option 2 – Loosen your diverter with cooking spray
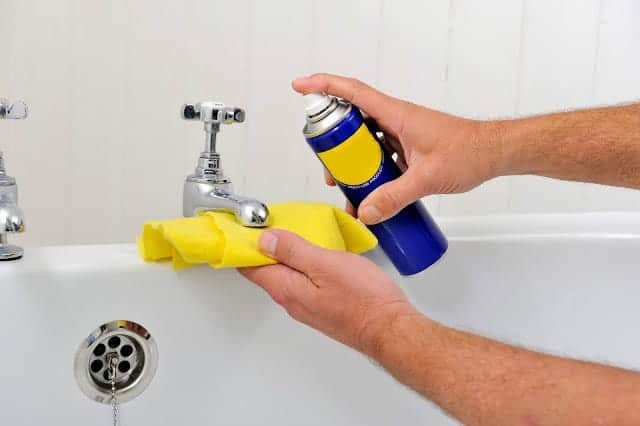
If your diverter gate stays stubborn after your vinegar soak, try using a lubricant to make it work better. Any cooking spray will do, and you probably have some in the kitchen.
- Step 1: Pull the diverter knob up and down a few times to loosen it.
- Step 2: Apply some cooking spray to lubricate the knob.
- Step 3: Try pulling it up and down again. Spray a few more times if you need to.
- Step 4: Wipe away any excess spray and wash the oil off the bathtub.
Always use cooking spray instead of hair spray or wax. The latter two products have ingredients that could be corrosive and might damage the metal and plastic parts of your shower.
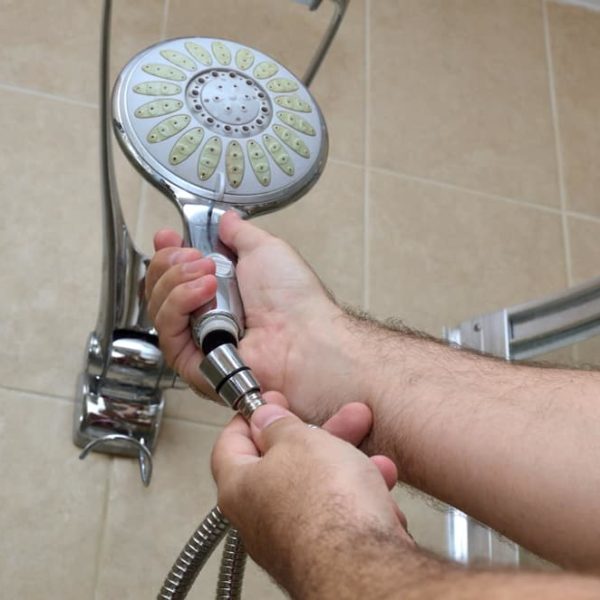
Option 3 – Soak the whole spout
Your vinegar wash will only clean the visible parts of your spout. When you want to stop your handheld showerhead from leaking, you need to clean the inner parts of your diverter gate.
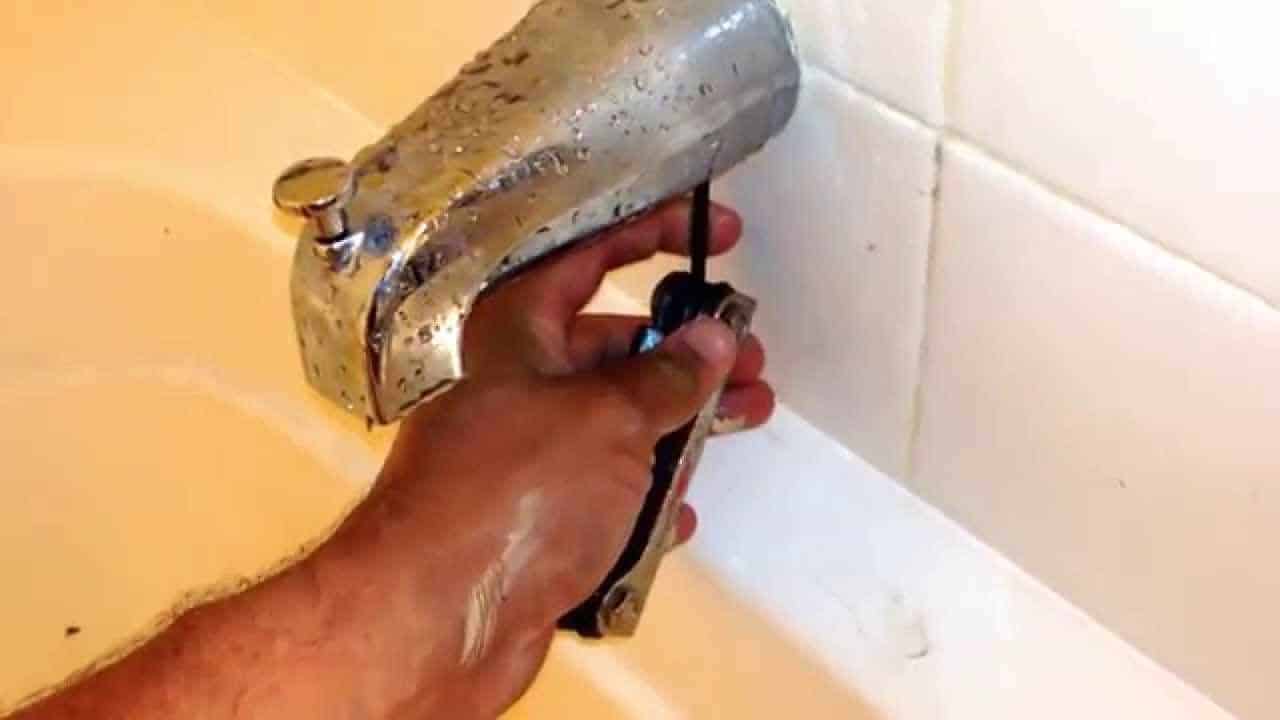
- Step 1: Turn off your water supply from the main spigot. This prevents flooding.
- Step 2: Inspect your spout to see how it’s attached to the wall. There are three common styles:
- A single screw under the spout
- A threaded pipe that screws onto the wall
- A pop-in pipe that slides onto the wall and locks in place.
- Step 3: Remove the spout according to its type:
- If it’s a screw-on, remove the screw then pull out the spout.
- If it’s threaded, turn it anticlockwise until it comes off.
- If it’s a pop-on, use a screwdriver or palette knife to gently pry it off the wall.
- Step 4: Look inside the spout and use a rasp or sandpaper to scrape off any visible dirt or stains. You can also scrape off the dirt using a paste of vinegar and baking soda. Apply the paste onto the dirty parts of the spout, let it sit for half an hour, then rinse it off.
- Step 5: Fill a metal dish with vinegar and water. It should be enough to completely cover your spout, right up to its base.
- Step 6: Put the spout inside your vinegar mixture and leave it for three to four days. Once a day, remove the spout and check it, using a rag or old toothbrush to scrape off loose dirt.
- Step 7: Once it’s spotless, dry it with a clean rag and add some Teflon tape to the tip.
- Step 8: Put your spout back onto its copper pipe.
- Step 9: Reconnect your water supply and run your water to see if you’ve fixed the leak.
At this point, you have a shower spout that looks brand new, so if it’s still not working, you may have to throw it out and buy another shower diverter kit.
Option 4 – Replace the valve gate

If you’re still having issues, it’s probably time to visit the hardware store. Cheap replacements are easily available and rarely cost more than $50. If you just want the gate, it’s even cheaper.
- Step 1: Turn off your water using your main bathroom spigot.
- Step 2: Cover the drain with duct tape. This prevents small faucet bits and screws from going down the drain and getting lost.
- Step 3: Remove your shower spout from the wall and carry it to the hardware store.
- Step 4: Ask for a replacement gate valve that fits your shower model.
- Step 5: Take your replacement valve home and carefully read the instructions.
- Step 6: Fix your spout back on the wall. This anchors your spout, making it easier to repair.
- Step 7: Twist the spout so that it faces upward, but don’t remove it from the wall.
- Step 8: Pry the plastic prongs apart then pull the white bits out of the spout.
- Step 9: Remove the metal knob from the top of your spout.
- Step 10: Slip the new shower diverter knob into the top of the spout.
- Step 11: Being careful not to drop anything, insert the underside portion of the diverter valve. Start with the spring, followed by the black washer.
- Step 12: Slip the white plastic peg and snap it into place, holding everything together.
- Step 13: Turn the spout right side up.
- Step 14: Reconnect your water, and test the diverter.
This option is cheaper than replacing your entire shower spout, but it’s also more complicated. Many people who try this at home still end up with a leaking diverter, so if you want to do it this way, consider having a plumber do it for you.
Option 5 – Replace the whole spout
This seems drastic, but it’s easier than you think and is the most effective solution. Shower spouts aren’t that expensive. You can get a replacement for as low as $20. Decide whether you want to buy the same model you have or replace it with a universal spout.
- Step 1: Shut off your water supply and remove your spout from the wall.
- Step 2: Take it to the hardware store and buy a suitable replacement.
- Step 3: Bring your new spout home and read the instructions.
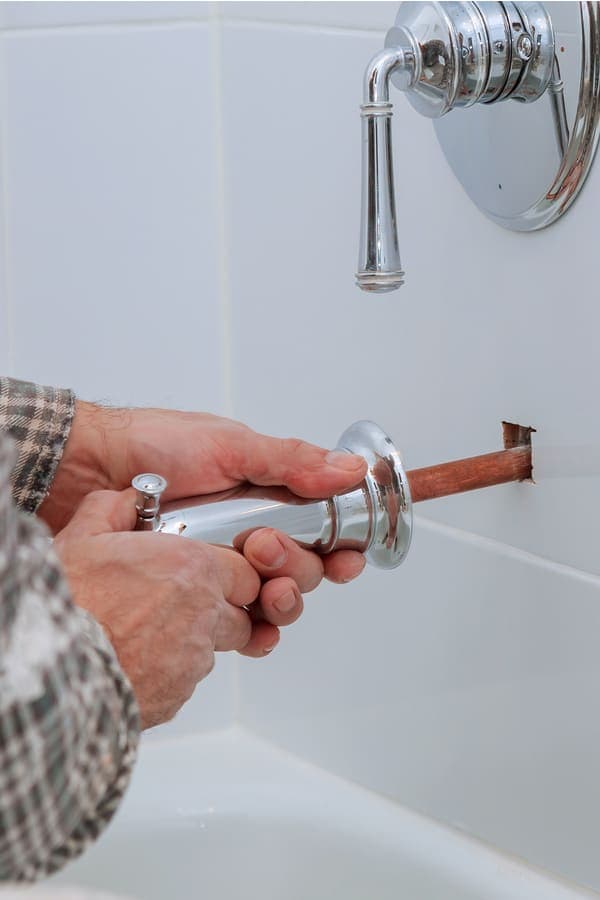
- Step 4: Use vinegar and a soft brush to clean any debris off the copper piping on the bathroom wall. This prevents leakage when you put in your new spout.
- Step 5: Dry the pipe and put some Teflon tape on its edge. This reduces any potential friction and lowers the chances of leakage.
- Step 6: Fix the spout onto the wall according to its type. You can push it in, screw it in, or hold it in position and insert the under-spout screw.
- Step 7: Reconnect your water supply and run the tap to see if it’s still leaking.
Consider any variations
When you noticed your shower diverter wasn’t working as it should, you probably ran to Google and YouTube. And as you may have noticed, most online tutorials use tee-valve diverters in their demos. This is partly because tee-valves are more common than the other two types.
But once in a while, you might find yourself dealing with two-valve or three-valve bathroom spouts, especially in older houses. Luckily, they’re just as easy to fix as a tee-valve shower diverter. You can still soak, lubricate, and replace your two-valve or three-valve.
The main difference is in the piping mechanism. When you remove a tee-valve from the wall, you find a single copper pipe. With two-valves and three-valves, you’ll find the corresponding number of copper pipes. If your shower diverter is a two-valve, focus on the temperature dial.
This is because it often doubles as a shower diverter gate. It controls hot and cold, but it also controls up (to the showerhead) or down (to the spout). On the other hand, if the shower has a three-valve diverter, focus on the middle pipe. That’s where the valve is located.
Repair your shower the easy way
It’s annoying when you’re trying to have a shower but your bathtub keeps dripping. Or when you’re filling the tub and the rain shower head keeps wetting your back. With a few basic tools, you can fix it!
- Soak your faucet in vinegar to get rid of dirt and hard water residue.
- Spray the diverter knob with cooking spray to lubricate its sticky bits.
- Replace the shower diverter gate using a store-bought repair kit.
- Replace the whole spout with a newer model from the hardware store.
Is your shower diverter giving you grief? Tell us all about it in the comments!